Author Archives: Winnie N

Korean BBQ Beef Ribs (Kalbi)

Korean BBQ Beef Ribs (Kalbi)

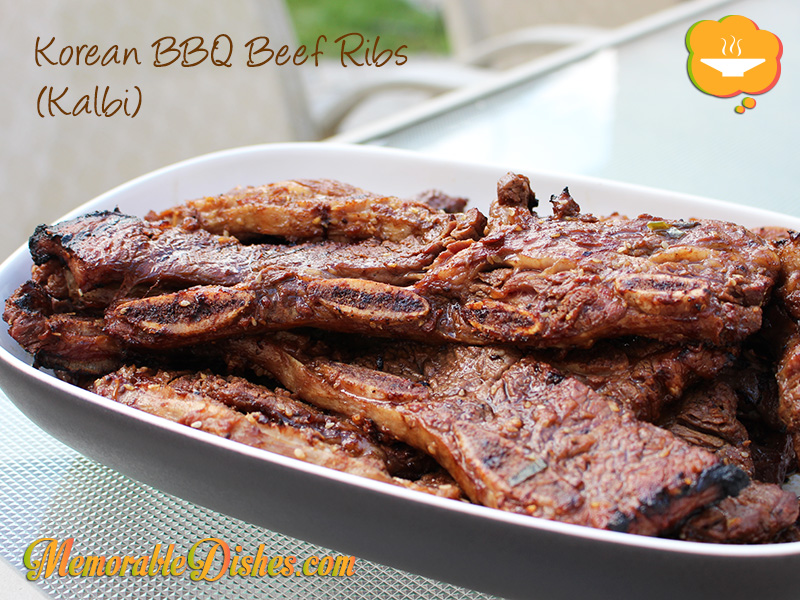
This is one of my favourite things to barbecue in the summer when I have friends over. Usually, I make this Memorable Dish several times each summer. Now that I have my third child, I think I’ve made it only once this summer. Yikes! Over the years I have perfected my recipe for kalbi. I adapted a recipe I found, modified it, and used it ever since. I assume it’s a pretty authentic recipe (if it isn’t please let me know 🙂 ) .

My husband and I have become a kalbi partner in crime cooking team. I do the marinade and he barbecues them. He’s been burning the kalbi less and less and making it just the way our family likes it. It’s hard to tell you exactly how long to barbecue the beef ribs for. It really depends on your grill, the thickness of the meat, and how cooked your family likes it.

As you can see, I am trying to hold on to the flavours of summer! But of course you could make this anytime of the year. Don’t despair if your kalbi doesn’t turn out the way you like. It has taken us lots of trial and error to perfect the recipe and cook them the way we like it. Even at times, we would burn or overcook them (usually it’s the first time each summer 😛 ) Make summer last all year long by making this Memorable Dish!
Korean BBQ Beef Ribs (Kalbi)

Korean BBQ Beef Ribs (Kalbi)

Prep Time: 20 minutes

Cook Time: 10 minutes

Total Time: 30 minutes

Serving Size: 4-6

Ingredients

  • 4 pounds Beef Short Ribs, (ask the butcher to cut them just under 1/2 inch)
  • Marinade:
  • 1 cup Soy Sauce
  • 2 tbsp Sesame Oil
  • 1 tbsp Honey
  • 2 tbsp Brown Sugar
  • 1/4 tsp ground black pepper
  • 1 tbsp Korean Ground Red Pepper
  • 2 tbsp Sesame Seeds, toasted
  • 1 Asian Pear, grated
  • 1 small Onion, grated
  • 1 tbsp Ginger, grated
  • 2 tbsp Garlic, minced
  • 2 Green Onions, sliced
  • Add to meat 30 minutes before barbecuing:
  • 2 Kiwis, pureed

Preparation

  1. In a large bowl or baking dish, mix all the marinating ingredients together (except for the pureed kiwis).
  2. Marinate beef short ribs with all the marinating ingredients for at least 1 hour or preferably overnight.
  3. Take your ribs out 30 minutes before you’re ready to barbecue them. Add pureed kiwis to the marinade and meat and mix well. (Do not leave kiwi on the meat for longer or it’ll break down the meat too much.
  4. Heat your grill to high. Remove the meat from the marinade.
  5. Once your grill is heated, barbecue the ribs until tender, lightly charred and to the doneness that you desire.
  6. Serve with rice and kimchee.

Notes

Note #1: I don’t usually put ground red pepper in my recipe because I have young kids and don’t want it too spicy. Even without it, the kalbi is mighty tasty 🙂 .

Note #2: I use an extra large ziploc bag with a bowl underneath to marinade my ribs and rotate the meat around every few hours.

https://www.memorabledishes.com/korean-bbq-beef-ribs/

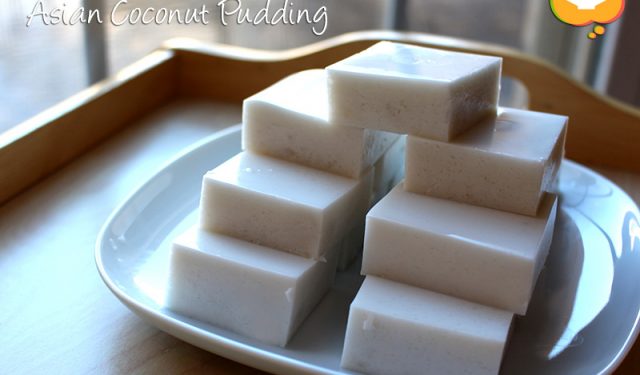
Asian Coconut Pudding (椰汁糕)

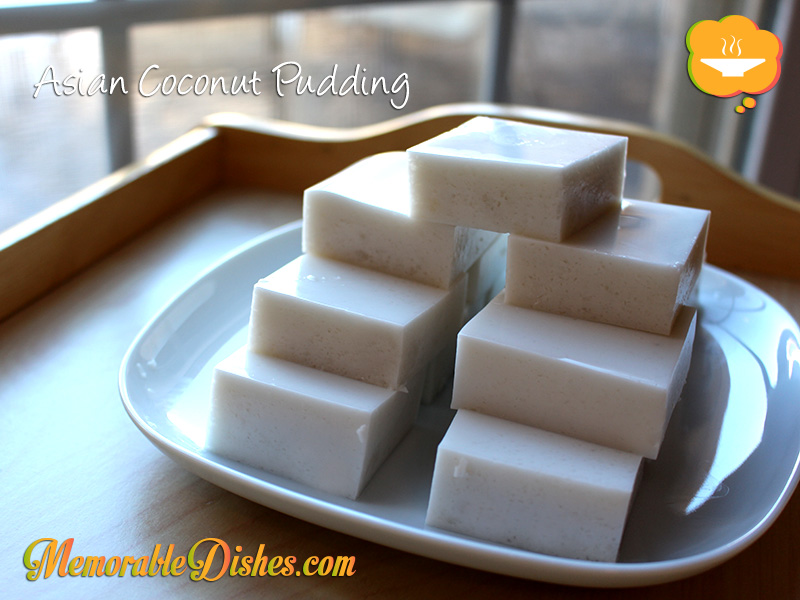
Asian Coconut Pudding

I remember my mom used to make this for us while growing up in Hong Kong. The summer weather was super hot and humid and having this as a snack or dessert was so nice and refreshing. I was going to call this “Chinese” Coconut Pudding but I am sure the Chinese adopted this Memorable Dish from other southeast Asian countries. Also, it’s not really like a pudding but more like a jelly-like cake.

My mom gave me the recipe she had from her notebook and said it wasn’t the greatest but I tried it anyway. It turned out to be a big disaster. I was suspicious of the recipe when I looked at it. It used a huge amount of cornstarch that I knew was going to yield a pasty pudding. So the first one I made went straight to the garbage 😛 .

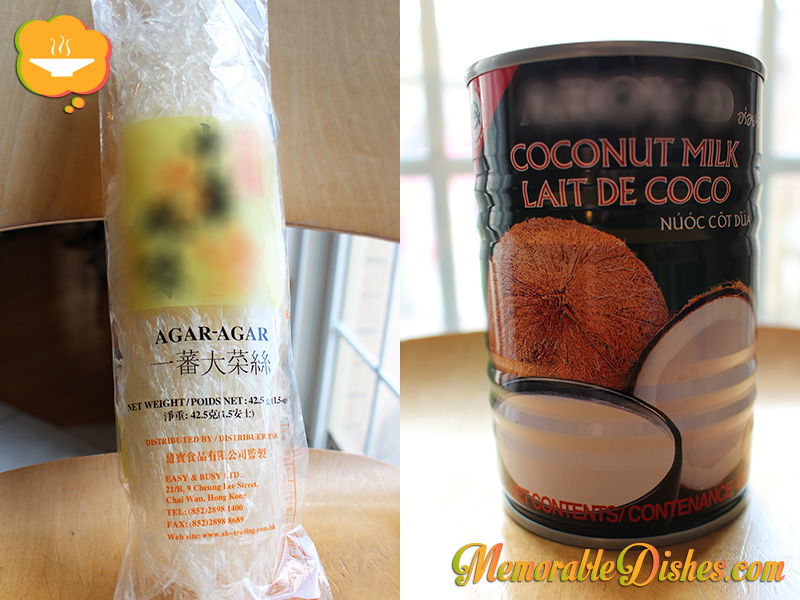
I found different recipes online that use gelatin powder but this wasn’t what my mother used. She used agar-agar instead. Agar-agar is sold dry but when reconstituted, it becomes jelly-like. Lots of Asian desserts use agar-agar to create a jelly-like effect. This recipe combines my mother’s recipe along with my own experimenting. It tastes great and has the agar-agar texture that I expected. Next time I’m going to experiment with gelatin powder and see what that would be like. This Memorable Dish has become more like a science experiment than cooking 😉 .Asian Coconut Pudding

Asian Coconut Pudding (椰汁糕)

Prep Time: 10 minutes

Cook Time: 5 minutes

Total Time: 15 minutes

16 Squares

Ingredients

  • 1/2 oz agar-agar
  • 1 cup Water
  • 2 cups Coconut Milk
  • ½ cup Sugar
  • 1 Egg White

Preparation

  1. In a medium pot, heat 1 cup of water and agar-agar using low to medium heat. (Make sure the water is never boiled but at a low simmer.)
  2. Whisk agar-agar in the water until it’s dissolved. Add sugar and mix.
  3. In a small bowl, beat egg white gently. Pour egg white in the coconut milk. Then pour this mixture into the pot and simmer gently until everything is mixed. (About a minute or two.)
  4. Pour coconut milk mixture in a 8x8 glass pan (to be cut into squares) or into different molds to set.
  5. Put it into the fridge to chill and set.
  6. Cut into squares.

Notes

Note #1: I divided my 1.5 oz agar-agar into thirds to get my 1/2 oz by cutting it with kitchen shears.

Note #2: If you want to make the texture extra smooth, strain the mixture before putting it in the pan or molds.

https://www.memorabledishes.com/asian-coconut-pudding/

Agar-Agar & Coconut Milk

Agar-Agar & Coconut Milk

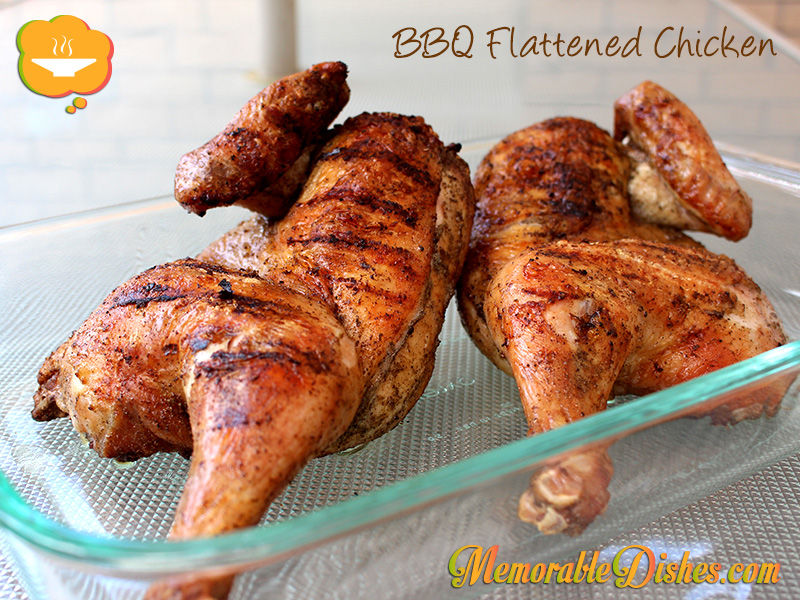
BBQ Flattened Chicken

BBQ Flattened Chicken

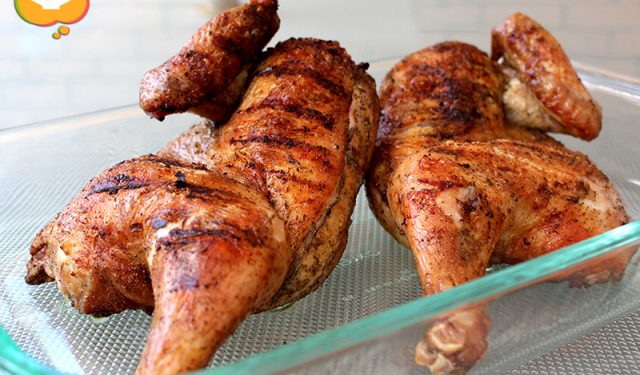
When I first made this Memorable Dish, I cut out the back and rib bones as recommended by recipes I found online. When serving it to my mom and aunt, who both love sucking on meat and fish carcasses, they were disappointed that there were no bones to suck on from my flattened chicken. If you are a food lover, you know the tastiest part of the meat is close to the bone.

My boys used to love eating chicken and meat off the bone. As they’ve grown older, they just like eating the meat part (I think they’ve become lazy and just want to eat quickly so they can go off and play.) Now my oldest son is finally starting to eat the meat off the bones again. My daughter is still young and has the patience to eat the whole chicken drumstick right to the bone!

It is so easy to barbecue flattened chicken after doing the initial prep. I use seasoning from my Perfect Roast Chicken recipe but you can use any seasoning you want. Even simple salt, pepper and garlic powder taste great. Now I don’t dare to cut out the back and rib bones anymore in case my family pop by to eat my flattened chicken 😛 .BBQ Flattened Chicken

BBQ Flattened Chicken

Prep Time: 15 minutes

Cook Time: 45 minutes

Total Time: 1 hour

Serving Size: 4-6

Ingredients

  • 1 Chicken whole (approximately 4 pounds)
  • 1 tbsp Kosher Salt
  • ½ tsp Pepper
  • 1 tsp Garlic Powder
  • 1 tsp Poultry Seasoning

Preparation

  1. Mix salt, pepper, garlic powder and poultry seasoning in a small bowl. Set aside.
  2. Cut chicken in half and tuck the wings in. If desired, cut out the back and rib bone with kitchen shears.
  3. Sprinkle herb and salt mixture all over chicken.
  4. Heat your whole barbecue up to high heat.
  5. Once it’s heated, place chicken on the barbecue skin side down.
  6. Grill on high for 5-10 minutes until you get grill marks. Watch carefully so you don’t get flare ups.
  7. Turn heat off on the side where you have the chicken on and leave the other side of the barbecue on high. (You’ll be cooking by indirect heat.)
  8. Flip the chicken (skin side on top now) and barbecue on indirect heat for 30-45 minutes until chicken is done.
  9. Let the chicken rest for 10-15 minutes before cutting.
https://www.memorabledishes.com/bbq-flattened-chicken/

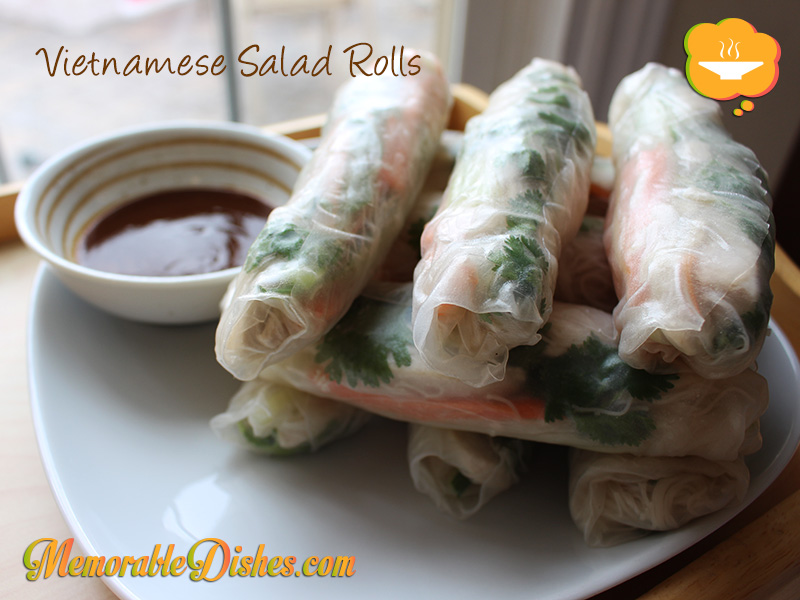
Vietnamese Salad Rolls

Vietnamese Salad Rolls

I remember being introduced to Vietnamese food when my uncle married my aunt. We were living in the States at the time. My aunt is from Vietnam but she’s native Chinese. And the foods she grew up eating in Vietnam were different than the ones I was used to. So when she prepared these salad rolls and other Vietnamese dishes, I was very excited about trying them. The traditional rolls use Vietnamese sausage or shrimp but I used poached chicken instead. I also used a simple hoisin and sesame paste dipping sauce instead of the watery one with the fish sauce. I believe you could use either.

Our kids used to find it awkward to eat when they were little. But as they’ve grown older, they’ve come to love this dish. It’s a bit time consuming to make because I’m an amateur roller 😉 When it’s really hot outside, I like to eat something cool. So this is the perfect dish to make in the summer and great to take on a picnic. This is one of my all-time favourite summer Memorable Dishes to make. So crunchy and refreshing!Vietnamese Salad Rolls

Vietnamese Salad Rolls

Prep Time: 30 minutes

12-14 Rolls

Ingredients

  • 1 pound poached Chicken Breast, sliced
  • 2 cups Carrots, julienne
  • 2 cups Cucumbers, julienne
  • 2 cups cooked Rice Vermicelli
  • 1 cup Cilantro
  • 1 package Rice Paper
  • Boiling Water
  • Dipping Sauce
  • 1 tbsp Chinese Sesame Paste
  • 1/4 cup Hoisin Sauce
  • 1/4 cup Hot Water

Preparation

  1. Poach the chicken and prepare the rice vermicelli according to the package. Rinse the vermicelli in cold water to prevent from sticking.
  2. Have all your ingredients ready and prepare to wrap.
  3. Use 2-3 large plates on the table to wrap the rolls in.
  4. Put boiling water in a large bowl, enough water to submerge the rice paper in.
  5. Place 1 rice paper in the boiling water. Make sure the whole paper is submerged.
  6. Take rice paper out and place it on a plate. (It takes a few minutes for it to become pliable to work with.) Do the 2nd rice paper and place it on the 2nd plate.
  7. Go back to the 1st place and start adding ingredients to the roll, some chicken, cucumbers, carrots, rice vermicelli and cilantro. Don’t over stuff.
  8. Roll it up like a spring roll and place it on the plate.
  9. Repeat steps 5-8 until all the ingredients are used up. (If the hot water is not hot enough, replace it with freshly boiled water.)

Notes

To keep the rolls moist, line the plate with dampened paper towel and place finished rolls on top. Cover with another dampened paper towel. You’re able to keep the rolls moist for at least one day in the fridge.

https://www.memorabledishes.com/vietnamese-salad-rolls/

Summerlicious at Auberge du Pommier

Last summer we came to Auberge du Pommier for Summerlicious lunch. We enjoyed it tremendously but it was bittersweet. We were supposed to be in Paris around that time but had to cancel the trip because of my husband’s new job. Instead, we headed to Auberge so that we could pretend we were in France for just a little bit.

This year we returned to Auberge du Pommier for Summerlicious to celebrate my husband’s new job and hopefully this work won’t make us cancel any family trips again! When I visit during the warmer months I enjoy sitting outside. With its floral terraces and water fountain, it reminds me of when we visited Aix-en-Provence pre-kids ten years ago. Now that we’re après three kids later, we really enjoy these little escapes without the kids once in awhile. (However, I know our kids would really enjoy the food here. Bringing them would not be so relaxing for us 😉 ) .

With French music playing in the background, the setting and atmosphere of the restaurant transport you to the French countryside. (I’m really missing Aix now 🙁 ). So let’s get to all the food so I can stop daydreaming of being in France again. To really immerse ourselves in the French way of life, we decided to do the wine tasting along with our meals. I love that the waitress commented on how it would be more fun. Yes, it was more fun! Without the kids tugging at me, enjoying a fine meal with wine is truly one of life’s greatest pleasures.

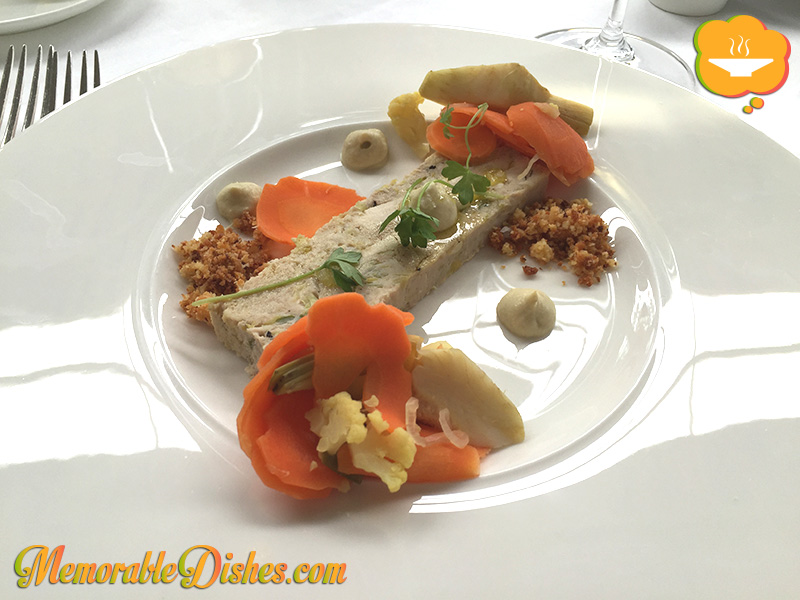
I ordered the Terrine and my husband followed suit. For whatever reason, they gave him the salad instead. It was meant to be because I knew he wouldn’t enjoy the terrine as much as I would. All the flavours worked so well together. The slightly pickled vegetables balanced the meaty terrine perfectly. I was busy soaking up the atmosphere and enjoying my eating moment without the kids that I forgot to record the wine the waitress paired our meals with. But I do remember the wines were from France and also from Prince Edward County.

Terrine at Auberge du Pommier

Terrine: chicken & leek terrine, market vegetables à la Grecque, truffled artichoke emulsion

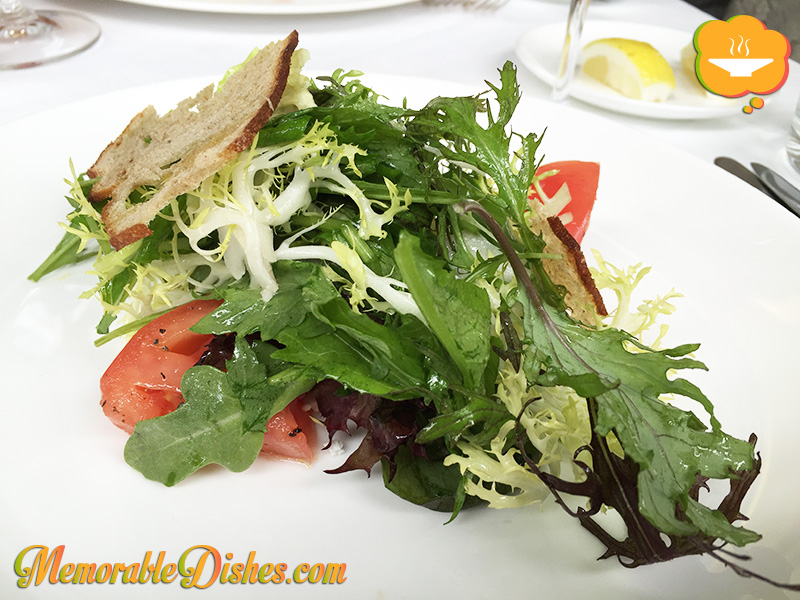
Salade at Auberge du Pommier

Salade: Tamarack Farms heirloom tomatoes, black olive petals, Ontario feta, 100km greens

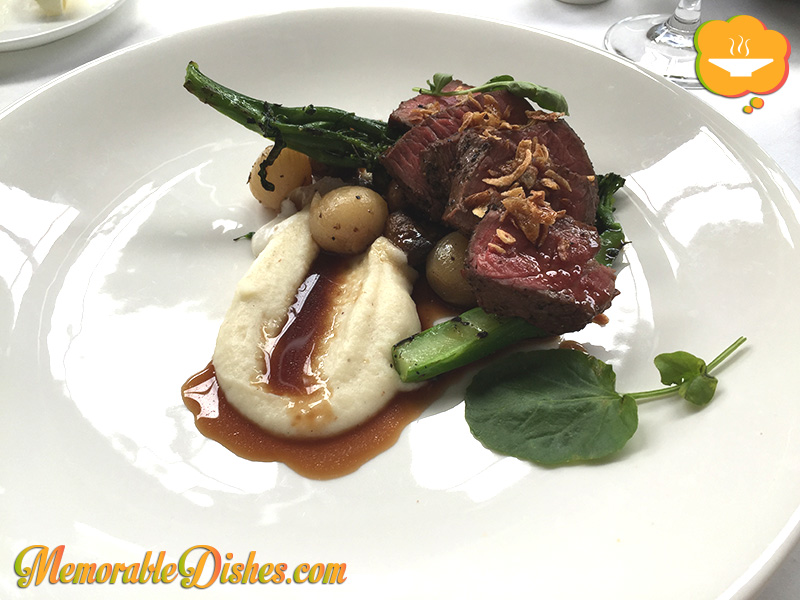
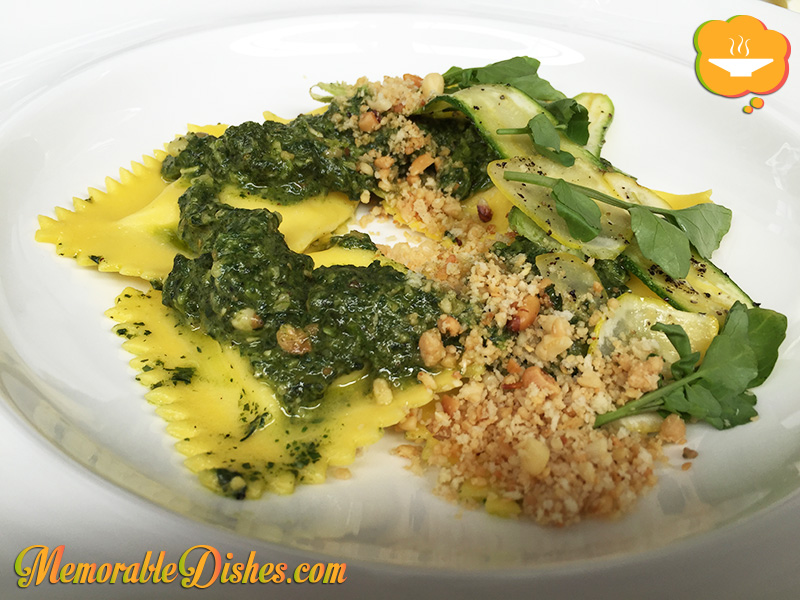
For the main course I ordered the boeuf. I wasn’t familiar with the cut of the coulotte steak and the waitress said that it wasn’t like a tenderloin but with lots of flavour. I agree with her assessment because it was a mighty tasty piece of meat. Again, all the sides and the steak worked perfectly together. I still remember the taste in my mouth. It was truly an umami experience. My husband ordered the ravioles and of course I had to taste them. They were divine! I love my meat but I could’ve easily traded my steak for that vegetarian dish.

Boeuf at Auberge du Pommier

Boeuf: coulotte steak, lemon thyme vegetable fricassée, horseradish, fried shallots

Ravioles at Auberge du Pommier

Ravioles: lemon ricotta ravioli, summer legumes, watercress, pine nuts, olive oil

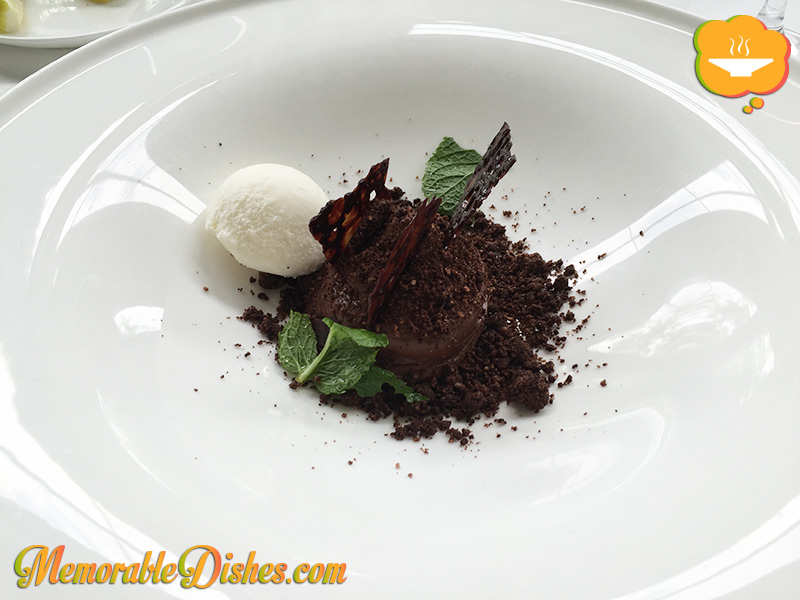
For dessert, I picked the chocolat plate. I am a chocolate lover but I was very impressed with the mint white chocolate ice cream. I was expecting the strong mint taste that I was used to from store-bought or even ice-cream shop ice cream. But the minty taste of Auberge’s ice cream was subtle and complimented the rest of the chocolate dish. My husband picked the panna cotta and I had a taste of his dessert, of course. But I was still baffled by the yummy minty ice cream that I had.

Chocolat at Auberge du Pommier

Chocolat: chocolate crémeux, coffee crumble, cacao tuile, mint white chocolate ice cream

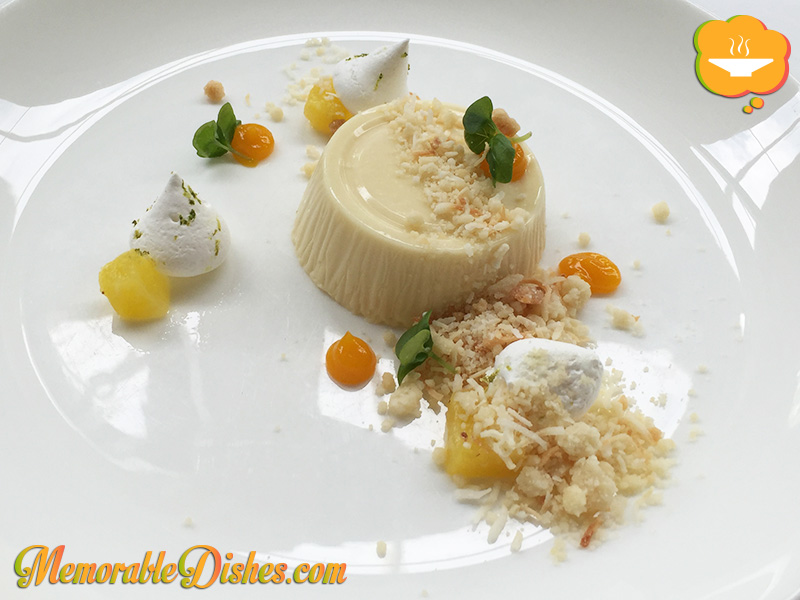
Panna Cotta at Auberge du Pommier

Panna Cotta: pineapple panna cotta, coconut streusel, lime meringue, mango gelée

Everything at Auberge du Pommier was impeccable. From the moment you walk through the door, everyone makes you feel special. Not only is the food phenomenal, the attention from all the staff and servers truly make this a Memorable Place to eat. Eating all these Memorable Dishes at such a cozy and romantic atmosphere was a great escape from the hustle and bustle of our busy lives. Auberge is truly a “refined retreat from the city” as stated on their website, and it honestly is.

Jelly Candy

Jelly Candy

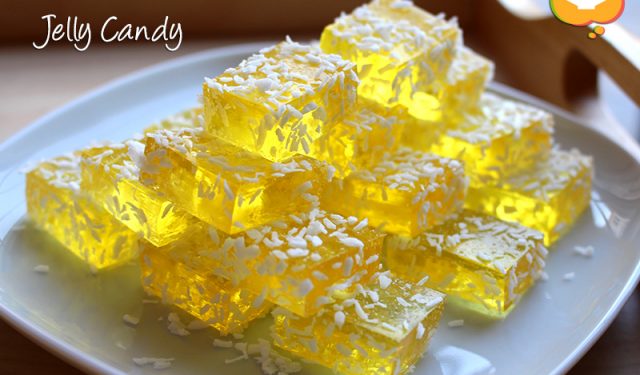
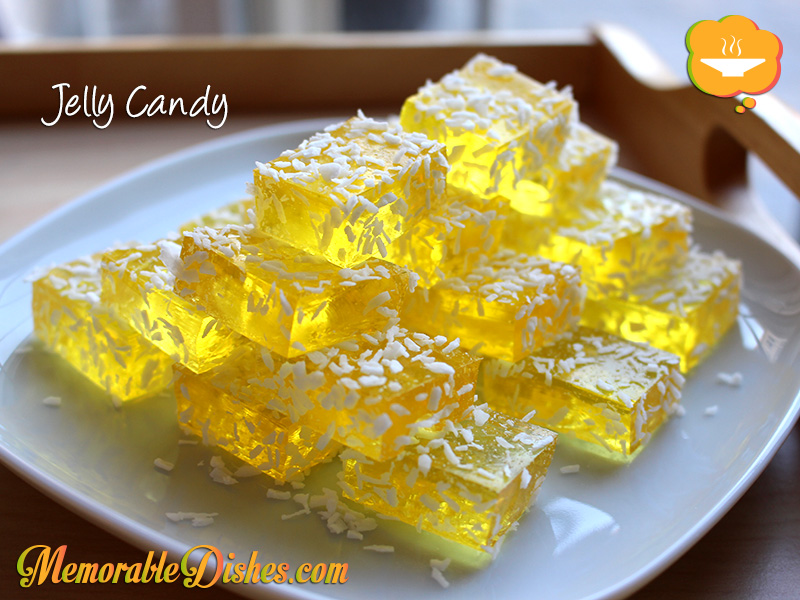
When I saw different flavours of jello such as mango and lychee at the Asian grocery store, it triggered childhood memories of jelly candies my mom used to make for us. She called them jelly candies or jello candies. They’re not really candies because they’re not actually hard. But we know them here as Jello Jigglers or Knox Blocks.

My mom made these for us, for potlucks she used to host, or to bring to friends’ houses. She would cut them into little squares and coat them with shredded coconut. I don’t know why she coated them with coconut but I think she found a recipe from a newspaper or magazine from back in the day. They might have suggested that coating jelly candies with coconut makes them extra fancy to serve at parties 😉 .

Even though this is obviously not a fancy Memorable Dish, I remember eating them fondly. My mom also layered the jello in different flavours to make the jelly candy more fun. The effect looks amazing but of course is more time consuming to make. My friend also reminded me that her mom used to make it layered with evaporated milk. I should definitely try to make it that way when I have more time. But I really love the look of the colourful layered jello. It always brings a smile to my face because it reminds me of my mother making it for us when we were kids 😀
Jelly Candy

Jelly Candy

Prep Time: 10 minutes

Total Time: 10 minutes

16 Squares

Ingredients

  • 1 box flavoured Jelly Powder (80 grams)
  • 2 envelopes of Gelatin
  • 2 cups Boiling Water
  • 1/4-1/2 cup finely shredded Coconut

Preparation

  1. In a medium bowl, mix jelly powder and gelatin with boiling water.
  2. Stir with spoon or whisk until all the powder is dissolved.
  3. Pour liquid into a 8" x 8" pan.
  4. Put in the fridge to cool it completely.
  5. Cut them into small squares and coat them with shredded coconut.
https://www.memorabledishes.com/jelly-candy/

Robertsons Jelly Powder

Lychee and Mango Jelly Powder

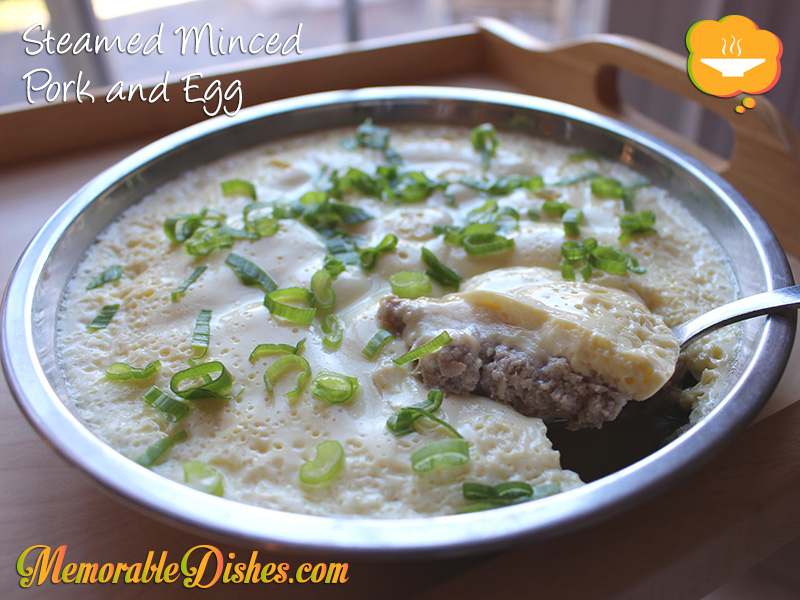
Steamed Minced Pork and Egg

Steamed Minced Pork and Egg

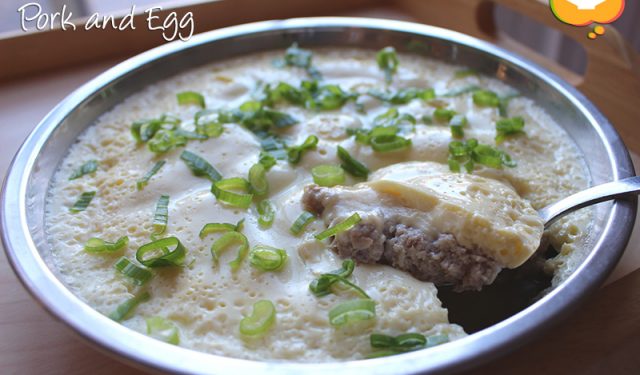
Sometimes the most simplest food gets overlooked. I can’t believe I didn’t write a blog post about this Memorable Dish sooner! Steamed minced pork and egg was a childhood staple for me. I used to and still love eating this simple dish mixed with rice.

Growing up in Hong Kong, I remember eating this dish quite a bit. Even after moving to Canada and the United States, my mother continued making it for us. It uses simple ingredients that you can find anywhere so the comfort of this childhood dish can be made in a pinch.

Our family loves this Memorable Dish with the exception of my oldest son. He likes the pork but doesn’t like the custardy egg. He thinks it’s tofu (which he doesn’t like). I would say most kids love it though because of its silky egg. Every time I have this dish it reminds me of being a little girl gobbling it with rice.Steamed Minced Pork and Egg

Steamed Minced Pork and Egg

Prep Time: 10 minutes

Cook Time: 10 minutes

Total Time: 20 minutes

Serving Size: 4

Ingredients

  • 1/2 pound of Ground Pork
  • 1 tsp of Soy Sauce
  • 1/2 tsp of Cornstarch
  • 1/4 tsp of Sugar
  • 1/2 tsp Shaoxing Wine or Cooking Wine
  • Dash of White Pepper
  • 3 large Eggs
  • 3/4 cup Chicken Broth
  • 1/8 tsp Salt
  • Green Onions, sliced, for garnish

Preparation

  1. Marinate ground pork with soy sauce, cornstarch, sugar, shaoxing wine, and white pepper for at least 30 minutes.
  2. In a stainless steel or ceramic wide and shallow dish, spread the ground pork mixture on the bottom of the dish as thin as possible.
  3. In a small bowl, beat the eggs, chicken broth and salt.
  4. Pour egg mixture on top of the ground pork.
  5. Steam for 8-10 minutes after the water has boiled.
  6. Garnish with sliced green onions.
https://www.memorabledishes.com/steamed-minced-pork-and-egg/

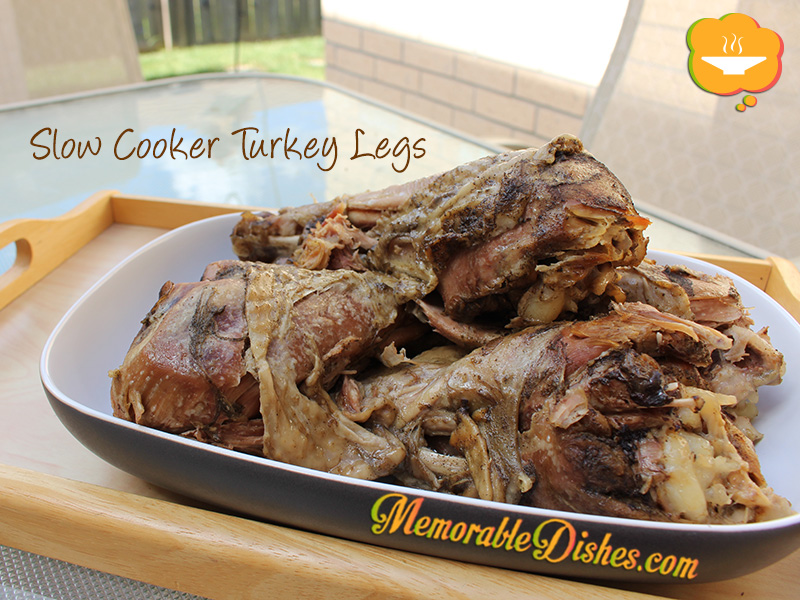
Slow Cooker Turkey Legs

Slow Cooker Turkey Legs

I’m not much of a slow cooker user. I know some people love it and I know it’s a useful vessel to cook meals for the family because you can set it and forget it. Somehow, I never have embraced the slow cooker as much as I’d like. Maybe it’s because you usually throw everything into it without browning the meat and it doesn’t have the depth of flavour that like. (I know I could brown the meat first then put it into the slow cooker but using more than one pot to cook a stew dish is just too much hassle.) I have been looking for ways to use my slow cooker lately because I had some delicious slow cooker ribs at a friend’s house and they were delicious!

Now back to my turkey legs. I made turkey legs in the oven before and it was quite a mess. I had to cook them for a long time to get them tender and the kiddies didn’t seem to like them. But cooking turkey legs in the slow cooker is an easy way to get them nice and tender. This recipe is super easy and delicious. My favourite part of cooking the turkey legs in the slow cooker is the juices they produce. If you’re nervous about putting the legs in the cooker without any liquid, pour 1/4 cup of water (but you really don’t have to).

After they’re cooked, don’t be deceived by the beige-looking turkey legs, they are delicious! If you like to brown them a bit in the oven before serving go right ahead. You can also reduce the sauce into a thicker gravy but I like the taste and consistency of the sauce after the legs have been rendering in the slow cooker for six hours. This Memorable Dish gets everyone’s mouth watering. Being Chinese, of course I serve my turkey legs with rice. But you can also break up the meat and mix it up with the sauce as a ragu and serve it over pasta.

Slow Cooker Turkey Legs

Slow Cooker Turkey Legs

Slow Cooker Turkey Legs

Prep Time: 5 minutes

Cook Time: 6 hours

Total Time: 6 hours, 5 minutes

Serving Size: 4-6

Ingredients

  • 4 Turkey Legs
  • 2 tsp Kosher Salt
  • 1 tsp Poultry Seasoning
  • 1 tsp Garlic Powder
  • 1/2 tsp Black Pepper

Preparation

  1. Mix all the salt and seasonings in a small bowl.
  2. Coat all the turkey legs generously with the spice mix.
  3. Set slow cooker at Low for 6 hours.

Notes

Here’s the seasoning portion for one turkey leg: 1/2 tsp Salt, 1/4 tsp Poultry Seasoning, 1/4 tsp Garlic Powder, 1/8 tsp Black Pepper.

https://www.memorabledishes.com/slow-cooker-turkey-legs/

Basil Pesto

Basil Pesto

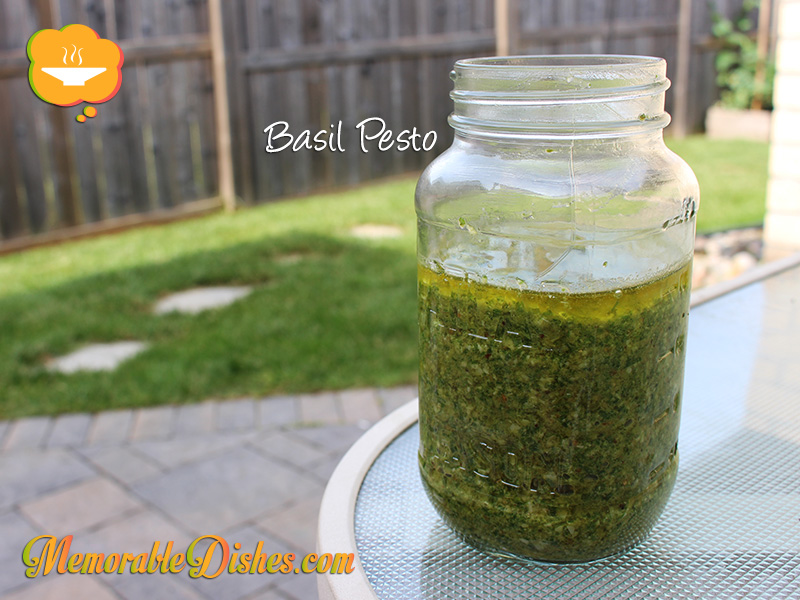
Summer is here and it’s pesto season! With the warm weather, the best thing is to grow your own basil. It is also the most economical way to make your own pesto. This Memorable Sauce is a favourite in our household. All the kids LOVE pasta with pesto. I also spread it on chicken and grill it on the barbecue. Everyone in our family  absolutely goes wild for it. They chant for pesto when I make it!

The only time I make basil pesto is summer because I grow it in pots in my backyard. If you grow basil, you know how fast and easy it grows under sunlight with plenty of water. Even me, who is known for my black thumb can grow basil 😉 . I’ve never tried this before but a friend of mine grew basil in her condo by placing the basil plants underneath her fluorescent tube lights in her ceiling. She grew them indoors all year long because her rabbits love eating them. Please don’t ask me how she does it 🙂 .

You can also grow basil indoors by bringing your pots inside. However, my basil plants die pretty soon after I do this. I think it’s because I don’t have enough sunlight where I want to put the pots. If you have any success growing them indoors besides the fluorescent lights trick, please share 🙂

Basil Pesto

Basil Pesto

Basil Pesto

Prep Time: 10 minutes

Total Time: 10 minutes

Makes 2 Cups

Ingredients

  • 4 cups Basil, loosely packed
  • 1 cup grated Parmesan Cheese
  • 1/2 cup Pine Nuts
  • 8 cloves Garlic
  • 1 cup Olive Oil
  • 1/2 tsp Kosher Salt
  • 1/2 tsp freshly ground Black Pepper

Preparation

  1. In a food processor, place garlic and pine nuts to pulverize for 10 to 15 seconds.
  2. Then add basil, parmesan cheese, kosher salt and black pepper.
  3. Restart the food processor again, and slowly add the olive oil in the feed tube until the mixture is pureed. Scrape in between blending if mixture is stuck to the sides.

Notes

Note #1: You could toast your pine nuts lightly if you want to.

Note #2: You can freeze them in ice cube trays to be used later.

https://www.memorabledishes.com/basil-pesto/

St. Lawrence Market Lunch & Goodies

Proscuitto & Cheese Plate

Our family doesn’t live in the city so we don’t frequent the St. Lawrence Market in downtown Toronto to buy their fresh meats and produce. We actually go there to eat lunch and buy some yummy goodies to take home. My main goal of heading down there every time is to buy some good cheeses. But along the way, we always end up buying a lot more than we planned for.

Alex Farm Products

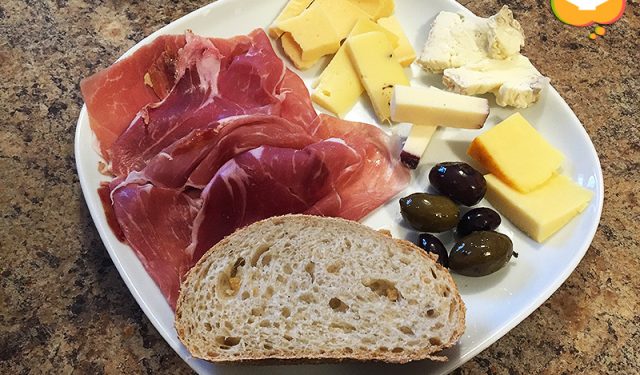
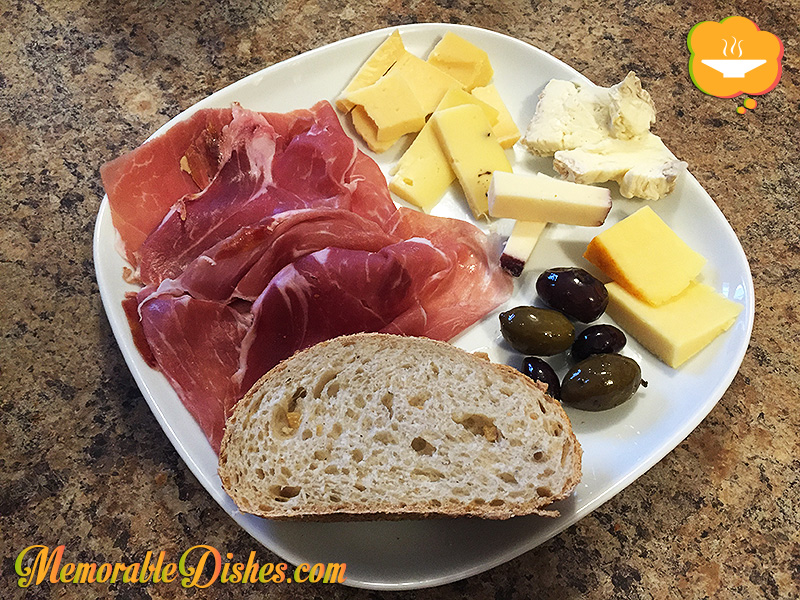
I call Alex Farm Products cheese pushers because my aim is to buy one or two types of cheese but I always end up with five 😉 . I usually ask for strong cheeses because that’s what I like. The cheesemonger shaves off the different variety of cheeses and lets us sample them. This time he even gave us samples of soft cheeses, which I normally don’t get, and I ended up loving them! It’s like he can read my mind and knows what I like. I brought the cheeses home hoping the boys would try them. Of course they didn’t even try any of them. It was my toddler girl who ate every piece of cheese I gave her, even the stinky ones – she even asked for more! Maybe girls have a more sophisticated palette 😉 .

St. Lawrence Market - Alex Farm Products and Scheffler's Delicatessen & Cheese

Alex Farm Products and Scheffler’s Delicatessen & Cheese

Scheffler’s Delicatessen & Cheese

I remember having homemade prosciutto at a friend’s house and it was so delicious that I was tempted to make my own. Since I am not planning to cure a pork leg to make prosciutto anytime soon, I have to get my prosciutto fix at Scheffler’s Delicatessen & Cheese. I’m not sure if it’s the best place to get prosciutto at the Market but it’s definitely the most visible. They were super friendly and helpful and I ended up buying some pancetta and olives as well.

Proscuitto & Cheese Plate

Prosciutto & Cheese Plate

Buster’s Sea Cove

Every time we head down to St. Lawrence Market, we always head to Buster’s Sea Cove for lunch because the boys love seafood. We sat by the bar area while waiting for our food. I told the boys to watch the chef cook and learn some tips because they say they want to open a food truck when they grow up. The chef was super friendly and was chatting with the boys and he ended up adding some sauteed olives and red pepper topping to our grilled halibut. How nice!

Grilled Calamari with Fries – The boys’ favourite! Fresh and flavourful calamari. Perfectly cooked.

Grilled Halibut with Salad –  Big pieces of grilled halibut also cooked perfectly. The salad and coleslaw were equally as good.

Clam Chowder – My favourite! Creamy with chunks of clam – delicious! Even the boys loved it. (They usually don’t have clam chowder. They must’ve been really hungry!

Buster's Sea Cove - Grilled Calamari, Grilled Halibut, Clam Chowder

Buster’s Sea Cove – Grilled Calamari, Grilled Halibut, Clam Chowder

Uno Mustachio

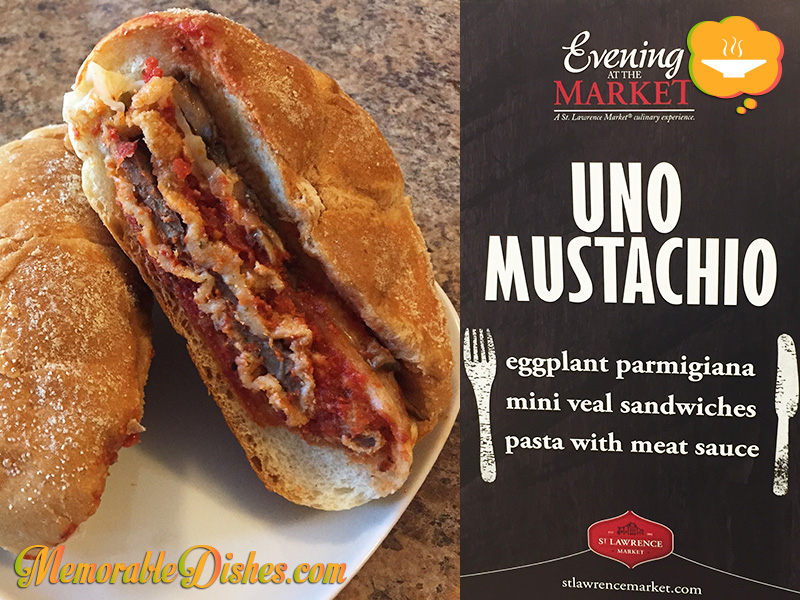
Another eatery that we never miss is Uno Mustachio for their famous Italian sandwiches. I didn’t know the place was called Uno Mustachio. We always refer it as the big Italian sandwich place downstairs. Even if we are too full to eat there, we usually buy one or two sandwiches to take home. You can never go wrong with the Veal Eggplant Parmagiano sandwich. If you can’t decide, check out their menu first before heading there because it can get overwhelming with so many options.

Uno Mustachio - Italian Sandwich

Uno Mustachio – Italian Sandwich

Stonemill Bakery

Another must-go-to place while we are at the MarketStonemill Bakery. Get there early because they sell out by late afternoon.

Italian Roasted Garlic Bread – The best bread ever! This bread makes the best croutons if you end up having any leftovers.

White Chocolate Macadamia Nut Cookie and Chocolate Cookie with White Chocolate Chips – Chewy and soft.

Double Chocolate Croissant and Almond Croissant – Flaky with the perfect amount of filling.

Stonemill Bakery - Baked Goods

Stonemill Bakery – Baked Goods

Eve’s Temptations

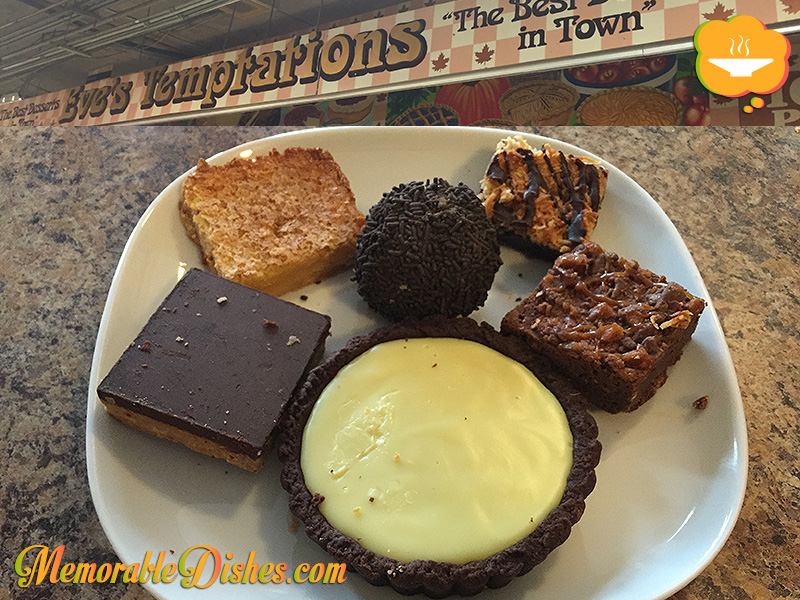
If you know my husband, you know he’s a dessert lover. I thought the cookies and croissants were enough but he had to buy more to take home. We saw some delicious treats at Eve’s Temptations and of course we had to buy some. Here are the five desserts we got: Key Lime Chocolate Pie, Chocolate Peanut Butter Square, Lemon Square, Rum Ball, German Brownie and Peanut Butter Brownie.

Eve's Temptations - Desserts

Eve’s Temptations – Desserts

St. Lawrence Market is definitely a Memorable Place to visit for us. I remember going with just my husband before we had kids. Now bring the kids with us to these outings. They enjoy sampling the food as much as we do.

This concludes our outing to the St. Lawrence Market. We didn’t even hit the other food places we normally go to like the peameal bacon sandwich place and the Portuguese tart place. We’ll have to go back to the Market again soon to eat and explore some more!

Show Buttons
Hide Buttons