Author Archives: Winnie N

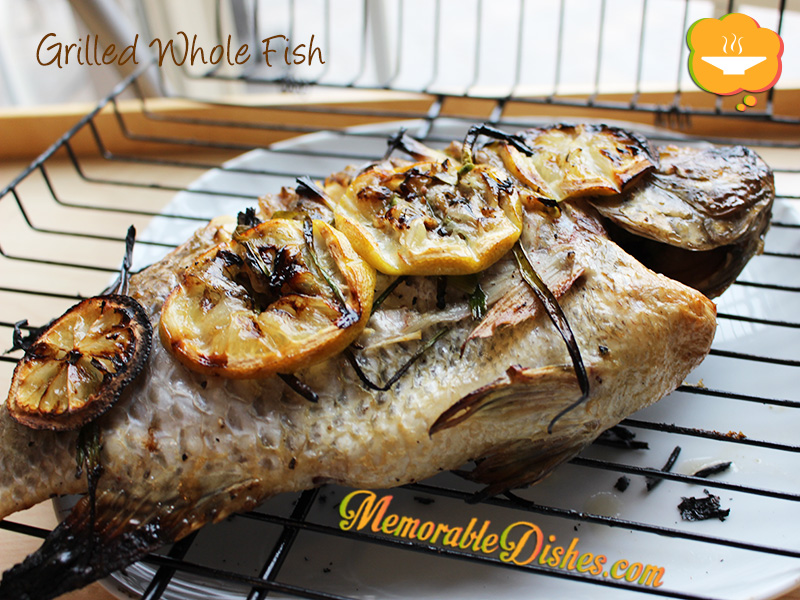
Grilled Whole Fish

Grilled Whole Fish

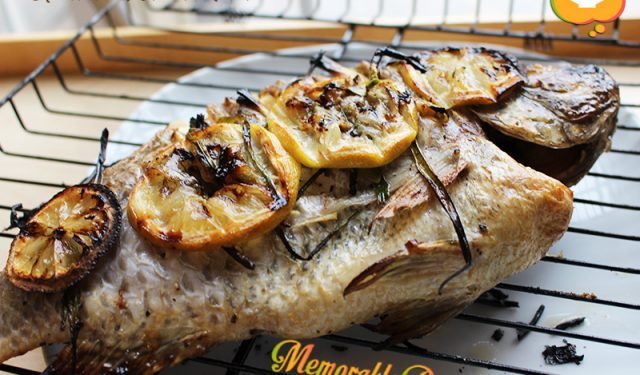
Being Cantonese, you would think I’d have a post about steamed whole fish already! We practically eat steamed fish at every Chinese dinner. But alas, I have a grilled fish post first because it’s barbecue season! I absolutely love grilled fish. I love the smell of the charred fins and smoky taste of the fish when you grill it.

This Memorable Dish was inspired by the sea bream I saw at our local Chinese supermarket. The sign says, “Sea Bream, European”. I don’t usually see sea bream on sale so I snatched one up right away. The sea bream brought back memories of visiting Greece on my honeymoon. Being a seafood lover, Greece was a fresh seafood paradise. Every restaurant I went to, I ordered grilled whole fish. Every time I asked what type of fish it was the waiter would say, “It’s sea bream.” Before visiting Greece, I’d never heard of sea bream before. But apparently it’s a very popular fish to eat in Europe. So when I saw it at the supermarket in Canada, I was super ecstatic and bought it to grill. I wanted to test grill it first before my post because I didn’t want to screw it up 😀 .

The sea bream I grilled turned out great so I proceeded to grill a whole tilapia for this post. If your fish is a bit thicker in certain parts, cut some slits so it’ll cook more evenly. I also had some fresh garlic stalks from my in-laws’ garden that I stuffed the fish with. When I brought the cooked fish into the house, the kids all cheered. (Maybe they were happy that I didn’t burn down the house when they saw smoke coming out of the barbeque 😛 .) Fish is always a favourite in our household. I think the kids enjoy the grilled fish as much as I do since it’s a nice change from our usual steamed fish.Grilled Whole Fish

Grilled Whole Fish

Prep Time: 5 minutes

Cook Time: 15 minutes

Total Time: 20 minutes

Ingredients

  • 1 Whole Fish (Sea Bream or Tilapia approximately 1 1/2 pounds)
  • 6 Lemon slices
  • 1-2 stalks of fresh Garlic, cut the thick parts to thinner pieces
  • Salt & Pepper
  • Olive Oil

Preparation

  1. Preheat grill on high.
  2. Cut the thick parts of the fish with 2-3 diagonal slits.
  3. Coat the fish on both sides with olive oil.
  4. Sprinkle fish with salt and pepper.
  5. Stuff the cavity with fresh garlic stalks and put some into the slitted parts of the fish.
  6. Place 3 lemon slices on the large fish grilling basket. Then place the fish on top. Then place the other 3 slices on top. Close the grilling basket.
  7. Grill fish on high heat until the fins are a bit charred (approximately 5-10 minutes).
  8. Then flip and grill for another 5-10 minutes.

Notes

Note #1: If you don’t have fresh garlic stalks, you could use chives or any other aromatics that you like.

Note #2: The amount of time to cook the fish depends on how big or thick your fish is and also your barbecue. Please check the thickest part of the fish for doneness. Also, the fish will continue to cook once you take it off the grill. So take it off as soon as it’s done and let it sit for 5 minutes before serving.

https://www.memorabledishes.com/grilled-whole-fish/

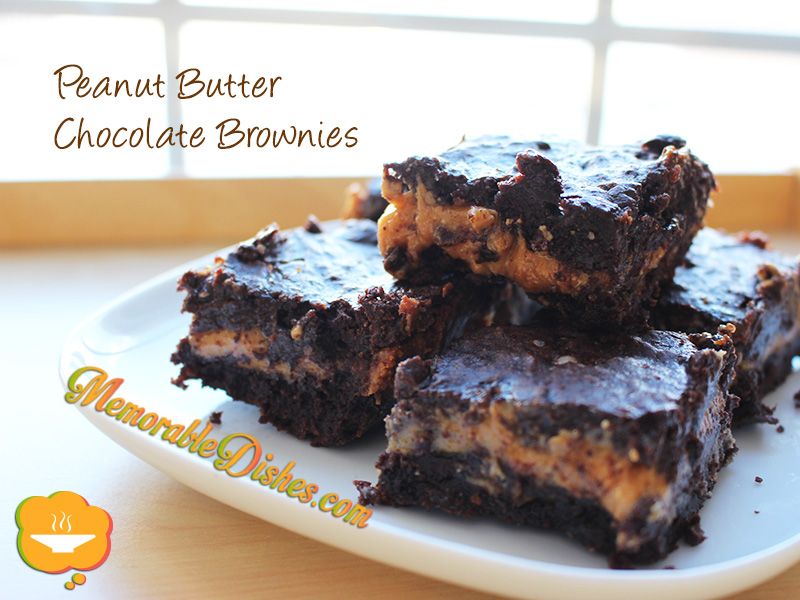
Peanut Butter Chocolate Brownies

Peanut Butter Chocolate Brownies

I originally found this Memorable Treat when I was looking for dairy-free desserts for a dinner party I was attending. I love Texanerin.com because of the healthier versions of delicious desserts on their site. I’ve had desserts which are supposed to be healthier but taste like cardboard. I’d rather skip dessert if it tastes crappy. The whole point of having dessert is to treat ourselves. And because I don’t have desserts everyday, when I have one it better be darn good!

These peanut butter chocolate brownies are a great compromise between delicious and healthier brownies because they’re made with whole wheat flour and coconut oil. The sugar is on the high side. However, she did mention using honey wouldn’t work but you could try using coconut sugar. You can always test it using less sugar to suit your taste.

Now where was I? Yes, my dinner party dessert. I decided on choosing this recipe because my husband loves the peanut butter and chocolate combination and also this recipe is pretty easy to make with ingredients I have on hand already. This is a Memorable Dish times three because within the span of one week, I made this recipe three times! The original one for the dairy-free dessert dinner party. Then the next day, I made another one to bring to a friend’s house. And, because my husband complained that I kept making these brownies for our friends and he didn’t have enough, I made another batch mid-week just for ourselves. These peanut butter chocolate brownies are not only delicious but easy enough to make three times a week!Peanut Butter Chocolate Brownies

Peanut Butter Chocolate Brownies

Prep Time: 15 minutes

Cook Time: 25 minutes

Total Time: 40 minutes

16 Brownies

Ingredients

  • Filling
  • 1 cup salted natural Peanut Butter
  • 1/3 cup Honey
  • 1/4 cup Coconut Oil, room temperature (normal butter works for a non-dairy-free version)
  • Brownies
  • 1/2 cup Coconut Oil or Olive Oil (or Canola)
  • 1 cup Granulated Sugar or Coconut Sugar
  • 3 large Eggs, room temperature
  • 2 teaspoons Vanilla Extract
  • 3/4 cup Dutch-process cocoa powder
  • 3/4 cup Whole Spelt, Whole Wheat Pastry or Whole Wheat Flour
  • 1/4 tsp Salt

Preparation

  1. Preheat your oven to 350°F. Line an 8" x 8" pan with parchment paper or spray the pan with baking spray.
  2. Combine filling ingredients (peanut butter, honey and coconut oil) and place in fridge while you prepare the brownie batter.
  3. In a medium bowl, stir together the oil and sugar. Add the eggs and vanilla and beat just until combined.
  4. In a small bowl, mix together the cocoa powder, flour and salt. Add the flour mixture to the wet mixture. It will be really thick, but that's okay. Only stir until combined!
  5. Spread half of the batter into the prepared pan. To get the peanut butter filling somewhat evenly into the pan, I rolled the filling into balls and smushed them to make them flat, and then used those to cover the first half of the brownie batter. Cover the peanut butter filling with the rest of the brownie batter. Bake for 20 to 25 minutes.
  6. Take them out when they are set in the middle. The top will be shiny and may look strange but it has nothing to do with how done they are. They should not be the least bit cakey, but really, really fudgy. Both the brownie part and peanut butter part won't appear to be done when you take it out of the oven, but it is.
  7. Let it cool and then put them in the fridge. They will firm up and get fudgy in there.

Notes

Original Recipe from Texanerin.com.

https://www.memorabledishes.com/peanut-butter-chocolate-brownies/

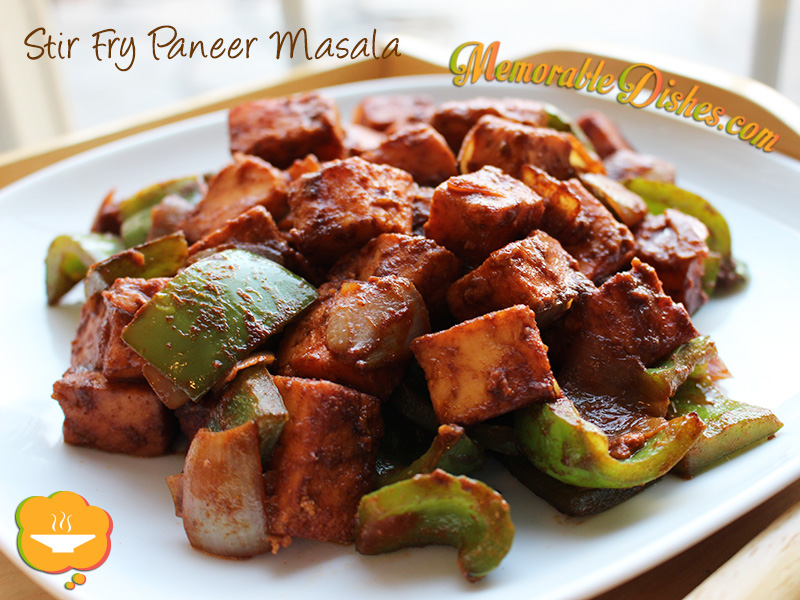
Stir Fry Paneer Masala

Stir Fry Paneer Masala

I first tasted this Memorable Dish at a summer picnic barbeque at a park with our friends. It’s a big group and we try to get together once or twice a year. But it’s insane because the group was huge to begin with. And now that almost all of us have children it’s even crazier. Mind you, not everyone can make it but it’s still a very large group to have hosted at one person’s house.

We all bring something to the barbeque to eat and share. Most of us bring hot dogs and hamburgers but when someone brings something different, I get very excited. My friend brought this yummy stir fry paneer dish. Our family loves Indian food so being a curious cook, I asked her what was in it. She told me this super easy recipe and I’ve been making it ever since. She calls the dish paneer tikka but being Chinese, I call it Stir Fry Paneer Masala because it deviates from the traditional paneer tikka.

Although my oldest son loves Indian food, he’s not crazy about paneer which he says is like tofu. My second son loves it because it’s like a cheesy tofu, and he just loves tofu. My toddler girl loves everything cheesy. So even though this recipe is a tad spicy, she devours it. Of course both my husband and I love this Memorable Dish. It’s always great to discover new easy dishes to make for a weeknight dinner that everybody in the family loves (minus one) 😉 .Stir Fry Paneer Masala

Stir Fry Paneer Masala

Prep Time: 10 minutes

Cook Time: 10 minutes

Serving Size: 2-4

Ingredients

  • 1 400g package Paneer, cut into 1/2 inch cubes
  • 1 tbsp & 1 tsp Tandoori Masala
  • 1 tbsp & 1 tsp Soy Sauce
  • 1 tsp Ketchup
  • 1/4 cup Water
  • 1 tbsp Vegetable Oil
  • 1 Green or Red Pepper, 1 inch pieces
  • 1 small Onion, cut into large dice

Preparation

  1. Marinate paneer with 1 tablespoon soy sauce and 1 tablespoon tandoori masala for at least 1 hour.
  2. Heat wok or large frying pan with vegetable oil.
  3. Fry onions and green peppers until softened but still has a bit of crunch to it.
  4. Add paneer and stir.
  5. Add water and 1 teaspoon of each: tandoori masala, soy sauce, ketchup.
  6. Stir fry until the paneer is warmed through.
https://www.memorabledishes.com/stir-fry-paneer-masala/

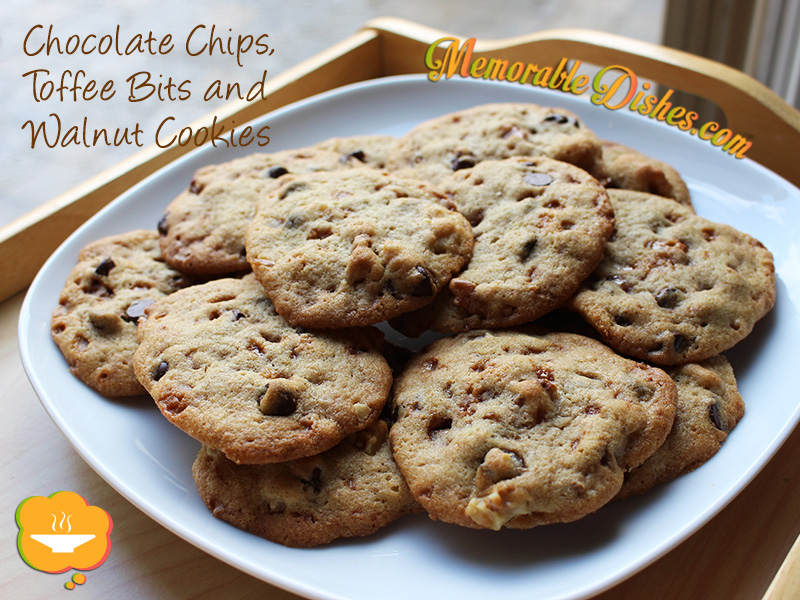
Chocolate Chips, Toffee Bits and Walnut Cookies

Cookies! C is for cookie and it’s good enough for me… This song sung by Cookie Monster is in my head more than I would like because my toddler girl is obsessed with her Sesame Street songs. But the cookie monster at my house is not herit’s my husband! He absolutely loves cookies and is constantly hounding me to make them. With the limited time I have writing a food blog post every week, taking care of the kids, working from home, plus cooking meals everyday for my family of five, I cannot possibly be baking cookies everyday! (Believe me, I’m no Martha Stewart   😉 .) However, I would like to create the illusion that I’m a good homemaker so when people come to visit, I greet them wearing a frilly apron serving freshly baked cookies.

That’s what happened when I went over to one of my friend’s house (minus the frilly apron). She would bake fresh cookies for me on the fly. She says she always has a mixed batch of cookie dough in the fridge. So when people come over she just scoops the dough and bakes a small batch of cookies just enough for the guests to eat. This way she always serves freshly baked cookies! How clever is that?

These cookies made it as a Memorable Dish because absolutely everyone in my family requests them. I’ve perfected this recipe by combining chocolate chips, toffee bits and walnuts. My mouth waters just thinking about them. I tried making these cookies with just coconut oil to be a little healthier but I found they’re just not quite the same. So I compromised by using half butter and half coconut oil and really love the result. Cookies without the buttery taste are just not cookies! I also use half white and half whole wheat flour.

I would like to say that if unexpected guests come to visit they will be lucky enough to get some freshly baked cookies. Technically, I should have a stash of frozen cookie balls waiting to be baked and served. But if my family knows cookie balls are in the freezer, they would pace around the freezer like a bunch of hungry wolves every night waiting for those cookies to be baked. I don’t think they would rest until all the cookie dough is gone. Soooo the unexpected guests might not be so lucky to taste this Memorable Treat afterall 😉 .Chocolate Chips, Toffee Bits and Walnut Cookies

Chocolate Chips, Toffee Bits and Walnut Cookies

Prep Time: 20 minutes

Cook Time: 10 minutes

Total Time: 30 minutes

48 Cookies

Ingredients

  • 1/2 cup Butter, softened
  • 1/2 cup Coconut oil
  • 1/2 cup Packed Brown Sugar
  • 1/2 cup Granulated Sugar
  • 2 Eggs
  • 1 1/2 tsp Vanilla Extract
  • 1 cup All-purpose Flour
  • 1 cup Whole Wheat Flour
  • 1 tsp Baking soda
  • 1/2 tsp Salt
  • 1 cup Semi-sweet or Dark Chocolate Chips
  • 1 cup Toffee bits
  • 1 cup Chopped Walnuts

Preparation

  1. Heat oven to 375°F.
  2. In a large bowl, beat softened butter, coconut oil, brown sugar and granulated sugar until fluffy.
  3. Beat in eggs and vanilla until creamy.
  4. In a medium bowl, mix together flour, baking soda and salt.
  5. Gradually blend the dry ingredients into the wet ingredients.
  6. Stir in chocolate chips, toffee bits and chopped walnuts.
  7. Drop approximately 1 tablespoon of cookie dough onto ungreased cookie sheet.
  8. Make sure you have enough space in between the cookie dough because it will spread.
  9. Bake 10 to 12 minutes until golden brown.

Notes

Note #1: If you’re planning ahead (and if you remember), take the butter out of the refrigerator the night before so that the butter is at room temperature when baking. For best results, eggs should be room temperature too.

Note #2: If you want to make a larger batch to freeze, scoop the dough out into little balls and place them onto a cookie tray. Freeze the dough balls until they are hard. Then put them into freezer bags. When you are ready to eat them, place them on the cookie tray to bake. If you bake them frozen, cook them a little longer. If you defrost them to room temperature, bake them like you would normally would.

https://www.memorabledishes.com/chocolate-chips-toffee-bits-and-walnut-cookies/

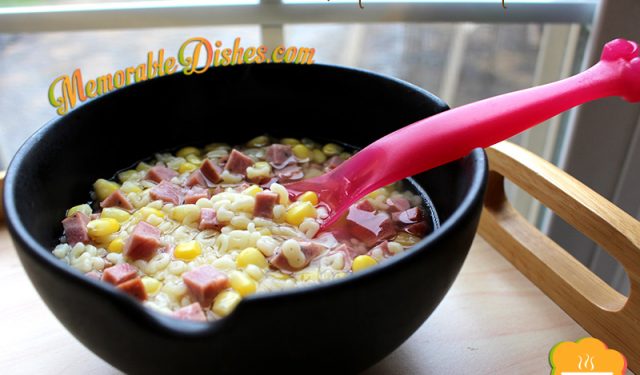
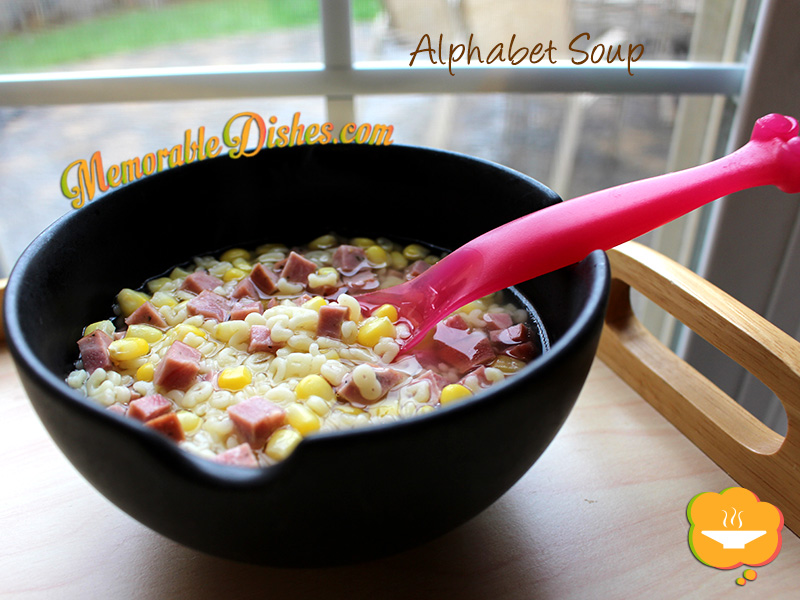
Alphabet Soup

Alphabet Soup

This Memorable Dish was requested by my second son because he was sick this past week. It was definitely a sick soup week for all. When one person in the family gets sick, at least two out of the five (but usually more) will also get sick. Luckily (or maybe unluckily) I never get sick, which means I am the one taking care of the sickies. Growing up Chinese, when we get sick, we eat congee such as my Century Egg and Pork Congee. We also avoid certain foods. For example, when we get a cough, we never eat oranges or drink cold drinks. We also make special drinks or soups to nourish ourselves when we’re sick. So on top of making the specially requested alphabet soup, I have also been making drinks and soups using Chinese herbs. But we’ll save special nourishing Chinese soups for another post. Now back to alphabet soup…

I love that the boys request certain foods depending on what mood they are in. They have equated soupy noodles as foods that they like to eat when they are sick. My second son requests special foods quite often. He has been requesting Spaghetti and Meatballs and macaroni and cheese and even offered to help me cook them because he loves these dishes so much. I love to get reminders on what to make from time to time. With busy weekdays, I often make my usual go-to dishes (some kind of meat/fish with rice and veggies). It’s nice to hear special requests because that means they enjoy the food I make for them 🙂 .

When I told the boys that I’m making Alphabet Soup, they all cheered. Sickies and non-sickies alike enjoy this Memorable Dish. Even though you could make this soup with any shaped pasta, using the alphabet pasta was extra special to them. They always ask for seconds for this simple and quick dish. I don’t know why I don’t make it more often because this dish really makes them so happy! Then again, if I make it often, it might not be so special afterall 😉 .Alphabet Soup

Alphabet Soup

Prep Time: 10 minutes

Cook Time: 10 minutes

Total Time: 20 minutes

Serving Size: 1

Ingredients

  • 1/2 cup of cooked alphabet pasta
  • 1/2 cup diced Ham (or whatever leftover meats you have on hand, I’m using turkey Kolbassa this time)
  • 1/2 cup frozen Corn (defrosted)
  • 2 cups Chicken Broth (Homemade or your favourite store-bought brand)
  • Splash of Vegetable Oil
  • Salt and White Pepper to taste

Preparation

  1. Prepare alphabet pasta according to package instructions.
  2. Drain pasta in colander, add vegetable oil and mix to prevent from sticking.
  3. Bring the chicken broth to a boil and add pasta, ham, and corn.
  4. Once the broth boils again, it’s ready to serve.
https://www.memorabledishes.com/alphabet-soup/

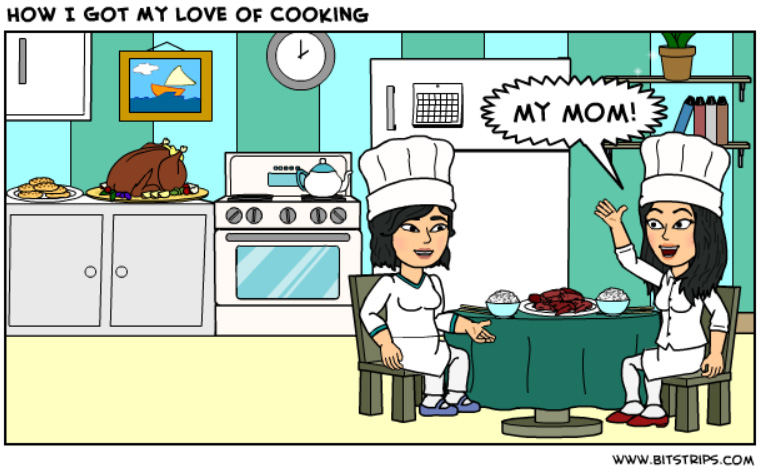
How I Got My Love of Cooking – My Mom

My mom is a great cook and I have to thank her for passing her love of cooking to me. She always let me help her in the kitchen – washing vegetables, rice and cutting small things. She never told me to get out of her way when she was trying to cook. Nor did she pressure me to learn to cook because I was a girl and needed to learn that sort of thing. She just let me observe and absorb. Although she wasn’t too crazy about my non-stop questioning, she never made me leave the kitchen. I was always a very curious child asking question after question. There is actually a Cantonese phrase for that which roughly translates to “breaking a sand bin with non-stop questions”. I know it sounds a bit weird in English, it makes more sense in Cantonese and it even has a ring to it.

I remember learning to cook by watching my mom, asking questions and her letting me help. I learned how to gut a fish and clean squids at quite a young age. Even today, one of my favourite things to do is cleaning squids. Yes I know it sounds gross but it’s somehow very therapeutic to me.

I am lucky to have a mother who is very adventurous in the food realm. She often experiments with different things she’s seen or read. I have to say because of my mom’s love and adventure for food, my brothers and I love to eat and are always in search of new culinary delights! I think my kiddies already possess a bit of food obsession like my brothers and I. Practically every day the boys ask, “What are we eating for dinner?” My baby girl makes “ummm” noises when she eats something she likes and actually requests specific foods. I am hoping to pass on the love of food to my children the same way my mom passed it on to me 🙂 .How I Got My Love of Cooking - My Mom

Greek Potatoes

Greek Potatoes

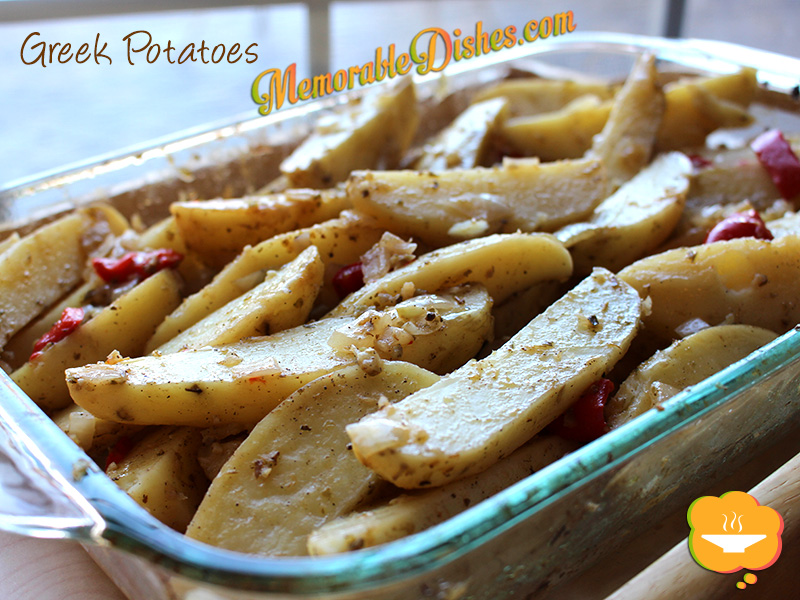
This past Sunday was Greek Orthodox Easter and it’s the perfect time to pay tribute to this Memorable Dish. Growing up in an Asian household, our staple carb is obviously rice. We ALWAYS have rice for dinner at my parents’ house. Noodles are reserved for lunches and possibly breakfast. So eating bread or potatoes as a carb just doesn’t feel right. However, I absolutely love these Greek Potatoes!

I am always afraid to replicate simple traditional recipes with a few ingredients. Even though this Memorable Dish is simple, it’s the magic touch of experience and love that goes into the dish that could make or break it. Like making pasta, even though it’s only semolina flour, egg, salt and water, you need lots of experience to turn those ingredients into delicious pasta with the right chewiness and taste.

I got this recipe from my husband’s aunt. We went over to their house and when she served these potatoes I couldn’t believe how great they tasted. Such a simple dish but so flavourful! I hope I replicate it as it’s intended to be. But I find it not quite the same as when we had it at my husband’s aunt’s place. It must’ve been the magic touch I was talking about 😉 .

Greek Potatoes

Greek Potatoes

Greek Potatoes

Prep Time: 30 minutes

Cook Time: 1 hour

Total Time: 1 hour, 30 minutes

Ingredients

  • 10 medium Potatoes, peeled, cut into quarters lengthwise
  • 1 Onion, finely diced
  • 1 Red or Green Pepper, finely diced
  • 2 cloves Garlic, minced
  • 1 Lemon, squeezed juice
  • 1/4 cup Olive Oil
  • 2 tsp Oregano
  • 2 tsp Salt
  • 1 tsp Black Pepper

Preparation

  1. Preheat oven to 350°F.
  2. In a large bowl, mix all the ingredients well with the potatoes.
  3. Place the seasoned potatoes in a large roasting dish.
  4. Bake covered with foil for 45 minutes to 1 hour or until tender. Leave in oven for 15 minutes.

Notes

Note #1: You can also use 1/4 cup of store bought bottled lemon juice.

Note #2: The original recipe uses 1 tbsp of oregano. I find it a bit too strong for our family’s liking. So adjust accordingly.

https://www.memorabledishes.com/greek-potatoes/

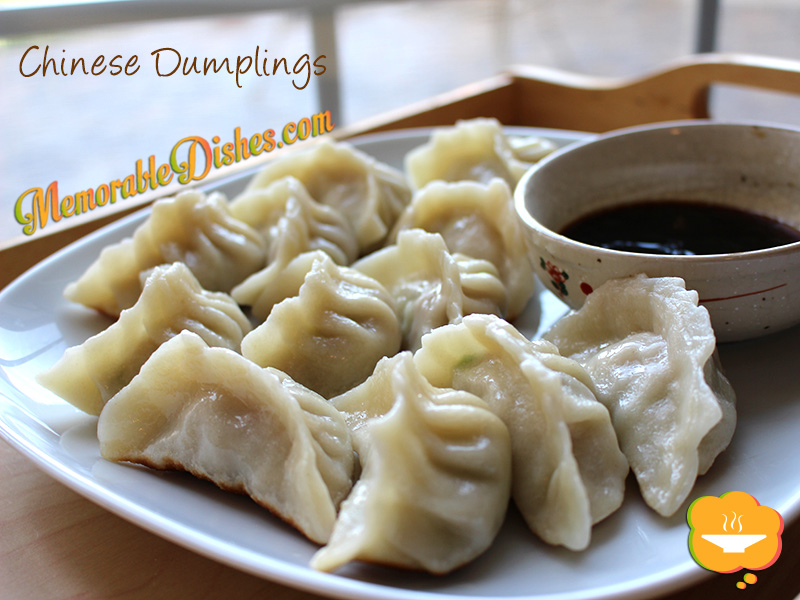
Chinese Dumplings

Chinese Dumplings

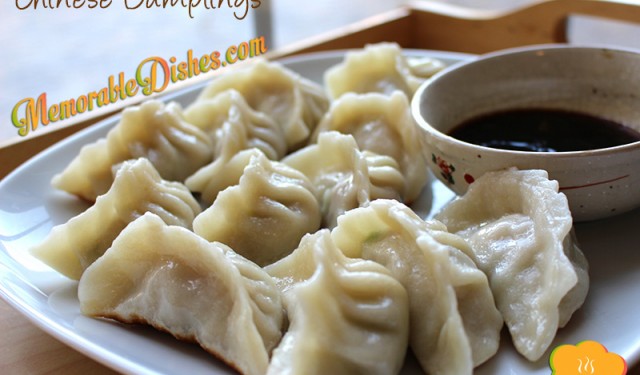
As a child I remember going to my maternal grandmother’s house on Sundays to wrap Chinese dumplings. As southern Chinese people, we don’t usually eat a lot of dumplings and are not very skillful in making the dough from scratch. So I can’t quite understand why we make dumplings on a fairly regular basis. My mother says it’s because my maternal grandfather’s friend (who we call great uncle) is an expert dumpling maker who used to own a dumpling shop. What a treat for me as a child! To witness my great uncle transforming flour and water into dough and then into dumpling wrappers was like magic.

Northern Chinese are known for their expertise in dumpling making. As southerners, we are not, hence we recruit other family members for the task to make the process go faster. Plus, it’s a great social event and gives us a chance to talk and bond. It’s like spending quality time and making something delicious to eat at once—a two for one deal!

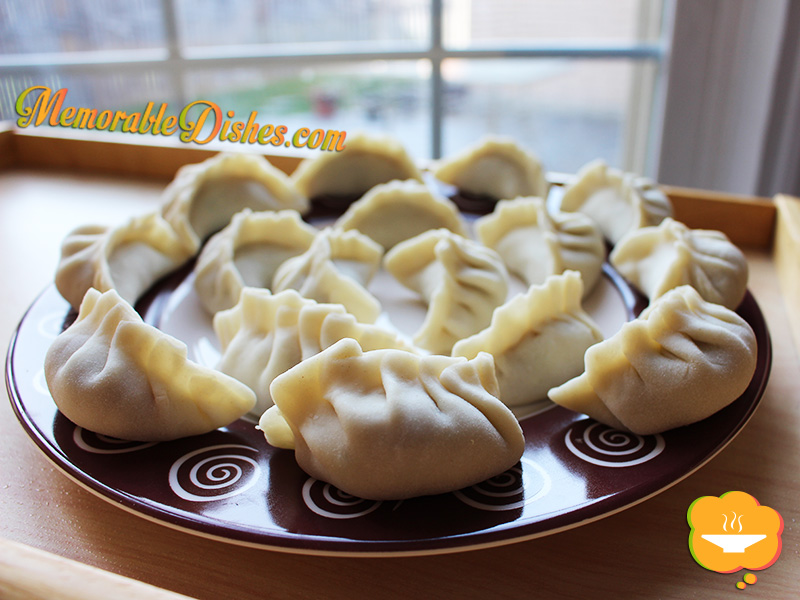
While I was making these dumplings, my boys were eager to help. (I think they just wanted to play with the dough 😉 .) I told them they could help next time. My mother and I were making very “slow progress”, as quoted by my second son, and any interference would make the process even slower. We are not skillful dumpling makers but I must say I am looking forward to making this Memorable Dish again soon. The more I make it, the better I will become and in no time I will be as fast as the dumpling makers I see at the Chinese dumpling shops! (Yeah right! But I can’t wait to make it again soon. I’ll see how long the boys will last and see if they will actually finish making the dumplings from start to finish 🙂 .)

Chinese Dumplings

Chinese Dumplings

Chinese Dumplings

36 dumplings

Ingredients

  • Dumpling Dough
  • 2 cups All Purpose Flour
  • 1 cup Boiling Water
  • Filling
  • 2 cups Napa Cabbage, julienne
  • 3 tsp Salt (2 tsp for cabbage and 1 for pork)
  • 1 pound Lean Ground Pork
  • 1/4 cup Green Onions, thinly sliced
  • 1 tbsp grated Ginger
  • 1 tbsp minced Garlic
  • 1 tbsp Chinese Cooking Wine
  • 1 tsp Cornstarch
  • 1 tsp Sesame Oil
  • 1/8 tsp White Pepper
  • Dipping Sauce
  • 2 tbsp Soy Sauce
  • 2 tbsp Vinegar
  • 1 tsp Sesame Oil
  • Water for boiling dumplings
  • 1 1/2 tbsp Vegetable Oil

Preparation

  1. In a medium bowl, mix 2 teaspoons of salt into the napa cabbage. Set aside for 5 minutes and squeeze out the excess moisture with a paper towel.
  2. In a large bowl, mix the napa cabbage, pork, green onions, ginger, garlic, wine, cornstarch, sesame oil, white pepper and the remaining 1 teaspoon salt. Set aside.
  3. In a large bowl, mix the flour and 1 cup of boiling water together. Mix until a soft dough forms. Knead the dough on a lightly floured surface until smooth, about 5 minutes.
  4. Divide the dough in half and shape each into a roll approximately 12 inches long. Cut each roll into half inch slices.
  5. Roll 1 slice of dough into a 3-inch circle. The dough shouldn’t be too thin nor too thick.
  6. Place 1 tablespoon of pork mixture in the center of the circle.
  7. Lift up the edges of the circle and pinch into pleats to create a pouch. Pinch the top together. Repeat with the remaining slices of dough and filling.
  8. Heat a large pot with water. Once the water is boiled, put approximately 12 dumplings at a time to boil.
  9. Once the dumplings float to the top, boil for another 2 minutes. Drain and set aside.
  10. Heat a nonstick wok or skillet until very hot. Add 1/2 tablespoon vegetable oil
  11. Place 12 dumplings in a single layer in the wok and fry 1-2 minutes, or until the bottoms are golden brown.
  12. For the dipping sauce, mix the soy sauce, vinegar and 1 teaspoon of sesame oil in a small bowl. Serve with the dumplings.

Notes

Note #1: You can make and store extra dumplings by freezing them on a tray lined with parchment paper. Put them into bags after they’re frozen. You don’t need to defrost them when boiling. Just boil them a little longer since they are frozen.

Note #2: If you cannot enclose the dumplings by creating pleats mentioned above, just pinch the dumplings tightly closed so the filling doesn’t leak out.

https://www.memorabledishes.com/chinese-dumplings/

Chinese Dumplings - Raw

Chinese Dumplings (Raw) – You can see my amateur skill at pleating the dough 🙂

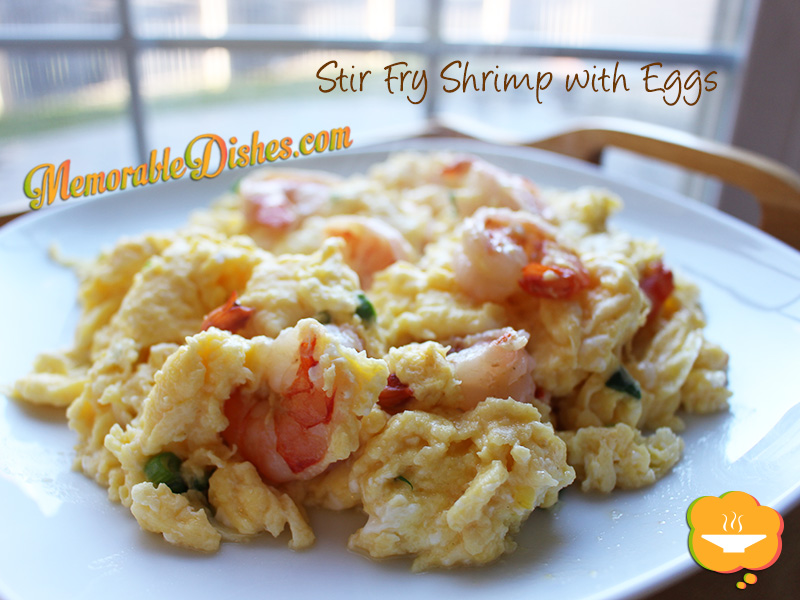
Stir Fry Shrimp with Eggs
(蝦仁炒蛋)

Stir Fry Shrimp with Eggs

When I was growing up my mother often made this Memorable Dish for us. Now as a mother myself, this simple dish has become a staple at my house as well. When I run out of time or don’t know what to make for dinner, I prepare Stir Fry Shrimp with Eggs. We always have eggs and we always have frozen shrimp in our freezer. Of course it’s tastier to use fresh shrimp but we don’t live near the ocean and frozen shrimp is the next best thing. It’s still mighty tasty though.

Eggs are considered to be a simple and humble dish. However, when you add shrimp it jazzes it up to something wonderful. This homestyle dish is so versatile and popular that it also appears on Chinese restaurant menus.

Requested by my boys who love shrimp and seafood, my mother has continued the tradition of making this Memorable Dish for her grandkids. Stir Fry Shrimp with Eggs make an appearance at my mom’s Sunday night dinners quite often 🙂

I know lots of people resort to eggs for an easy to make dinner. Add this to your repertoire and give this quick but yummy Memorable Dish a try!
Stir Fry Shrimp with Eggs

Stir Fry Shrimp with Eggs
(蝦仁炒蛋)

Prep Time: 10 minutes

Cook Time: 5 minutes

Total Time: 15 minutes

Serving Size: 2-4

Ingredients

  • 1/4 pound Shrimp, peeled and deveined
  • 1/4 tsp Sesame Oil
  • 1/8 tsp Kosher Salt
  • Dash of White Pepper
  • 8 large Eggs, beaten
  • 2 tbsp Water
  • 1/2 tsp Kosher Salt
  • 1 sliced Green Onion for garnish (optional)
  • 1 tbsp Vegetable Oil

Preparation

  1. In a bowl, mix sesame oil, salt and pepper with the shrimp.
  2. In a larger bowl, gently beat the eggs with 2 tbsp of water. Then add the 1/2 tsp of salt and mix.
  3. Heat 1 tbsp of oil in a non-stick wok or large frying pan.
  4. Stir-fry shrimp in the wok and cook until they just turn from translucent to slightly opaque.
  5. Then add the egg and gently mix and flip the egg using a spatula.
  6. Mix in the green onions (if using). Be sure not to brown the eggs.
  7. Cook until all the eggs are done but slightly runny and fluffy.
https://www.memorabledishes.com/stir-fry-shrimp-with-eggs/

Hawaiian Food Trip: Food-venirs and Other Foods

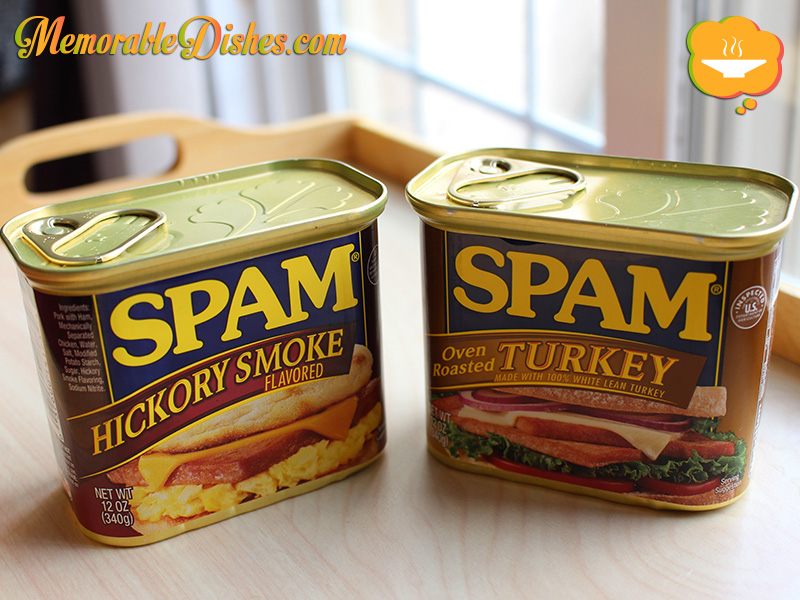
Cans of Spam (front)

In every country I’ve visited, I’ve been fascinated by the food. Even before I started writing this food blog, I’ve visited countries and brought food home (items that are allowed 🙂 .) as souvenirs.

I believe Hawaii is the land of Spam. I’ve never seen so many flavours and varieties anywhere I’ve been to. In my Hawaiian Food Trip: Aloha!, I posted a photo of the “Spam Wall” from the grocery store. I wanted to buy every single flavour to taste them but alas, I couldn’t. It would’ve cost more for the overweight baggage fees to bring cans of Spam back to Canada. So I only got one Turkey and one Hickory to try out. It was a hard decision to make. Now looking at the photo, I should’ve gotten the Teriyaki one too! Darn it! I guess I’ll have to go back to Hawaii again soon 😉

Cans of Spam (front)

Cans of Spam (front)

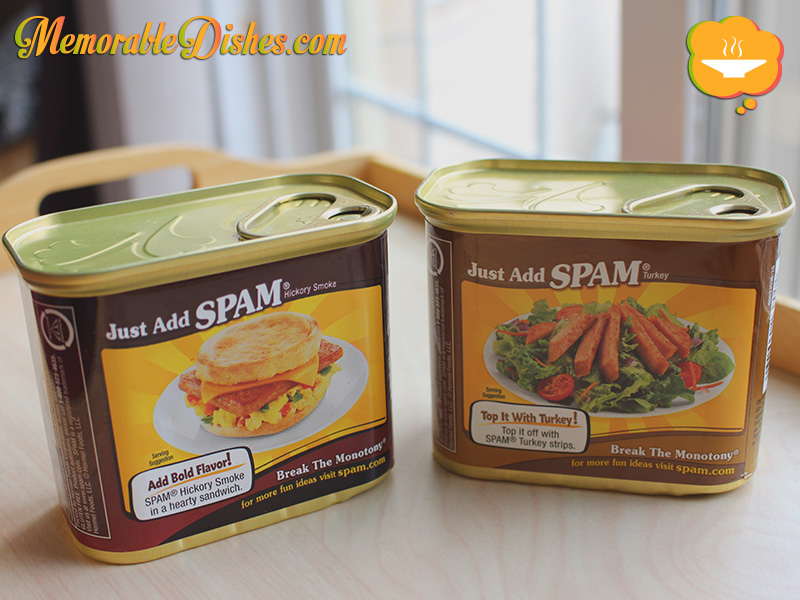
Cans of Spam (back)

Cans of Spam (back) – Love the recipe ideas!

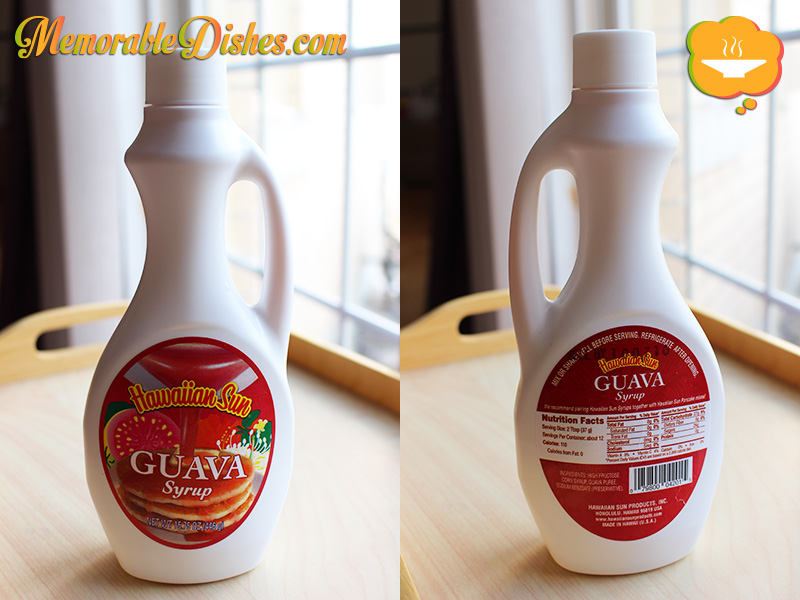
It was so cool to see the different flavours of syrup being sold at the grocery store. Out of all the tropical flavoured syrups that were sold, I decided to buy the guava syrup. I love guava! Again, I was tempted to buy all the other flavours as well—coconut and lilikoi (passion fruit) syrup but didn’t due to the luggage weight restriction.

Guava Syrup

Guava Syrup

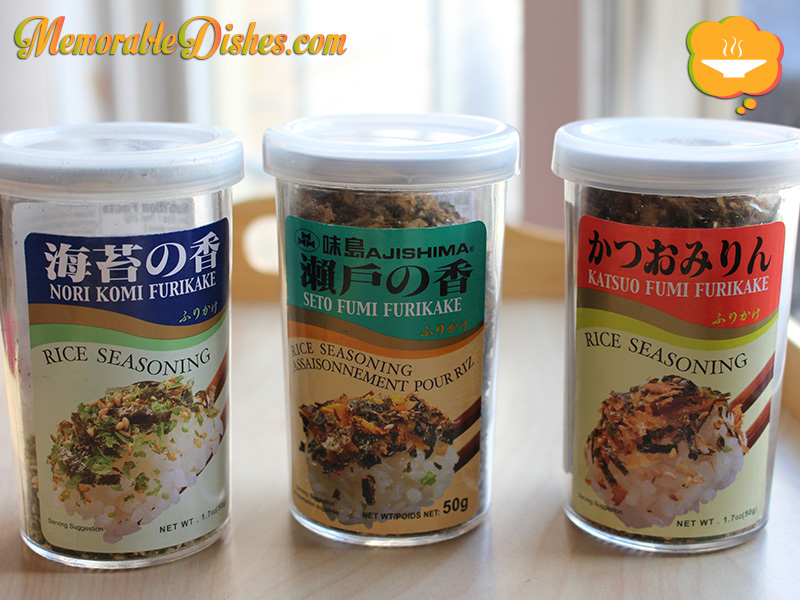
Furikake—bought one bottle, ate it there and brought the rest home. I know we can get it from Asian grocery stores here but I never thought of buying it until eating it in Hawaii. (I actually bought two extra bottles when I got back home to test out other flavours 😛 .) Now, I’m obsessed with these rice seasonings! My plain white rice now yearns for a sprinkle of furikake to make it more exciting! Plain rice will never be the same again!

Furikake

Furikake

McDonald’s

Every time we visit different countries, we have to visit a McDonald’s. It’s funny that when I’m at home, I don’t even crave for McDonald’s. But when I’m abroad I think about it more. Maybe it’s because we’re out all the time and McDonald’s is everywhere. I love discovering specialty items that are available only at the local McDonald’s at a particular place or country.

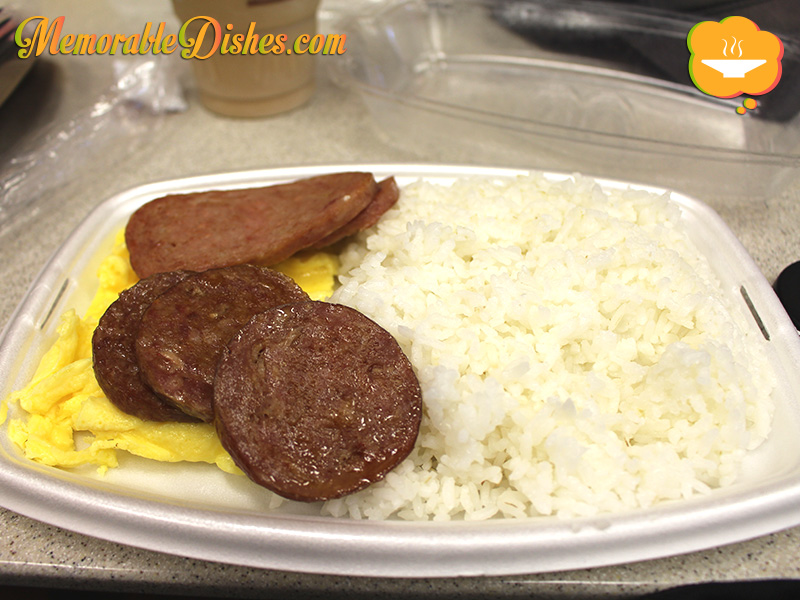
Local Deluxe Breakfast – Eggs, Portuguese Sausage, Spam, of course, and Rice. Even when I had McDonald’s in Hong Kong and China, they didn’t serve rice for breakfast!

McDonald's Local Hawaiian Deluxe Breakfast

McDonald’s Local Hawaiian Deluxe Breakfast

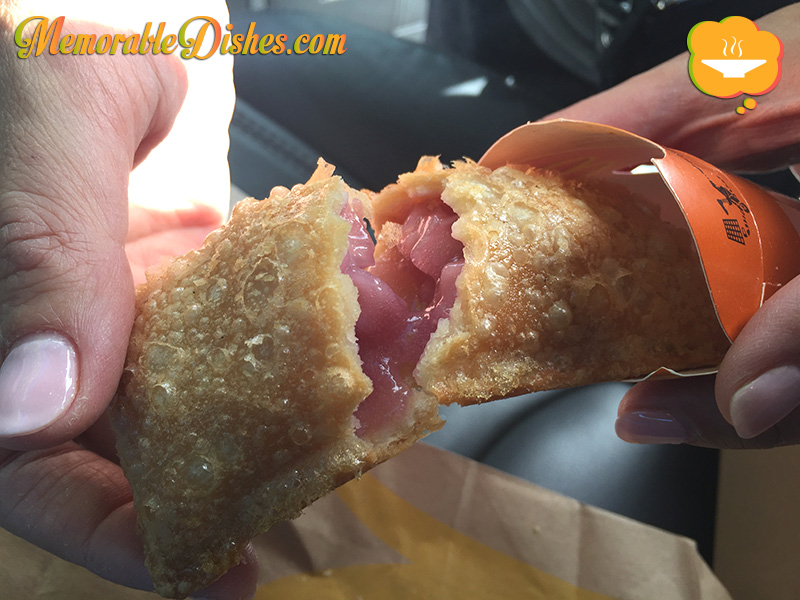
Taro Pie – Your typical McDonald’s pie but with taro inside. Very interesting and delicious!

McDonald's Taro Pie

McDonald’s Taro Pie

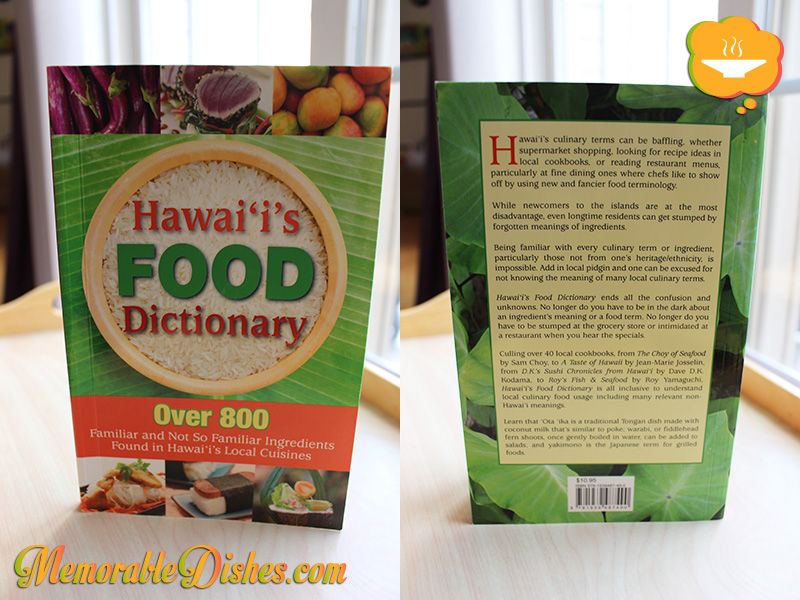
My oldest son was the one who saw the Hawaiian Food Dictionary at the ABC store. He is so sweet and knows how much I love food and cooking. So he insisted that I buy the book for myself 🙂 . These ABC stores are everywhere. Don’t forget to save the receipts! You can claim prizes if you spend over $100 at any island on Hawaii.

Hawaii's Food Dictionary

Hawaii’s Food Dictionary

I would have bought more food items from Hawaii. But our luggage was full and it went over our 50 pound limit (I had to transfer some of my loot to my daughter’s portable crib bag 😛 )! Alas, this is the last post from my Hawaiian Food Trip. Our family had a really fun time exploring the islands and tasting all the Memorable Dishes. To quote the lady from the luau when the show was about to end, “Aloha is not a real goodbye because I know you will return…” Yes! I will return! Aloha for now!Aloha

Show Buttons
Hide Buttons