Author Archives: Winnie N

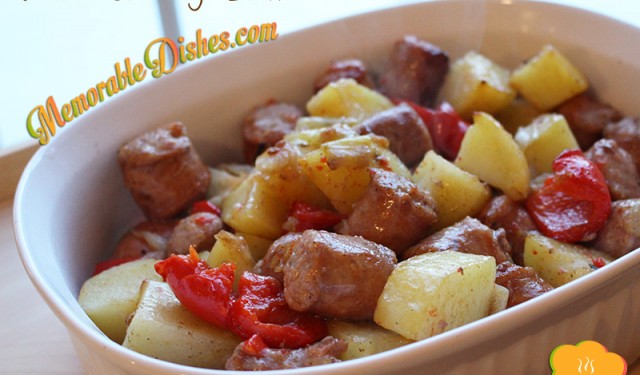
Potato Sausage Bake

Potato Sausage Bake

This is one of those dishes that I came up with on the fly because of what I had on hand. Often I make dishes from things I find in the fridge and not with the intention of making anything great. More often than not, my husband would say, “This is so good! Remember it for next time!” I tell him it’s nothing special and I’m sure I’ll remember it next time. I also like to challenge myself to come up with recipes in a pinch so I don’t write it down for that very purpose! 😛

One of the things I learned from one of my cooking class teachers about baking food (not baking sweets) is you can bake at a higher temperature if you’re short on time. One of the students asked the chef how long we should bake a dish for. The chef answered, “it depends on how much time you have. If you have more time, you can use the standard 350 degrees and if you have less time, put the temperature higher to speed up the process. Just watch the oven”. I never thought of that. When I read a recipe for baking food, I always follow the temperature precisely. When I cook on the stove, I adjust the temperature throughout to speed up the process. So it makes sense that you can do it for baking food as well. It is great advice from my teacher and I hear her voice assisting me every time I bake something savoury.

This experimental Memorable Dish is a quick one-dish dinner that could be made fairly quickly. It’s perfect for a weeknight dinner. I made this dish at 350 degrees for an hour the first time and this time, I baked it at 400 degrees for a shorter time. I kept an eye on it and it turned out great both times. I hope you try to experiment making different dishes with whatever food you have on hand. Please share and let me know how your experimental dish turns out 🙂
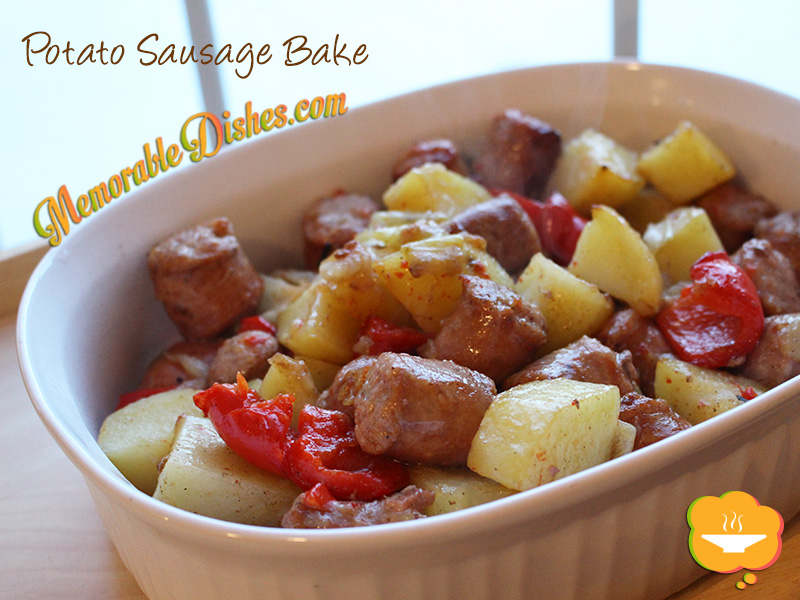
Potato Sausage Bake

Potato Sausage Bake

Prep Time: 15 minutes

Cook Time: 45 minutes

Total Time: 1 hour

Serving Size: 4

Ingredients

  • 3 medium Potatoes, large cubes
  • 1 medium Onion, large dice
  • 1 Red Pepper, large
  • 1/2 tsp Salt
  • 1/4 tsp Black Pepper
  • 1 tbsp Olive Oil
  • 4 pieces of your favourite Sausages, cut into 1-inch pieces

Preparation

  1. Preheat oven to 400°F
  2. Place and mix all the vegetables, salt, pepper and oil in a large baking dish.
  3. Put the cut up sausages with the vegetables and mix.
  4. Bake for 30-45 minutes until slightly brown. Mix the sausages and vegetables halfway.
  5. Depending on how big you cut your vegetables and sausages, it can take longer or shorter to bake.
https://www.memorabledishes.com/potato-sausage-bake/

Carrot Cake

Carrot Cake

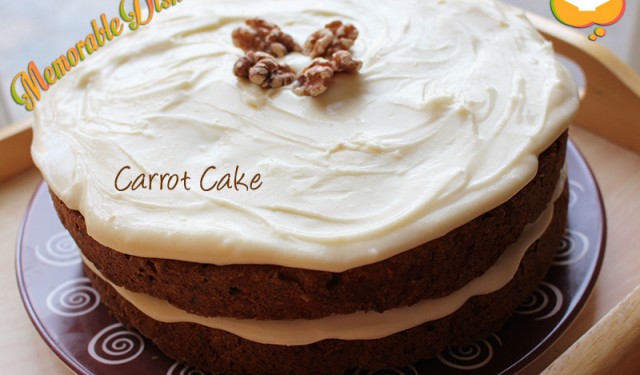
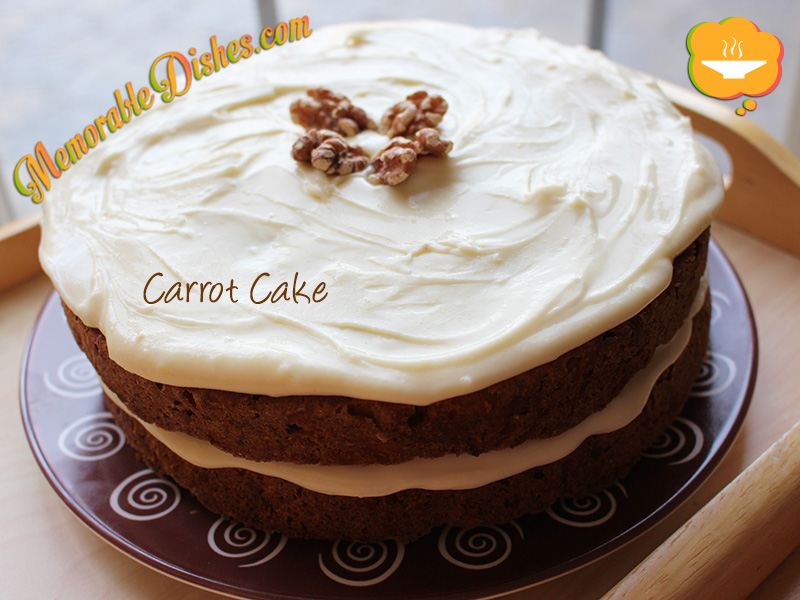
Carrot cake is one of my husband’s favourite Memorable Treats. He always wants to eat or make carrot cake. He got this particular recipe from a lady he used to work with. Yes, my husband likes to chat it up with the ladies for sweet treat recipes 😉

He doesn’t cook very much but he has a sweet tooth so he likes to bake whenever he can. I remember the first time I witnessed him preparing to bake his carrot cake. He bought all the ingredients and laid everything on the kitchen counter looking like a serious baker. I didn’t want to interfere and left him to his own devices. After awhile, I wondered why he took so long to bake the cake. The ingredients and instructions are fairly straightforward. So I peeked in to see what he was up to. Little did I know that he was cracking shells for fresh walnuts! When I saw him cracking walnut shells, I thought to myself, he must’ve really cared for freshness. Later I learned that he didn’t know you could buy shelled walnuts from a pack.

This carrot cake recipe has become my go to recipe. The ingredients are straightforward and the cake always turns out yummy! Now that my husband has become a veteran at carrot cake baking, he uses packaged walnuts. Maybe I shouldn’t have said anything and maybe he’d continue to crack fresh walnuts for the carrot cake for extra freshness 😉Carrot Cake

Carrot Cake

Prep Time: 30 minutes

Cook Time: 1 hour

Total Time: 1 hour, 30 minutes

1 Cake

Ingredients

  • 1 cup Butter, softened
  • 1 cup Granulated Sugar
  • 1 cup Packed Brown Sugar
  • 4 Eggs
  • 2 cups All-Purpose Flour
  • 2 tsp Baking Powder
  • 1 tsp Salt
  • 1/2 tsp Baking Soda
  • 2 tsp Cinnamon
  • 1 tsp Nutmeg
  • 3 cups Carrots, grated
  • 1/2 cups Raisins (optional)
  • 1/2 cups Pecans or Walnuts, chopped (optional)
  • Frosting
  • 1 package of Cream Cheese (250g), softened
  • 3 cups Icing Sugar
  • 1 tsp Vanilla

Preparation

  1. Preheat the oven to 350 degrees F.
  2. Cream butter, white and brown sugars and eggs in large bowl at medium speed with electric mixer until light and creamy.
  3. Combine flour, baking powder, salt, baking soda and spices in separate bowl.
  4. Add the flour mixture to the creamed mixture and mix on low speed just until blended. Stir in remaining ingredients. Mix well.
  5. Spread in cake pan.
  6. Bake for 50 to 60 minutes.
  7. Check if the cake is done by inserting toothpick in the middle of the cake. When it comes out clean, it’s done.
  8. For Frosting
  9. Beat cream cheese, icing sugar and vanilla until smooth.
  10. Frost the cake once it’s cooled.

Notes

Note #1: I divided the batter into 2 shallow cake pans and cook for lesser time. If you’re using shallow cake pans, cook for less time and check

Note #2: I used less icing sugar than the recipe called for. So add enough to your taste.

https://www.memorabledishes.com/carrot-cake/

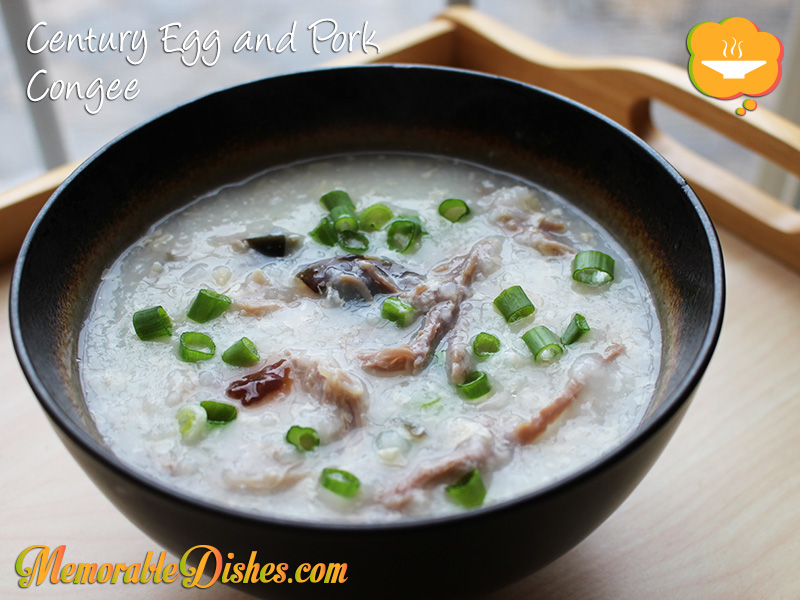
Century Egg and Pork Congee
(皮蛋瘦肉粥)

Century Egg and Pork Congee

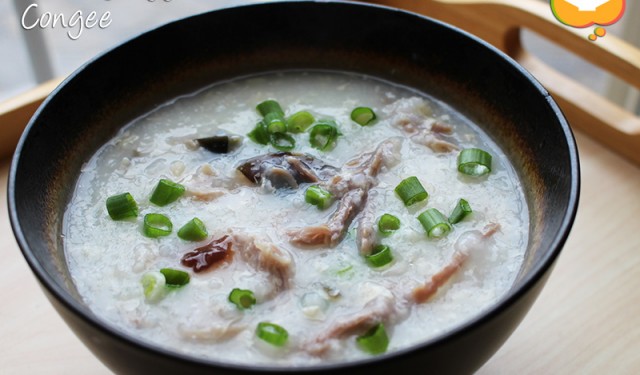
Congee is a comfort food that many Asians grew up eating. It’s a rice porridge that is typically served for breakfast or lunch if you accompany it with other heartier foods such as noodles. You’ll get full pretty fast if you’re eating congee but you’ll get hungry pretty soon too because it’s liquidy. It’s also a great meal to eat when you’re feeling sick because it’s warm and nourishing. Congee is like North American’s chicken soup.

I’m sure a lot of Chinese children grew up eating this Memorable Dish whether they grew up in Asia, North America or any other part of the world. If they are able to buy century eggs, their moms or grandmothers would’ve made them this congee when they were children.

My mother uses a couple of Chinese ingredients that may not be common to some. So if you can’t find them or don’t want to use them, it’s OK. One ingredient is conpoy (dried scallop) because it gives the congee a better taste. You won’t find good quality conpoy at your Chinese grocery store. We usually buy it from a Chinese dried seafood shop (海味店). She also mixes dried bean curd sheet (腐竹) with the rice before boiling it.

At first, my boys didn’t seem to like congee very much. Every time we had it at my mom’s house, they would only eat a few spoonfuls. They ate more of the side dishes of noodles and Chinese cruller. For them, congee equates Chinese cruller; congee is blasphemous without it. As time goes by, they started getting second bowls of congee! I wonder if it’s because of the crunchy Chinese cruller they love dipping the congee into or their taste suddenly evolved into a higher level of adult sophistication.

I’m sure this Memorable Dish brings back childhood memories for a lot of Chinese families. I remember my grandmother making it for us when we were kids and now my mother makes it for us and my kids. When my kids grow up I will teach them how to make this dish for their family with the hopes that they will continue the tradition of congee cooking for their loved ones.Century Egg and Pork Congee

Century Egg and Pork Congee
(皮蛋瘦肉粥)

Prep Time: 15 minutes

Cook Time: 1 hour

Total Time: 1 hour, 15 minutes

Serving Size: 6-8

Ingredients

  • 1 pound Lean Pork, cut into 2 big pieces
  • 2 tsp Salt
  • 1 Century Egg (cut in half)
  • 1 cup Rice
  • 2 slices of Ginger
  • 16 cups Water
  • 3 pieces of Conpoy (Dried Scallop) (optional)
  • 1/2 cup Dried Bean Curd Sheet, crushed up (optional)
  • 1 sliced Green Onion for garnish
  • White Pepper & Salt or Soy Sauce to taste

Preparation

  1. The night before, coat pork pieces with salt and marinate in the fridge.
  2. If using conpoy, soak them in water to reconstitute it.
  3. On the day of making the congee, rinse rice until the water is almost clear.
  4. In a large bowl, mix 1/2 century egg, rice and dried bean curd sheet (if using) together. Set aside.
  5. After conpoy has been softened, break pieces up with a fork or by hand.
  6. In a large pot, put 12 cups of water, pork pieces, ginger slices, and conpoy (if using). Bring everything to a boil.
  7. Once it’s boiled, skim off scum and boil for another 15 minutes.
  8. Put rice mixture into the boiling liquid and once it’s boiled, turn down to medium to medium high heat.
  9. The liquid should be in a rolling boil state.
  10. Keep the pot lid slightly open so the congee won’t boil over,
  11. Cook congee for 15 minutes and add the additional 4 cups of water.
  12. Cook congee for approximately 45 minutes more.
  13. Check and stir the pot periodically to make sure the rice doesn’t stick to the bottom as it thickens.
  14. Once you boil it to the consistency of your liking, the rice should be broken down by now. Turn off heat.
  15. Take the big pork pieces out of the pot and shred it with a fork or by hand.
  16. Cut the other half of the century egg into small pieces.
  17. Put the shredded pork and century egg back into the pot of congee and mix.
  18. Serve in bowls and garnish with green onions, white pepper and salt or soy sauce to taste.

Notes

If you like thicker congee, cook it longer. If you like it thinner, add a bit more water. Make sure you bring it back to a boil if using cold water.

https://www.memorabledishes.com/century-egg-and-pork-congee/

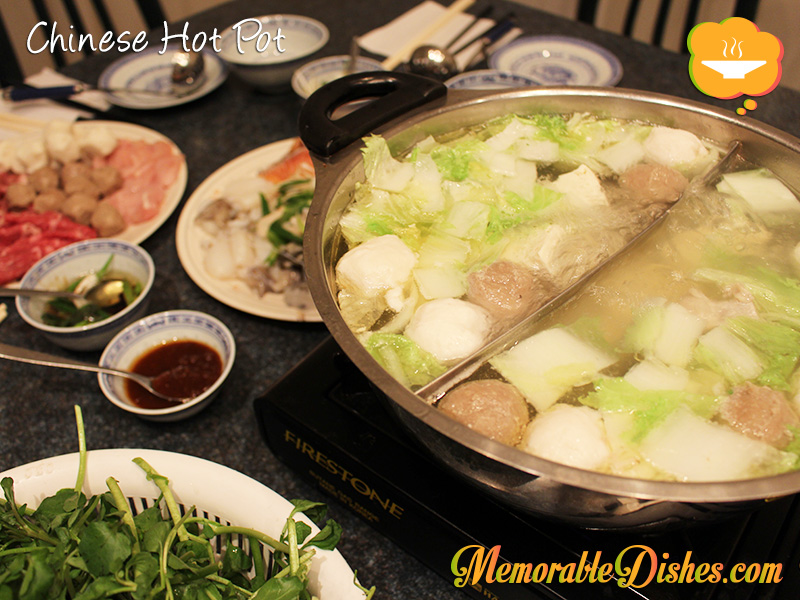
Chinese Hot Pot

Chinese Hot Pot

Hot pot is something that I crave during the cold winter months. The boys also look forward to eating it every winter. Chinese hot pot consists of using broth to cook slices of meats, seafood, dumplings and vegetables in a boiling pot of broth. You set this up on the dining table and everyone cooks their own food. It’s like a fondue except you cook with boiling broth.

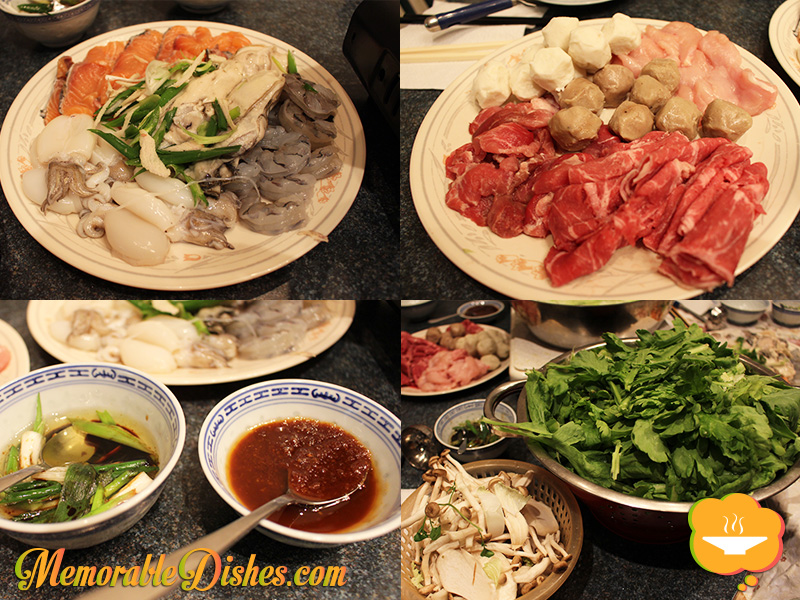
This is definitely a Memorable Dish for our whole family because we all look forward to it during the winter months. Thinking about eating hot pot always makes me hungry. The kids love picking their own pieces of meat and dumping them into the bubbling broth. They especially love the baby cuttlefish. My second son always forgets that the meat is piping hot after it’s just done cooking and usually ends up burning his tongue.

I remember my maternal grandmother used to have hot pot practically every evening during the winter months! In Hong Kong, there’s no central heating because it doesn’t snow and doesn’t get super cold. However, you need to wear thicker clothes inside the house or you might have a space heater if you’re really cold. To keep warm, my grandparents used to have hot pot in this mini pot that just serves one or two people.

We like using plain broth because of the kids. But you can spice it up by making your own spicy broth. If you dare, you can make a mala sauce which consists of Sichuan peppercorns, chilies and various spices. The Sichuan peppercorns create a numbing effect on your tongue – people either love it or hate it. But for now, we’ll stick to our regular broth hot pot.Chinese Hot Pot

Chinese Hot Pot

Prep Time: 30 minutes

Total Time: 30 minutes

Serving Size: Slice about 1/2 pound of meat per person.

Ingredients

  • Slices of Chicken
  • Slices of Beef
  • Slices of Pork
  • Slices of Fish
  • Cuttlefish
  • Shrimp
  • Oysters
  • Tofu
  • Frozen Dumplings
  • Udon Noodles
  • Leafy Vegetables (Spinach, Bak Choy, etc.)
  • Chicken Broth
  • For dipping sauces:
  • Scallions, julienned
  • Ginger, julienned
  • Vegetable Oil
  • Soy Sauce
  • Satay Sauce
  • Hot Sauce

Preparation

  1. Slice up all your meats if you’re not using frozen pre-sliced ones.
  2. For your dipping sauce, put your ginger and scallions in a bowl.
  3. Heat up the oil until it sizzles. You can check by putting a small piece of ginger in it.
  4. Once the oil is heated, pour the hot oil onto the ginger and scallions. Then pour in soy sauce.
  5. You can mix in satay sauce or use the satay sauce on the side.
  6. Set your butane burner on your dining table. (We also have an electric one.)
  7. Heat up your broth in a pot used for hot pot cooking on the stove.
  8. Once the broth is boiled, carefully transfer it onto your butane burner.
  9. Cook your meats in the broth and enjoy.
  10. You can make steamed rice to go with it if you want.
  11. As you cook, the broth will evaporate. Add boiling water to the pot so you’ll have enough liquid to cook the food.

Notes

Note #1: You can find butane burners and hot pot cooking pots at an Asian grocery store. The hot pot cooking pots are usually thinner and may have a divider in the middle so that you can split between a plain or spicy broth.

Note #2: You can purchase thin slices of meat in the frozen section at large Chinese grocery stores.

https://www.memorabledishes.com/chinese-hot-pot/

Chinese Hot Pot Ingredients

Winter Solstice Festival Dinner

Winter Solstice Festival Dinner

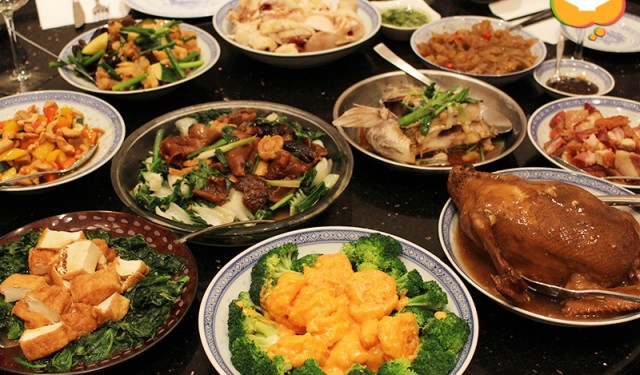
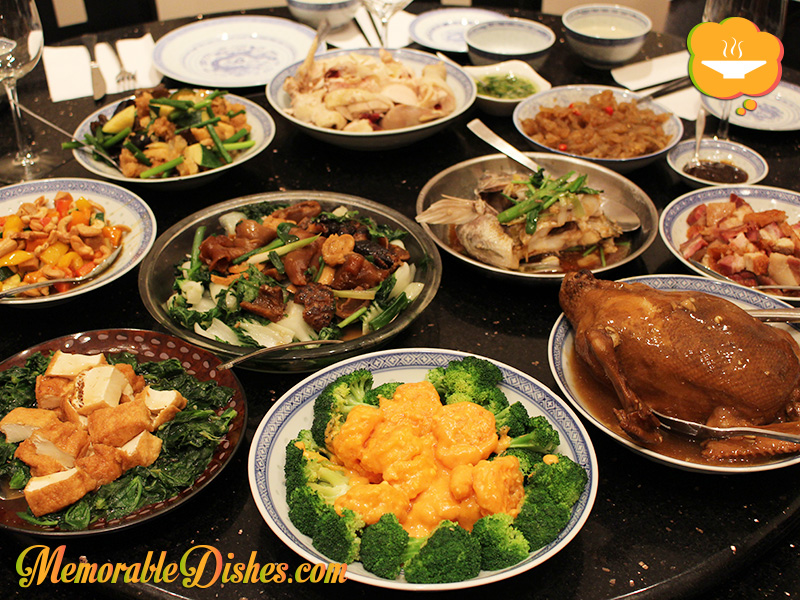
With all the hustle and bustle of Christmas preparation, I almost forgot about our Winter Solstice Festival or Dongzhi Festival dinner! It usually falls a few days before Christmas. When winter solstice falls on a weekday, we would have our dinner the weekend before the actual day. My mom makes a huge Chinese dinner with lots of different dishes. For these dinners, she makes special dishes that she normally doesn’t make for her usual Sunday dinners.

This year, we were also lucky to have my uncle make this special dish called Eight Treasure Duck. The duck is deboned and stuffed with eight “treasures” which consist of lotus seeds, chestnuts, red dates, dried shrimp, glutinous rice, salted duck egg, Chinese mushroom, and Chinese sausage. It’s braised until the meat is tender.

For dessert, we have tangyuan (湯圓) or balls of glutinous rice, which symbolize reunion. My paternal grandmother used to make tangyuan all the time. But my mother buys them from the grocery store since it’s time consuming to make them from scratch.

I look forward to eating these Memorable Dishes every time we have a special Chinese holiday to celebrate. Since we moved to North America, the smaller Chinese holidays and festivals might not be celebrated as prominently as we did in Hong Kong or China. But having these special dinners help us remember the Chinese festivals and special occasions. I am hoping to continue passing on these “eating” traditions to my children 😀img_WinterSolstice2015

Butter Cookies

Butter Cookies

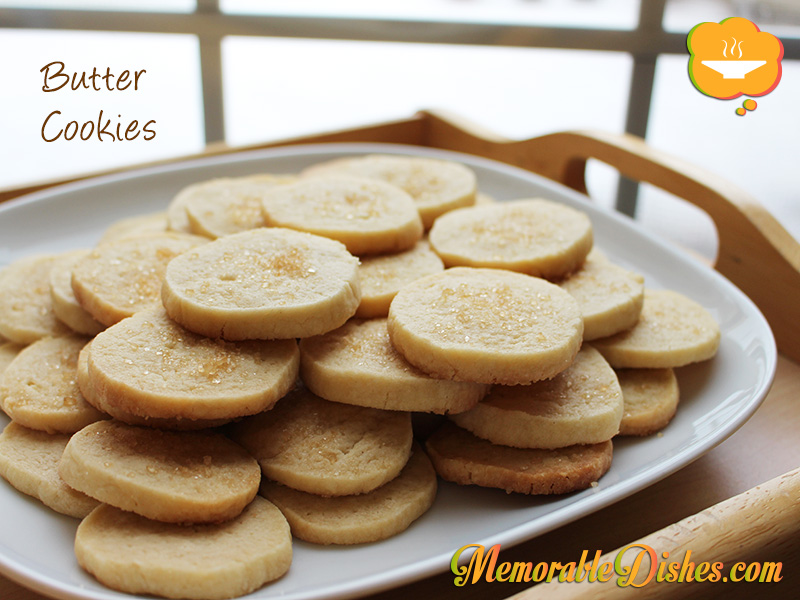
It’s almost Christmas time and if you haven’t done your Christmas baking yet, here’s a great butter cookies recipe. My friend originally found and shared this recipe with me and I have been using it since for my Christmas butter cookies. I love how easy it is to make and the results are always great!

I’ve been making this butter cookies recipe for years and everyone really enjoys them. Usually I roll the dough into a log, slice and bake them. I’ve also rolled them out and cut them into shapes and used icing to decorate them. Being not too keen on sweets, I use a half cup of sugar and use the whole egg instead of what the original recipe calls for. If you just use the egg yolk, the cookie turns out more shortbread-like, which is delicious too.

The kiddies always look forward to this Memorable Treat around Christmas time. I roll them out into a thinner roll and the cookies end up being smaller. The size is great for the kiddies’ hands. However, I end up eating more of them because they’re smaller 😉Butter Cookies

Butter Cookies

Prep Time: 20 minutes

Cook Time: 20 minutes

Total Time: 40 minutes

48 Cookies

Ingredients

  • 8 ounces unsalted Butter
  • 3/4 cup granulated Sugar
  • 1/4 tsp Salt
  • 1 1/2 tsp pure Vanilla Extract
  • 1 large Egg yolk
  • 2 cups all-purpose Flour

Preparation

  1. Beat the butter, sugar, salt and vanilla together until smooth and creamy.
  2. Mix in the egg yolk until well incorporated, scraping down the sides of the bowl at least once.
  3. Add the flour and mix just until incorporated.
  4. Scrape onto a lightly floured board and knead a few times, just until the dough smooths out.
  5. Turn onto a sheet of plastic wrap and roll into a log, wrap up and refrigerate for several hours or freeze.
  6. Before baking, preheat the oven to 325°F.
  7. Line your baking sheets with parchment.
  8. Slice the dough into slices about 1/8" thick and place them on the sheets about an inch apart (they won't be spreading very much, but they need air room around each cookie).
  9. Bake until JUST beginning to turn golden around the edges, about 16-18 minutes.
  10. Note: you can do many things with these cookies.
  11. You could roll the dough out and cut shapes.
  12. You could slice them even thinner and sandwich them with chocolate or jam or lemon curd.
  13. You could make them and then dip them half into chocolate.
  14. You could just make them and eat them, which is my favorite.
  15. Whatever you do, they will be delicious.

Notes

For best results, make sure butter and egg should be at room temperature.

Original recipe from: Food.com

https://www.memorabledishes.com/butter-cookies/

Coconut Cupcakes

Coconut Cupcakes

I absolutely adore these coconut cupcakes. After watching them on Ina Garten’s show, Barefoot Contessa, I HAD to make them. I’ve made them for my own parties and I’ve made them to bring over to my friends. Everyone absolutely loves these cupcakes! When I first saw them on Ina’s show, I couldn’t find the recipe online so I purchased her cookbook. But I’ve since found her recipe on the Food Network’s site. I love that the recipe makes so many cupcakes that you can always save a few for yourself. 😉

When I eat this Memorable Treat, I picture myself sitting at a Paris café, having a café au lait (I know the French drink this for breakfast but it’s my fantasy so I’m having it with my afternoon cupcake 🙂 .) and devouring this giant coconut cupcake in large bites. Then reality hits and one or all of my kids are nearby and I have to share my cupcake with them. The giant cupcake that I was supposed to have for myself diminishes into mere crumbs after each child takes a bite. They must have radar to sense that I’m eating something sweet and decadent.

These cupcakes are actually a great holiday treat! The creamy icing with shredded coconut reminds me of snow-capped houses. After baking them, I can’t wait for them to cool off. So I usually end up eating one without the icing. Yum!Coconut Cupcakes

Coconut Cupcakes

Prep Time: 1 hour

Cook Time: 35 minutes

Total Time: 1 hour, 35 minutes

18-20 Large Cupcakes

Ingredients

  • 3/4 pound (3 sticks) unsalted butter, room temperature
  • 2 cups sugar
  • 5 extra-large eggs at room temperature
  • 1 1/2 teaspoons pure vanilla extract
  • 1 1/2 teaspoons pure almond extract
  • 3 cups flour
  • 1 teaspoon baking powder
  • 1/2 teaspoon baking soda
  • 1/2 teaspoon kosher salt
  • 1 cup buttermilk
  • 14 ounces sweetened, shredded coconut
  • For cream cheese frosting:
  • 1 pound cream cheese at room temperature
  • 3/4 pound (3 sticks) unsalted butter, room temperature
  • 1 teaspoon pure vanilla extract
  • 1/2 teaspoon pure almond extract
  • 1 1/2 pounds confectioners' sugar, sifted

Preparation

  1. Preheat the oven to 325 degrees F.
  2. In the bowl of an electric mixer fitted with the paddle attachment, cream the butter and sugar on high speed until light and fluffy, about 5 minutes.
  3. With the mixer on low speed, add the eggs, 1 at a time, scraping down the bowl after each addition.
  4. Add the vanilla and almond extracts and mix well.
  5. In a separate bowl, sift together the flour, baking powder, baking soda, and salt.
  6. In 3 parts, alternately add the dry ingredients and the buttermilk to the batter, beginning and ending with the dry. Mix until just combined. Fold in 7 ounces of coconut.
  7. Line a muffin pan with paper liners. Fill each liner to the top with batter.
  8. Bake for 25 to 35 minutes, until the tops are brown and a toothpick comes out clean. Allow to cool in the pan for 15 minutes. Remove to a baking rack and cool completely.
  9. Meanwhile, make the frosting. In the bowl of an electric mixer fitted with the paddle attachment, on low speed, cream together the cream cheese, butter, and vanilla and almond extracts.
  10. Add the confectioners' sugar and mix until smooth.
  11. Frost with cream cheese frosting and sprinkle with the remaining coconut.

Notes

Note #1: I used unsweetened coconut because I find that everything else is sweet enough.

Note #2: You can divide the batter to make 24 regular size cupcakes.

Note #3: I also used less icing sugar than the recipe called for. So add enough to your taste.

Recipe courtesy of The Barefoot Contessa Cookbook, 1999 All Rights Reserved Read more at: Foodnetwork.com

https://www.memorabledishes.com/coconut-cupcakes/

Spaghetti and Meatballs

Spaghetti and Meatballs

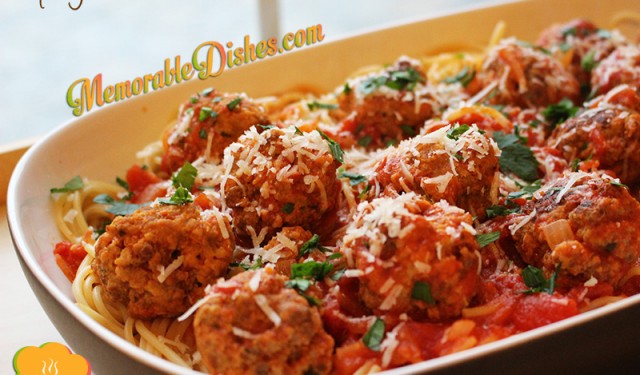
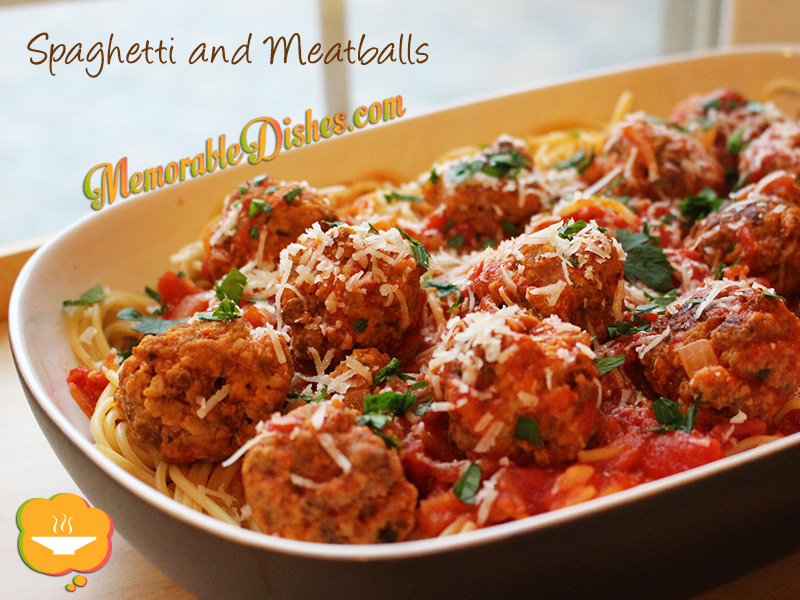
My second son has been hounding me to make spaghetti and meatballs. Everytime I said I was going to make them, I ended up making spaghetti and meat SAUCE instead. I know he loves the meatballs but he doesn’t know the time it entails to make them. Meat sauce is easy, fast, and I can make it without much planning. Even though he does help me crush the tomatoes, it doesn’t shave off that much time 😉 Making meatballs, at least good meatballs, takes time.

I’ve made tons of meatballs and followed dozens of recipes in the past. But I find Lidia Bastianich’s recipe easy to make and uses simple ingredients that produce juicy meatballs. I love watching Lidia Bastianich’s show on PBS or the Canadian equivalent of public television. It’s just so comforting watching her describe and cook her Italian dishes. When I search for “Lidia Bastianich meatballs”, lots of different recipes show up. The recipes are all slightly different but I found this one is the closest to the one I saw on her show.

Spaghetti and meatballs is a comforting dish that I wish I could make more often. It always brings a smile to my kids’ faces. When they heard that I was making spaghetti and meatballs, they got so excited and gave me big hugs and kisses. This Memorable Dish is a tribute to my Bubby. This dish definitely describes him to the core. Round (his round face) and comforting. 🙂Spaghetti and Meatballs

Spaghetti and Meatballs

Prep Time: 1 hour

Cook Time: 1 hour

Total Time: 2 hours

Serving Size: 6-8

Ingredients

  • For Meatballs:
  • 1 medium Carrot, coarsely chopped
  • 2 stalks Celery, coarsely chopped
  • 2 medium Onions, coarsely chopped
  • 1 pound ground Beef
  • 1 pound ground Pork
  • 1 pound ground Veal
  • 2 large Eggs, beaten
  • 1/2 cup Parsley, chopped
  • 2 cups Bread Crumbs
  • 1 tbsp Kosher Salt
  • For Sauce:
  • 1/4 cup extra virgin Olive Oil
  • 1 medium Onion, chopped (about 1 1/2 cups)
  • 2 tsp Kosher Salt, plus more as needed
  • 2 Bay Leaves
  • 1/2 tsp Peperoncino
  • 3 (28-ounce) cans San Marzano Plum Tomatoes, crushed by hands in large bowl
  • 1 pound Spaghetti

Preparation

  1. Preheat the oven to 425°F.
  2. In a food processor, combine the carrot, celery and onion. Pulse to make a fine-textured paste or pestata.
  3. Scrape the pestata into a large bowl and add the remaining meatball ingredients.
  4. Mix well with your hands to combine all of the ingredients.
  5. Roll into golf ball sized meatballs and place on baking sheets approximately 1/2 inch apart. You should fit approximately 24 meatballs on your baking tray. This recipe yields about 4 dozen (48) meatballs.
  6. Bake meatballs until browned all over, about 18 to 20 minutes. The meatballs do not need to be entirely cooked through because they will cook more in the sauce.
  7. While the meatballs are baking, begin the sauce.
  8. In a large pot, heat the olive oil over medium heat.
  9. Add the onion and sauté until softened about 5 minutes.
  10. Add 1 teaspoon of salt and peperoncino. Let the peperoncino toast for a minute.
  11. Add the crushed tomatoes. Slosh out the tomato cans and bowl with 4 cups of hot water and add to the pot.
  12. Add bay leaf and remaining teaspoon of salt.
  13. Bring sauce to a simmer while the meatballs finish baking, about 10 minutes more.
  14. When the meatballs have finished baking, gently add them to the sauce and return to a simmer.
  15. Simmer, shaking the pan periodically to move but not break the meatballs, until sauce is thick and flavourful, about 30 minutes.
  16. Add 1 pound of spaghetti to boiling salted water. When the pasta is al dente, drain with tongs and add directly to half of the sauce.
  17. Toss and serve immediately with some grated Grana Padano or Parmesan cheese.
  18. Top with meatballs and extra sauce to your taste.

Notes

Note #1: You could use two out of the three combination of meats. If you like, substitute ground turkey for one of the meats but be aware that the meatballs might be a little bit drier because it has less fat.

Note #2: The original recipe has 1 teaspoon of ground oregano in it. I omitted it so that I can use my extra meatballs for different recipes.

Note #3: After baking the meatballs, I freeze the extra ones to be used in other recipes.

https://www.memorabledishes.com/spaghetti-and-meatballs/

Fish Sticks and Cream of Chicken Soup

Fish Sticks & Cream of Chicken Soup

You would think fish sticks and cream of chicken soup were my childhood staples since I created a blog entry about them. On the contrary, these Memorable Dishes were special treats from my mom when she didn’t have time to make the multiple dishes that comprise every Chinese meal.

In Hong Kong, my mom worked full time and took care of my older brother and me at the time. Most people in Hong Kong do not own a car because it’s fairly expensive to maintain. Plus, the public transit system is amazing. Having said that, my mother still had to travel from one end of of the city to get to work and home by public transit. Everyday she would finish work, go to the market and buy fresh ingredients to cook us dinner. She did that EVERY evening. I don’t know how she did it because I can’t imagine anyone going to the market everyday on top of going to work full time. Not only did she cook us fresh meals every day, she cooked us several dishes including a soup. We always had fish, a meat dish, a vegetable dish, and steamed rice of course.

So every now and then when she was crunched for time, she would take shortcuts like every mom who tries to keep her sanity. When she didn’t have time to get fresh fish, she would bake us frozen fish sticks. I got super excited every time we got to eat this. I know it’s fried and frozen and not particularly healthy. But as a kid, we didn’t know that and it was such a special treat just to have fish sticks!

When she didn’t have enough time to make a soup, she would make a can of cream of chicken soup for us. Cream of mushroom soup either wasn’t available or not as popular as cream of chicken soup in Hong Kong at the time. Of course, I was also super excited about the cream of chicken soup too. My mom didn’t really whisk the soup until it was all smooth and creamy. So the soup would have pockets of creamy chunks which I liked drinking and smashing in my mouth.

This is to all moms out there – give yourself some slack! Don’t stress if you must make your kids frozen and processed foods from time to time. Even my full-time working mom who made dishes from scratch every evening took short cuts when she needed to 🙂Fish Sticks & Cream of Chicken Soup

Sweet & Sour Pork

Sweet & Sour Pork

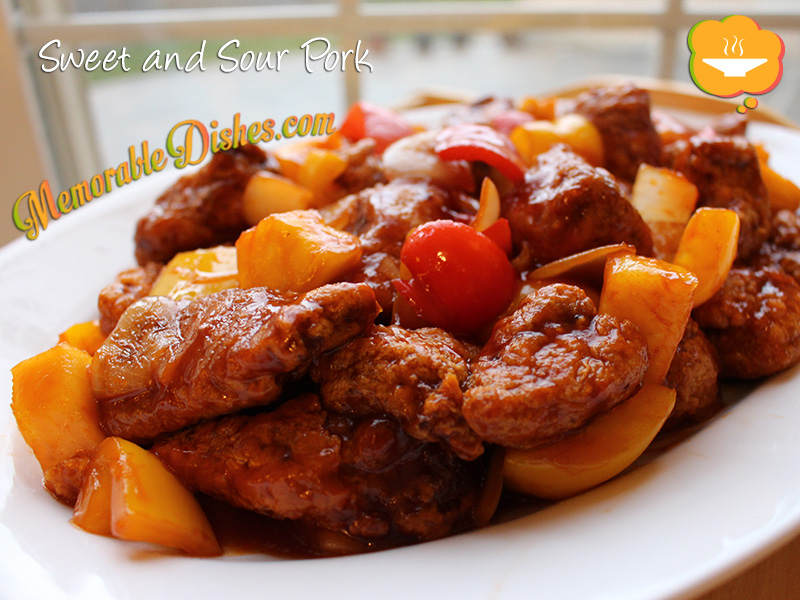
This Memorable Dish is another tribute to my husband. He loves sweet and sour pork. I would think most North Americans who eat Chinese food know about this dish and usually love it.

Believe it or not, this is NOT one of those dishes that was invented by North American Chinese, like chop suey. I believe sweet and sour pork is one of the most well known dishes in Chinese cuisine, both American/Canadian-Chinese and authentic Chinese restaurants alike.

My mom usually makes this for Sunday dinner when she has a bit more time because it’s a two-step process. First you have to deep fry the pork and then stir fry it with the sweet and sour sauce. I always find it a bit cumbersome to deep fry stuff at home. But alas, my mom does it because she enjoys making the food we like to eat.

This version of sweet and sour pork is based on my mom’s homemade version. Every Chinese family has their take on this dish and only certain Chinese restaurants make it well. Try my version but don’t forget to adjust the sweetness or sourness to your family’s liking.Sweet & Sour Pork

Sweet & Sour Pork

Prep Time: 20 minutes

Cook Time: 20 minutes

Total Time: 40 minutes

Serving Size: 4-6

Ingredients

  • 1 1/2 lbs Pork Butt (Shoulder), cut into 1 inch cubes
  • 1 tbsp of Soy Sauce
  • 1 tsp of Sugar
  • 1 tsp of Cornstarch
  • 1 tsp Shaoxing Wine or Cooking Wine
  • 1 small Onion, cut into large dice
  • 1 Pepper (green, red, orange or yellow), 1 inch pieces
  • 1 cup fresh or canned Pineapple,1 inch cube
  • 1/2 cup Ketchup
  • 1/2 cup Apple Cider Vinegar
  • 3 tbsp Sugar
  • 1 tbsp Soy Sauce
  • 1 Egg, beaten
  • 3/4 cup Cornstarch
  • Vegetable Oil for deep frying

Preparation

  1. Marinate pork with soy sauce, sugar, cornstarch, and cooking wine for at least 1 hour.
  2. In a small bowl, mix ketchup, vinegar, soy sauce and set aside.
  3. Preheat oil in a deep fryer or deep skillet to 375°F.
  4. Mix beaten egg with the marinated pork.
  5. Coat pork in cornstarch and shake off excess.
  6. Deep fry the pork until golden brown for about 5 minutes or until it floats.
  7. Make sure you don’t overcrowd the pork. Fry in batches if you’re not using a deep fryer with lots of oil.
  8. Once the pork pieces are done, place them on a plate lined with paper towel to absorb excess oil.
  9. In a wok or large skillet, heat up 1 tbsp of oil.
  10. Fry onions and green peppers until softened, then add ketchup mixture sauce.
  11. Once the sauce starts to boil, add the pineapples and stir.
  12. Put the pork in and mix until everything is coated.

Notes

Taste the ketchup mixture after you mix it. You might want to adjust the sweetness or sourness to your taste.

https://www.memorabledishes.com/sweet-sour-pork/

Show Buttons
Hide Buttons