Category Archives: Appetizer

Recipes of Appetizers

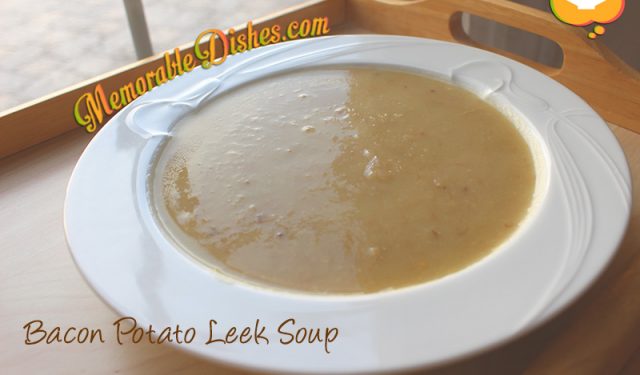
Bacon Potato Leek Soup

Bacon Potato Leek Soup

My kids love soup. However, growing up in a Chinese family, soup equates to something you drink at the beginning or at the end of a meal but never as a meal itself. Usually, the soup we drink is a broth that cleanses our bodies and helps us stay healthy. My kids were also introduced to drinking cleansing broths at my mother’s house. Later on, I learned my mom’s cleansing soup recipes and made them for my kids too. So my kids are growing up drinking cleansing broths like me.

When I initially introduced thicker soups as meals, my boys were flabbergasted. They thought it was weird that the soup was so thick and considered them non-soups. As a mom, I would keep on making foods that my kids originally rejected hoping that they would eventually respond well to them. After making my Roasted Butternut Squash Soup a few times along with bribing them with my Grilled Cheese Sandwiches (Finish the soup first, THEN you can have the grilled cheese!), they slowly opened themselves up to drinking or eating soup that is less brothy.

So when I made this Bacon Potato Leek Soup, they were in heaven. They declared that it was the best soup I ever made. I concluded when you add bacon to any food, kids would eat them. I dedicate this Memorable Dish to all the moms with kids who claim to have aversions to certain foods but eventually embrace them. (Yay for moms due to their nagging, I mean persistent effort!)Bacon Potato Leek Soup
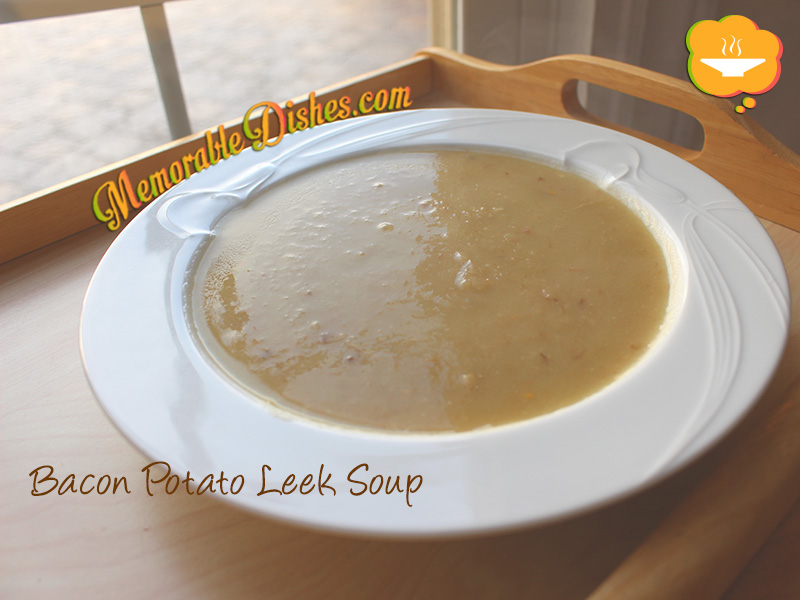
Bacon Potato Leek Soup

Prep Time: 20 minutes

Cook Time: 20 minutes

Total Time: 40 minutes

Serving Size: 6

Ingredients

  • 3-4 Leeks, white and light green parts only, roughly chopped (approximately 6 cups)
  • 2 lbs Potatoes (Yukon gold or Russet), peeled, diced into 1/2 inch pieces
  • 6 cups Chicken Stock
  • 1 cup Smoked Bacon, small dice
  • 1 Bay Leaf
  • Salt & Pepper to taste

Preparation

  1. In a large pot, brown the smoked bacon. (You could add a bit oil to render the fat if you want to but not necessary.)
  2. Strain the bacon and leave 1 tbsp of bacon fat in the pot.
  3. Add the leeks to the pot and cook them until softened (approx. 5 min).
  4. Add potatoes, bacon, stock and bay leaf. Bring to a boil and cook until potatoes are softened (approx. 15 min).
  5. Turn the heat off.
  6. Use an immersion blender to blend until smooth.
  7. Bring the puréed soup to a boil.
  8. Add salt and pepper to taste.

Notes

Note #1: Clean the leeks thoroughly by cutting off the top and dark green parts. Then cut the leek in half, lengthwise and rinse out any dirt in between the leek

Note #2: If you don’t have smoked bacon, just use a few slices of regular bacon.

https://www.memorabledishes.com/bacon-potato-leek-soup/

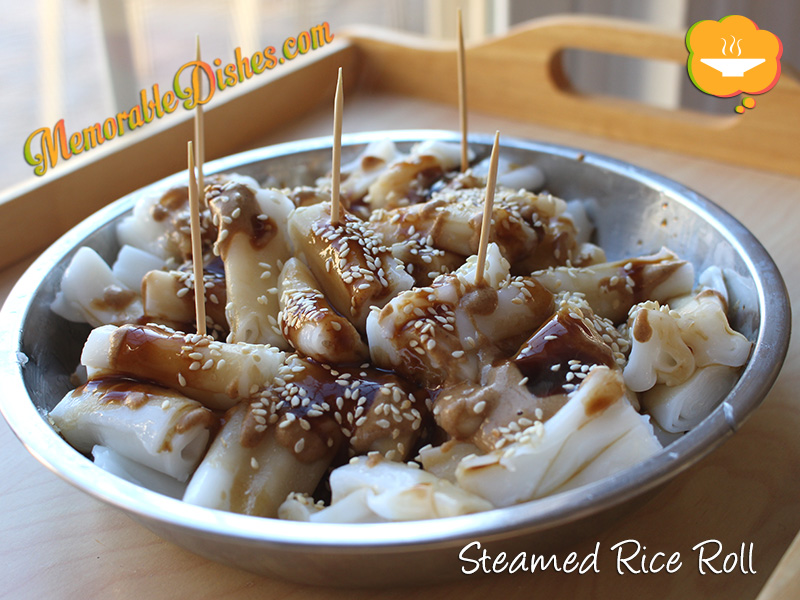
Steamed Rice Roll (豬腸粉)

Steamed Rice Roll

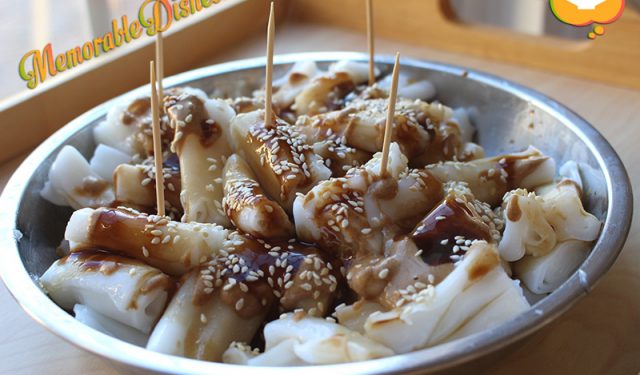
Hearing the clanging sounds of Chinese scissors and smelling rice roll being steamed bring back childhood memories of eating this Memorable Dish on the side of the road. The street vendor lines a brown parchment-like paper on top of a metal dish and cuts each strip of rice roll perfectly for each mouthful. Then he drizzles hot oil and gives us the option of adding the amount of soy sauce we want. The sesame sauce and hoisin sauce are diluted perfectly so it allows easy drizzling over the top of the steamed rice roll. There’s hot sauce available as well. I love hot sauce normally but I usually don’t put any in my steamed rice roll. I think the hot sauce overpowers the yummy combination of the oil, soy sauce, hoisin and sesame sauce.

Growing up in the mid-80s Hong Kong, food hawker carts were still on the streets at that time. Now, all the street vendors have moved into mini-mall food courts or they actually have a store alongside on the street. Eating breakfast on the street was a regular thing to do. I remember some schools didn’t allow kids wearing school uniforms eating on the street because they didn’t want a bad reputation for their school. But we didn’t care, we ate on the streets anyways. It wasn’t like there was uniform police who arrested us 😛 .

Recently, I heard a snippet about steamed rice roll from a Chinese radio food show. He talked about an amazing steamed rice roll place being closed down in Hong Kong and people just loved eating the rice roll from that place. It was the magic of the sauce that kept bringing people back. Apparently the lady who owns the place told the radio announcer that she renders pork fat and mixes it with the hot oil. That’s their secret weapon to bring their customers back time and time again. (Oooops for the vegetarians/vegans who eat their steamed rolls and think it’s a vegetarian/vegan dish.)

Even with my non-pork fat oil version, I almost devoured the whole package of steamed rice rolls myself! I think it’s the texture of the rice roll mixed with the combination of sauces that heightens my sense of the umami taste. My kiddies love eating this steamed rice roll as well. It’s too bad that they won’t be able to experience eating this Memorable Dish like I did because food carts like this are no longer on the streets. Their memory of eating this would be being served at restaurants or at home.Steamed Rice Roll

Steamed Rice Roll (豬腸粉)

Prep Time: 10 minutes

Cook Time: 5 minutes

Total Time: 15 minutes

Ingredients

  • 1 package of Fresh Rice Roll (can be found at your local Chinese grocery store)
  • 1 tbsp Chinese Sesame Paste
  • 2 tbsp Hot Water
  • 2 tbsp Hoisin Sauce
  • 1 tbsp Hot Water
  • 1/4 cup Premium Soy Sauce
  • 1/4 cup Water
  • 2 tbsp Sugar
  • 1 tbsp Toasted Sesame Seeds
  • 1 tbsp Oil, heated

Preparation

  1. Make the sauce by diluting 1 tablespoon of Chinese sesame paste with 2 tablespoon of hot water and 2 tablespoon of hoisin sauce with 1 tablespoon of hot water. Set aside.
  2. In a small pot, heat 1/4 cup premium soy sauce, 1/4 cup water and 2 tablespoon of sugar until the sugar dissolves. Set aside.
  3. Cut the fresh rice roll into 1 inch pieces and place them on a metal or ceramic plate.
  4. To steam the rice rolls, put approximately 1-2 inches of water in a large pot and bring it to a boil.
  5. Once the water is boiled, place bamboo steamer on top and place plate inside steamer and cover.
  6. Steam until rice roll is heated through (5 minutes or longer depending on how fresh rice roll is or if it’s in the fridge).
  7. Drizzle heated oil, toasted sesame seeds and enough sauce and soy sauce to taste.

Notes

You can make your own toasted sesame seeds by placing raw seeds in a shallow pan and heating them gently on top of the stove. Mix and watch carefully because once it starts toasting, they can heat up pretty fast.

https://www.memorabledishes.com/steamed-rice-roll/

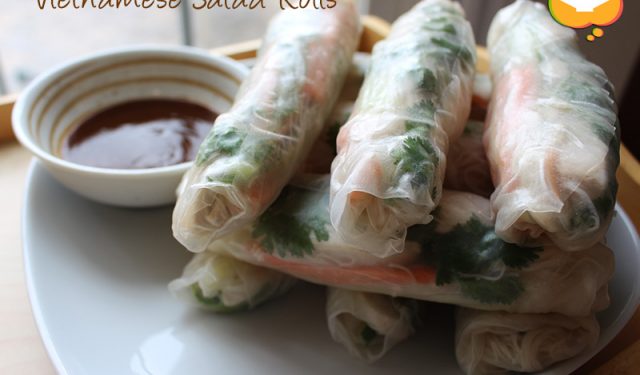
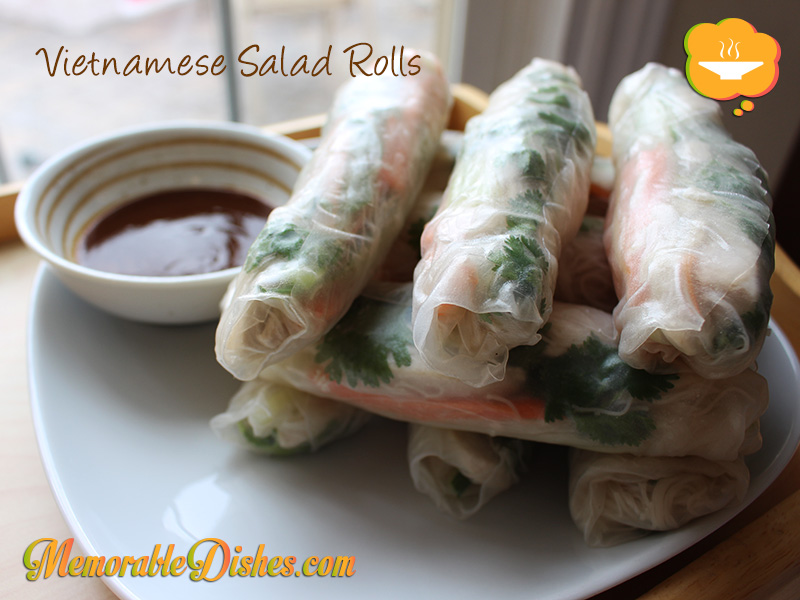
Vietnamese Salad Rolls

Vietnamese Salad Rolls

I remember being introduced to Vietnamese food when my uncle married my aunt. We were living in the States at the time. My aunt is from Vietnam but she’s native Chinese. And the foods she grew up eating in Vietnam were different than the ones I was used to. So when she prepared these salad rolls and other Vietnamese dishes, I was very excited about trying them. The traditional rolls use Vietnamese sausage or shrimp but I used poached chicken instead. I also used a simple hoisin and sesame paste dipping sauce instead of the watery one with the fish sauce. I believe you could use either.

Our kids used to find it awkward to eat when they were little. But as they’ve grown older, they’ve come to love this dish. It’s a bit time consuming to make because I’m an amateur roller 😉 When it’s really hot outside, I like to eat something cool. So this is the perfect dish to make in the summer and great to take on a picnic. This is one of my all-time favourite summer Memorable Dishes to make. So crunchy and refreshing!Vietnamese Salad Rolls

Vietnamese Salad Rolls

Prep Time: 30 minutes

12-14 Rolls

Ingredients

  • 1 pound poached Chicken Breast, sliced
  • 2 cups Carrots, julienne
  • 2 cups Cucumbers, julienne
  • 2 cups cooked Rice Vermicelli
  • 1 cup Cilantro
  • 1 package Rice Paper
  • Boiling Water
  • Dipping Sauce
  • 1 tbsp Chinese Sesame Paste
  • 1/4 cup Hoisin Sauce
  • 1/4 cup Hot Water

Preparation

  1. Poach the chicken and prepare the rice vermicelli according to the package. Rinse the vermicelli in cold water to prevent from sticking.
  2. Have all your ingredients ready and prepare to wrap.
  3. Use 2-3 large plates on the table to wrap the rolls in.
  4. Put boiling water in a large bowl, enough water to submerge the rice paper in.
  5. Place 1 rice paper in the boiling water. Make sure the whole paper is submerged.
  6. Take rice paper out and place it on a plate. (It takes a few minutes for it to become pliable to work with.) Do the 2nd rice paper and place it on the 2nd plate.
  7. Go back to the 1st place and start adding ingredients to the roll, some chicken, cucumbers, carrots, rice vermicelli and cilantro. Don’t over stuff.
  8. Roll it up like a spring roll and place it on the plate.
  9. Repeat steps 5-8 until all the ingredients are used up. (If the hot water is not hot enough, replace it with freshly boiled water.)

Notes

To keep the rolls moist, line the plate with dampened paper towel and place finished rolls on top. Cover with another dampened paper towel. You’re able to keep the rolls moist for at least one day in the fridge.

https://www.memorabledishes.com/vietnamese-salad-rolls/

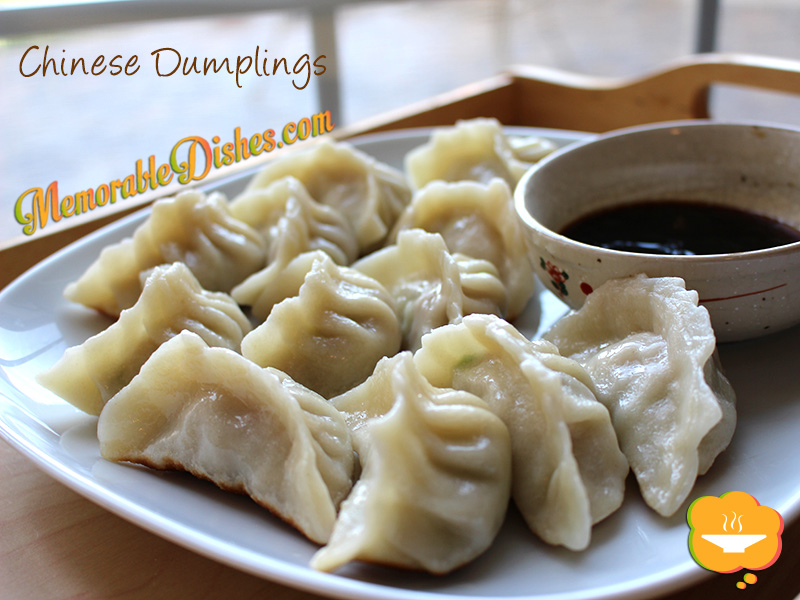
Chinese Dumplings

Chinese Dumplings

As a child I remember going to my maternal grandmother’s house on Sundays to wrap Chinese dumplings. As southern Chinese people, we don’t usually eat a lot of dumplings and are not very skillful in making the dough from scratch. So I can’t quite understand why we make dumplings on a fairly regular basis. My mother says it’s because my maternal grandfather’s friend (who we call great uncle) is an expert dumpling maker who used to own a dumpling shop. What a treat for me as a child! To witness my great uncle transforming flour and water into dough and then into dumpling wrappers was like magic.

Northern Chinese are known for their expertise in dumpling making. As southerners, we are not, hence we recruit other family members for the task to make the process go faster. Plus, it’s a great social event and gives us a chance to talk and bond. It’s like spending quality time and making something delicious to eat at once—a two for one deal!

While I was making these dumplings, my boys were eager to help. (I think they just wanted to play with the dough 😉 .) I told them they could help next time. My mother and I were making very “slow progress”, as quoted by my second son, and any interference would make the process even slower. We are not skillful dumpling makers but I must say I am looking forward to making this Memorable Dish again soon. The more I make it, the better I will become and in no time I will be as fast as the dumpling makers I see at the Chinese dumpling shops! (Yeah right! But I can’t wait to make it again soon. I’ll see how long the boys will last and see if they will actually finish making the dumplings from start to finish 🙂 .)

Chinese Dumplings

Chinese Dumplings

Chinese Dumplings

36 dumplings

Ingredients

  • Dumpling Dough
  • 2 cups All Purpose Flour
  • 1 cup Boiling Water
  • Filling
  • 2 cups Napa Cabbage, julienne
  • 3 tsp Salt (2 tsp for cabbage and 1 for pork)
  • 1 pound Lean Ground Pork
  • 1/4 cup Green Onions, thinly sliced
  • 1 tbsp grated Ginger
  • 1 tbsp minced Garlic
  • 1 tbsp Chinese Cooking Wine
  • 1 tsp Cornstarch
  • 1 tsp Sesame Oil
  • 1/8 tsp White Pepper
  • Dipping Sauce
  • 2 tbsp Soy Sauce
  • 2 tbsp Vinegar
  • 1 tsp Sesame Oil
  • Water for boiling dumplings
  • 1 1/2 tbsp Vegetable Oil

Preparation

  1. In a medium bowl, mix 2 teaspoons of salt into the napa cabbage. Set aside for 5 minutes and squeeze out the excess moisture with a paper towel.
  2. In a large bowl, mix the napa cabbage, pork, green onions, ginger, garlic, wine, cornstarch, sesame oil, white pepper and the remaining 1 teaspoon salt. Set aside.
  3. In a large bowl, mix the flour and 1 cup of boiling water together. Mix until a soft dough forms. Knead the dough on a lightly floured surface until smooth, about 5 minutes.
  4. Divide the dough in half and shape each into a roll approximately 12 inches long. Cut each roll into half inch slices.
  5. Roll 1 slice of dough into a 3-inch circle. The dough shouldn’t be too thin nor too thick.
  6. Place 1 tablespoon of pork mixture in the center of the circle.
  7. Lift up the edges of the circle and pinch into pleats to create a pouch. Pinch the top together. Repeat with the remaining slices of dough and filling.
  8. Heat a large pot with water. Once the water is boiled, put approximately 12 dumplings at a time to boil.
  9. Once the dumplings float to the top, boil for another 2 minutes. Drain and set aside.
  10. Heat a nonstick wok or skillet until very hot. Add 1/2 tablespoon vegetable oil
  11. Place 12 dumplings in a single layer in the wok and fry 1-2 minutes, or until the bottoms are golden brown.
  12. For the dipping sauce, mix the soy sauce, vinegar and 1 teaspoon of sesame oil in a small bowl. Serve with the dumplings.

Notes

Note #1: You can make and store extra dumplings by freezing them on a tray lined with parchment paper. Put them into bags after they’re frozen. You don’t need to defrost them when boiling. Just boil them a little longer since they are frozen.

Note #2: If you cannot enclose the dumplings by creating pleats mentioned above, just pinch the dumplings tightly closed so the filling doesn’t leak out.

https://www.memorabledishes.com/chinese-dumplings/

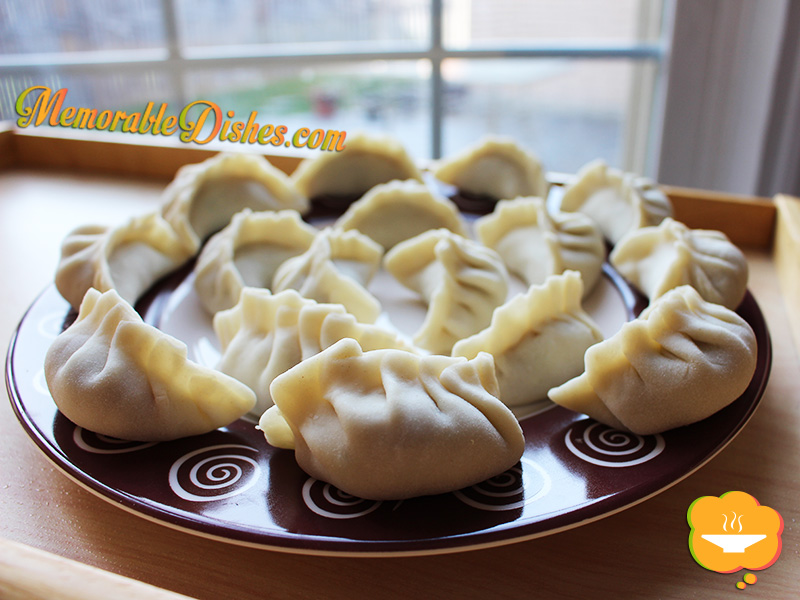
Chinese Dumplings - Raw

Chinese Dumplings (Raw) – You can see my amateur skill at pleating the dough 🙂

Curry Fish Balls

Curry Fish Balls

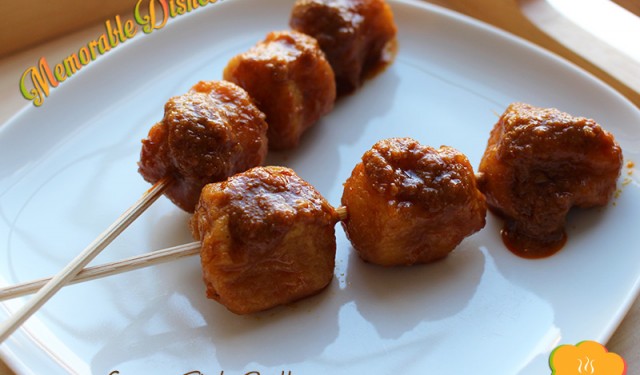
Curry fish balls is a quintessential street food I had growing up in Hong Kong. I remember the little vendor carts that sell them on the street. For a dollar a skewer (I think that was the price), my older brother and I would buy them as snacks after school. Even the elementary school I attended had a curry fish ball station at their snack bar! As soon as a vendor opens the bubbling curry fish balls, my mouth begins to water. I always admired how fast the service was even though there were so many people lining up. Holding the skewer in one hand, tongs in another and in lightening speed, the vendor puts the fish balls one by one with quick precision onto the skewer. All the fish balls line up perfectly in the middle of the skewer squished next to each other.

Nowadays, they don’t have food carts on the streets of Hong Kong anymore. They have these food stores/stations that are opened to the outside and you can purchase your curry fish balls there along with other street foods. We can also get them at Chinese food courts and malls where I live in Canada because we live in a highly populated Chinese area. Even when my cousins come visiting from the States, they search for this simple yet delicious street food.

Curry fish balls is not something you would normally eat at home because it’s a street food. I started making curry fish balls at home because I always have leftover sauce from my Portuguese Curry Chicken. I hate that it goes to waste so I soak fish balls in my leftover curry sauce. This Memorable Dish might be simple to make but it triggers lots of childhood memories growing up and eating in Hong Kong. This is a great potluck dish too. I went to a potluck one time and a lady brought curry fish balls in a slow cooker. What a great idea!Curry Fish Balls

Curry Fish Balls

Cook Time: 20 minutes

Total Time: 20 minutes

Ingredients

  • 1 package of Fish Balls
  • 1 pack of your favourite Curry Paste or leftover curry sauce
  • Water (if you’re using curry paste)

Preparation

  1. Prepare the curry paste according to the package of the paste. You’ll need to add water to dilute it.
  2. You want the fish balls to adhere to the sauce, so the consistency shouldn’t be too thin.
  3. Bring the curry sauce to a boil and then add the fish balls.
  4. Simmer in slow heat for approximately 15-20 minutes.
https://www.memorabledishes.com/curry-fish-balls/

Fish Sticks and Cream of Chicken Soup

Fish Sticks & Cream of Chicken Soup

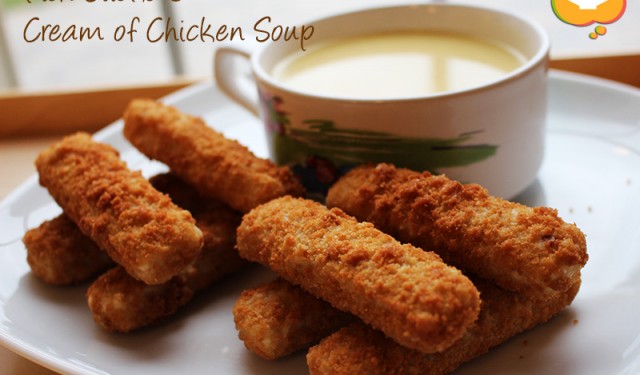
You would think fish sticks and cream of chicken soup were my childhood staples since I created a blog entry about them. On the contrary, these Memorable Dishes were special treats from my mom when she didn’t have time to make the multiple dishes that comprise every Chinese meal.

In Hong Kong, my mom worked full time and took care of my older brother and me at the time. Most people in Hong Kong do not own a car because it’s fairly expensive to maintain. Plus, the public transit system is amazing. Having said that, my mother still had to travel from one end of of the city to get to work and home by public transit. Everyday she would finish work, go to the market and buy fresh ingredients to cook us dinner. She did that EVERY evening. I don’t know how she did it because I can’t imagine anyone going to the market everyday on top of going to work full time. Not only did she cook us fresh meals every day, she cooked us several dishes including a soup. We always had fish, a meat dish, a vegetable dish, and steamed rice of course.

So every now and then when she was crunched for time, she would take shortcuts like every mom who tries to keep her sanity. When she didn’t have time to get fresh fish, she would bake us frozen fish sticks. I got super excited every time we got to eat this. I know it’s fried and frozen and not particularly healthy. But as a kid, we didn’t know that and it was such a special treat just to have fish sticks!

When she didn’t have enough time to make a soup, she would make a can of cream of chicken soup for us. Cream of mushroom soup either wasn’t available or not as popular as cream of chicken soup in Hong Kong at the time. Of course, I was also super excited about the cream of chicken soup too. My mom didn’t really whisk the soup until it was all smooth and creamy. So the soup would have pockets of creamy chunks which I liked drinking and smashing in my mouth.

This is to all moms out there – give yourself some slack! Don’t stress if you must make your kids frozen and processed foods from time to time. Even my full-time working mom who made dishes from scratch every evening took short cuts when she needed to 🙂Fish Sticks & Cream of Chicken Soup

Garlic Green Beans

Garlic Green Beans

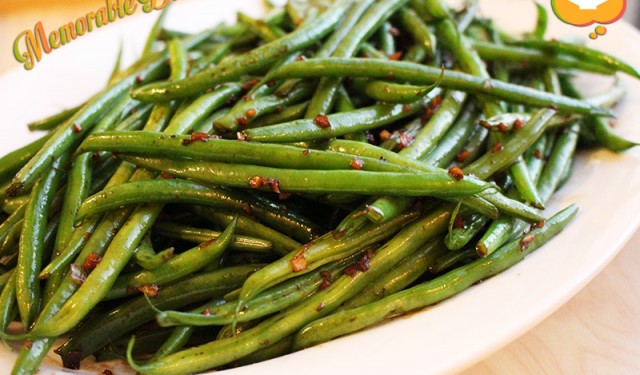
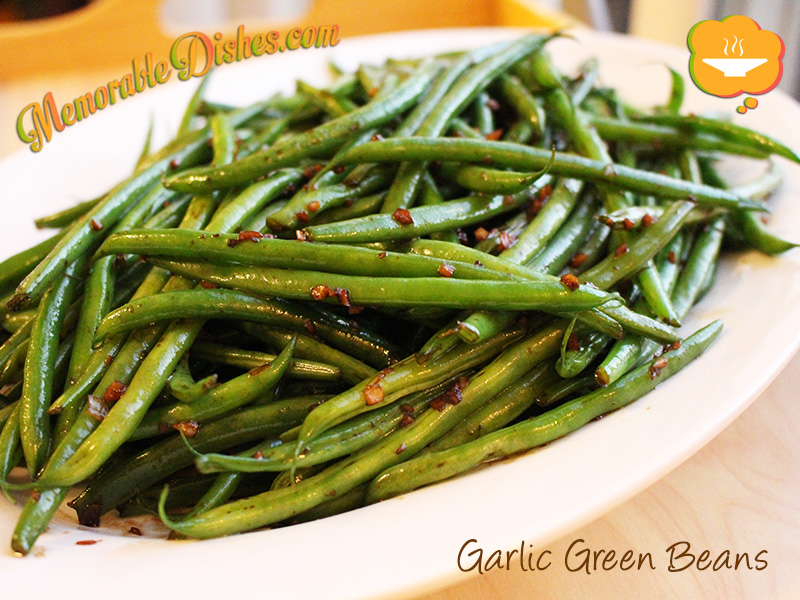
My kids insisted that I put this on my Memorable Dishes blog. They absolutely LOVE this dish. In fact, they said these garlic green beans were even better than French fries! I think they were just pulling my leg and trying to butter me up for something they want later 😉 Already, at such a young age, they’ve learned to subdue me with their sugary words…

I remember the days when the boys were not that much into vegetables. Persuading them to eat their veggies was like pulling teeth. Then when I least expected it, they were trying new vegetables! Maybe all the brainwashing horror stories I told them about not eating their veggies finally got to them 😉 I remember distinctly the first time they ate this vegetable. It was at a holiday potluck dinner with friends. We were waiting for other foods to finish cooking or heating up. The boys were super hungry so I told them to eat the garlic green beans our friends brought. I was expecting to hear moans and groans and thought to myself, they’re not going to eat them. I gave it a shot anyway and….lo and behold they ate them without any struggle! In fact, they actually embraced eating them.

I asked my friends what they put in it and all they said was garlic and butter. Since then, I started making this at home and every time they’ve loved it. Recently, I’ve added my own Asian twist to it and use soy sauce instead. Not just your regular soy sauce, mind you, but a good premium soy sauce. That took the green beans to a whole another level and that was when they said it tasted better than French fries.

I never would have thought simple garlic green beans with soy sauce could turn into a Memorable Dish. The trick is to cook the green beans to your liking. Our family likes it with a bit of a crunch to them. If you are able to find the French green beans (which are thinner), they are even better.Garlic Green Beans

Garlic Green Beans

Prep Time: 10 minutes

Cook Time: 10 minutes

Total Time: 20 minutes

Ingredients

  • 1 1/2 lb Green Beans
  • Water for boiling beans
  • Salt for boiling beans
  • 2 tbsp Vegetable Oil
  • 6 cloves Garlic, minced
  • 2 tbsp Soy Sauce

Preparation

  1. Bring water to a boil and add enough salt until you can taste it.
  2. Put green beans in boiling water. Once the water starts to boil again, drain the green beans and set aside.
  3. Heat oil in a wok or large frying pan.
  4. Add garlic and green beans and stir-fry for a few minutes until heated through.
  5. Add soy sauce and stir-fry until soy sauce is coated on all the beans.

Notes

If you end up overboiling the green beans, put them in an ice bath and drain.

https://www.memorabledishes.com/garlic-green-beans/

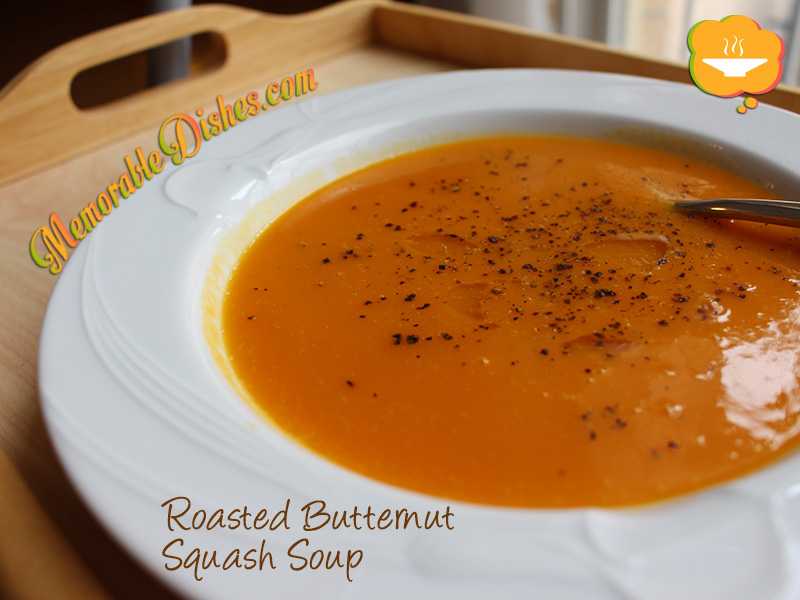
Roasted Butternut Squash Soup

Roasted Butternut Squash Soup

I am beginning to enjoy this time of year. I used to dread the Fall season because the weather gets cooler and summer clothes and flip flops get put away. Now when the leaves turn orange, brown and red, I think of eating warm and nourishing foods. I love that the colours of the vegetables in season also resemble the colours of the leaves.

Butternut squashes and other types of squashes dominate the grocery store this time of year. It’s hard not to buy them and make something out of them. The kids really enjoy this Memorable Dish, but this wasn’t always the case. They were used to drinking Chinese cleansing soup which is clear, so drinking this thick soup was weird to them. Now that they’re older and their taste has evolved, they are embracing this mushy soup. I make different versions of this soup and my oldest son really likes it with cumin added in.

I have tried roasting the butternut squash with the peel on, but the results are better if you peel it first. If you leave the peel on, the flavour gets left behind on the peel. Since you scoop the flesh out after roasting, the caramelization is left on the peel where the flavour is. To give this soup extra oomph, I tossed in a few garlic cloves to roast with the squash.

This is one of the recipes that you can’t really screw up and can make on the fly with a few ingredients on hand. If you want to sauté some onions and carrots, feel free to do so. I make this soup different every time and everyone always loves it! Enjoy this super easy (except for the peeling of the butternut squash part :P) and delicious Memorable Dish while the squashes are in season.

Roasted Butternut Squash Soup

Roasted Butternut Squash Soup

Prep Time: 20 minutes

Cook Time: 40 minutes

Total Time: 1 hour

Serving Size: 4

Ingredients

  • 1 Butternut Squash, peeled and cut into 1/2 inch chunks
  • 5 cloves of Garlic, peeled
  • Olive Oil
  • 4 cups Chicken or Vegetable Stock
  • 1/2 tsp Cumin
  • Salt & Pepper to taste

Preparation

  1. Preheat oven to 400°F.
  2. Place butternut squash and garlic on roasting pan and put enough olive oil to coat everything. Toss and make sure all the pieces are coated.
  3. Roast butternut squash and garlic for 20-30 minutes.
  4. Flip them around with a spatula and roast for another 20-30 minutes or until brown.
  5. In a pot, put the roasted butternut squash, garlic, cumin and stock.
  6. Use an immersion blender to blend until smooth.
  7. Bring the puréed soup to a boil.
  8. Add salt and pepper to taste. Then drizzle olive oil on top if desired.

Notes

Use more or less broth depending on the consistency you like or the size of your butternut squash.

https://www.memorabledishes.com/roasted-butternut-squash-soup/

Tomatoes with Fresh Basil

Tomatoes with Fresh Basil

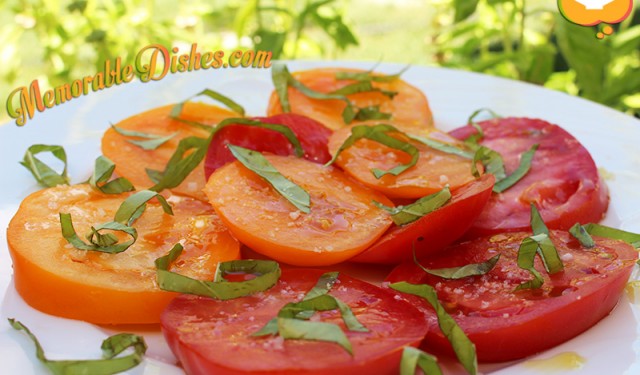
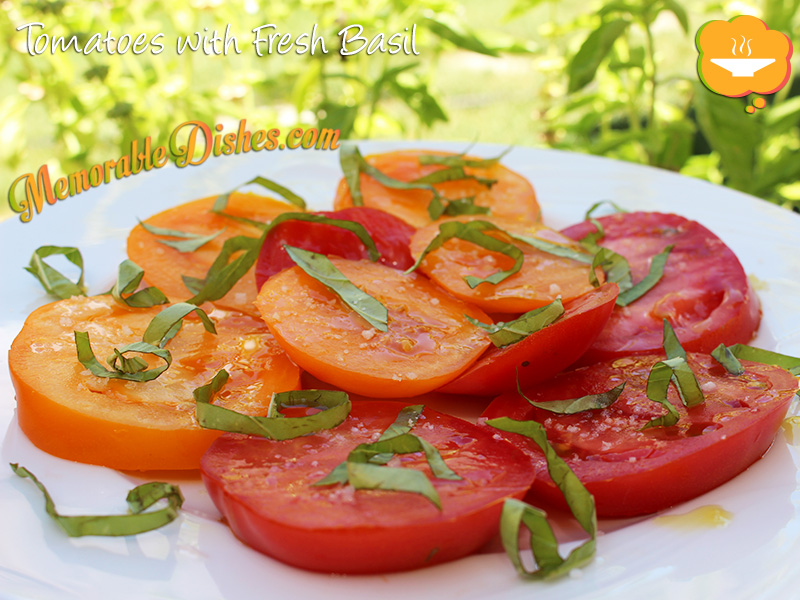
Summer = garden tomatoes + fresh basil + olive oil + fleur de sel = Heaven 🙂

This Memorable Dish post is as simple as the recipe itself. I absolutely adore this dish and can eat it everyday throughout the summer when tomatoes are in season. I prefer the yellow/orange tomatoes because they’re sweeter in taste. Get whatever is available and enjoy the sweet taste of summer.
Tomatoes with Fresh Basil

Tomatoes with Fresh Basil

Prep Time: 5 minutes

Total Time: 5 minutes

Serving Size: 1+

Ingredients

  • Ripe Tomatoes, fresh from garden or from farmer’s market
  • Fresh Basil, chiffonade
  • Extra Virgin Olive Oil, good quality
  • Fleur de Sel or any high quality finishing salt

Preparation

  1. Cut tomatoes into 1/4 inch thick slices.
  2. Scatter the basil on top and drizzle with olive oil.
  3. Sprinkle fleur de sel to taste.
https://www.memorabledishes.com/tomatoes-with-fresh-basil/

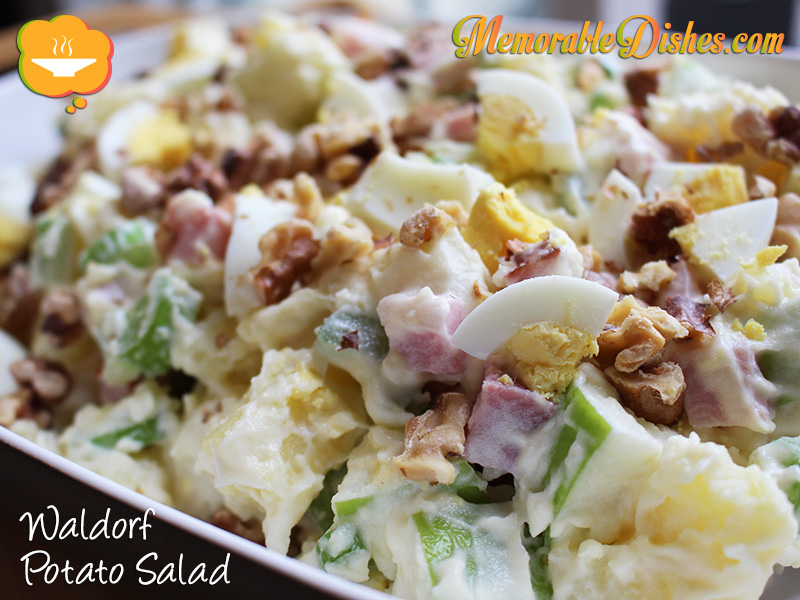
Waldorf Potato Salad

Waldorf Potato Salad

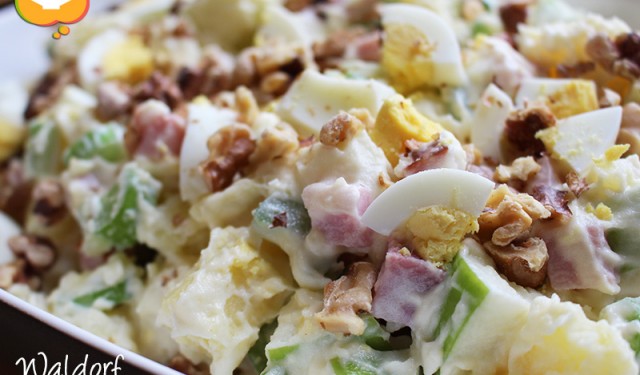
This Waldorf Potato Salad is one of my mom’s Memorable Dishes that she often made for us when we were children. It was also one of her favourite dishes to make for potlucks at our house or to bring to someone else’s home. Every time I think of this salad, I think of potluck parties with our family friends. Maybe my memory is a bit fuzzy but I always equate this salad, along with the Tomatoes Stuffed With Ham Salad, with mahjong parties.

Waldorf salad is generally made of apples, celery and walnuts, mixed in with mayonnaise. My mom used potatoes, eggs and ham in it. But I don’t remember her using celery. Maybe because we didn’t like them as kids or it wasn’t readily available in Hong Kong at the time.

My favourite part when eating this salad was biting into the sweet crunchy apples. My mom used to peel the apples so it was hard to tell whether we were biting into potatoes or apples after the mayonnaise was mixed in with it. It was always a nice surprise when I crunched into the juicy flesh of the apples. I love making and eating this Memorable Dish because it always brings back sweet memories of potluck parties and playing with my parents’ family friends’ kids.

Waldorf Potato Salad

Waldorf Potato Salad

Prep Time: 15 minutes

Cook Time: 15 minutes

Total Time: 30 minutes

Serving Size: 4-6

Ingredients

  • 6 cups Potatoes, cubed
  • 2 cups Apples, cubed (I used Granny Smith.)
  • 2 Eggs, hardboiled
  • 1 tbsp Lemon Juice
  • 1 cup Celery, diced
  • 1 cup Ham, diced
  • 1 cup Mayonnaise
  • 1/2 cup toasted Walnuts
  • Salt & Pepper to taste
  • 8 cups Water (or enough to cover the potatoes)
  • 1 tbsp Salt

Preparation

  1. Bring water to a boil, then add salt.
  2. Put potatoes in salted water and boil until tender (approximately 10-15 minutes).
  3. Drain potatoes and run them in cold running water.
  4. Mix apples with lemon juice to prevent them from browning.
  5. In a large bowl, mix the potatoes, apples, hard-boiled eggs, celery, ham with the mayonnaise
  6. Add salt & pepper to taste.
  7. Top with toasted walnuts.

Notes

Note #1: Use waxy potatoes (they are thin-skinned), such as red or new potatoes.

Note #2: My mom used to peel both the potatoes and apples. I peeled my potatoes but left the skin on the apples for colour.

https://www.memorabledishes.com/waldorf-potato-salad/

Show Buttons
Hide Buttons