Category Archives: Dessert

Recipes of Desserts

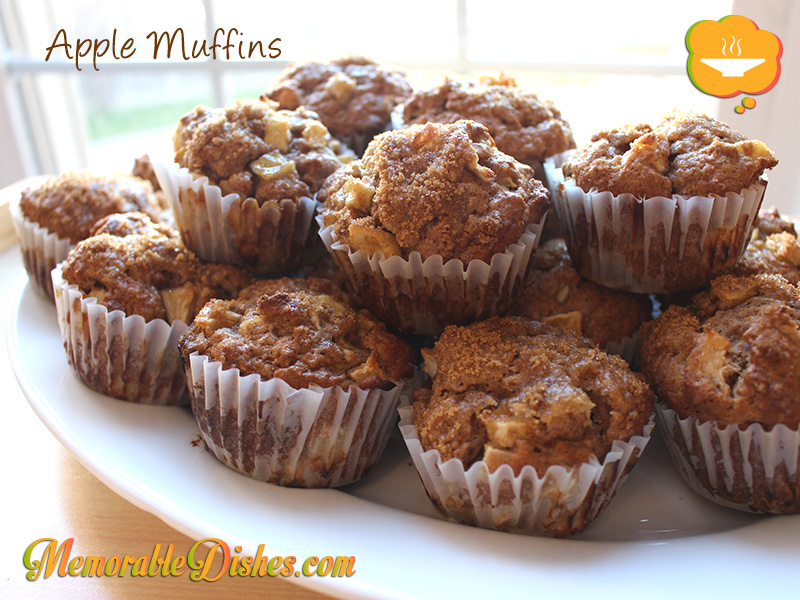
Apple Muffins

If you go apple-picking like our family does every Fall, you probably end up with a huge bag of apples that costs more than it would buying from the store. But our kids love it so we do it. (Ok, maybe I like it too šŸ™‚ .) If youā€™re sick of eating those apples day after day, this recipe is perfect for you.

Iā€™ve been using this recipe to make apple muffins when we have lots of leftover apples from apple picking. Surprisingly, this year I hardly had any apples left! We ate some and gave some away. But it seemed as if our pile of apples dwindled faster than I could make my muffins! (I usually make at least 2 batches.) I think the kids are growing and consuming more šŸ˜› .

Of course you can bake these apple muffins anytime you want and not just wait for a surplus. As usual, I used less sugar than the original recipe called for because I find most baked goods recipes too sweet. With the brown sugar sprinkled on top, itā€™s the perfect sweetness combined with a bit of tartness from the apples. This Memorable Dish is so great for breakfast or a snack.
Apple Muffins

Apple Muffins

Prep Time: 20 minutes

Cook Time: 20 minutes

Total Time: 40 minutes

18 Muffins

Ingredients

  • 1 cup Whole Wheat Flour
  • 1 cup All-purpose Flour
  • 1 tsp Baking Powder
  • 1 tsp Baking soda
  • 1/4 tsp Salt
  • 1 tbsp Cinnamon
  • 1/4 cup unsalted Butter, at room temperature
  • 1/4 cup Coconut Oil
  • 1/4 cup Granulated Sugar
  • 1/2 cup Dark Brown Sugar, packed, divided
  • 1 large Egg, lightly beaten
  • 1 cup (8 ounces) Buttermilk or Yogurt
  • 2 large Apples, peeled, cored, and coarsely chopped (approx. 4 cups)

Preparation

  1. Preheat the oven to 450Ā°F.
  2. Line muffin pan with baking cups.
  3. Mix together the flours, baking powder, baking soda, salt, and cinnamon, and set aside.
  4. In a separate bowl, cream the butter and coconut oil.
  5. Add the granulated sugar and 1/4 cup of the brown sugar.
  6. Beat until fluffy. Add the egg and mix well; stop once to scrape the sides and bottom of the bowl.
  7. Mix in the buttermilk/yoghurt gently. (If you over-mix, the buttermilk/yoghurt will cause the mixture to curdle.)
  8. Stir in the dry ingredients and fold in the apple chunks.
  9. Divide the batter evenly among the prepared muffin cups, sprinkling the remaining 1/4 cup brown sugar on top.
  10. Bake for 10 minutes, turn the heat down to 400Ā°F, and bake for an additional 10 minutes, or until a toothpick inserted into the center of a muffin comes out clean.
  11. Cool the muffins for 5 minutes in the tin, then turn them out onto a wire rack to cool completely.

Notes

Modified from original recipe at Smitten Kitchen.

https://www.memorabledishes.com/apple-muffins/

Here you can learn more about apple health benefits from Health Ambition and Well Being Secrets.

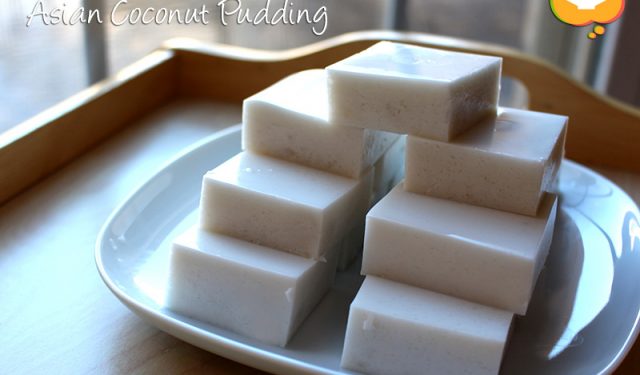
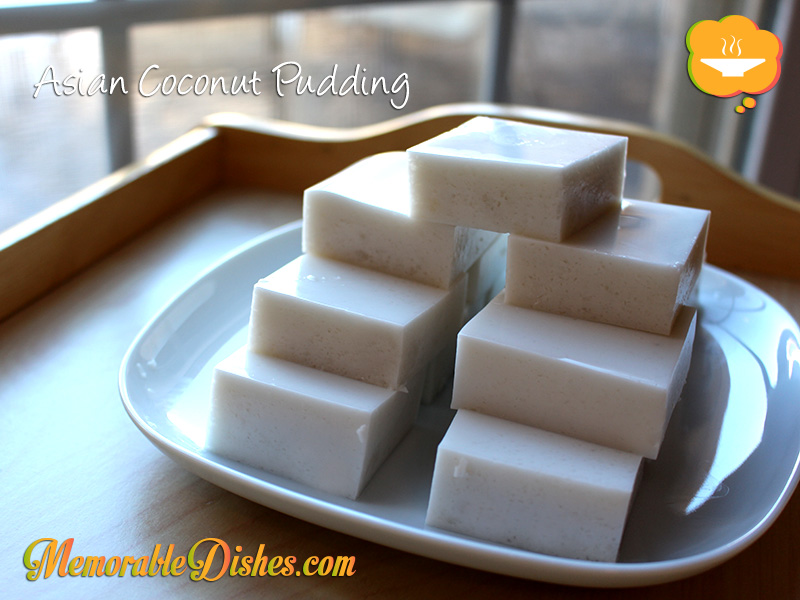
Asian Coconut Pudding (ꤰ걁ē³•)

Asian Coconut Pudding

I remember my mom used to make this for us while growing up in Hong Kong. The summer weather was super hot and humid and having this as a snack or dessert was so nice and refreshing. I was going to call this ā€œChineseā€ Coconut Pudding but I am sure the Chinese adopted this Memorable Dish from other southeast Asian countries. Also, itā€™s not really like a pudding but more like a jelly-like cake.

My mom gave me the recipe she had from her notebook and said it wasnā€™t the greatest but I tried it anyway. It turned out to be a big disaster. I was suspicious of the recipe when I looked at it. It used a huge amount of cornstarch that I knew was going to yield a pasty pudding. So the first one I made went straight to the garbage šŸ˜› .

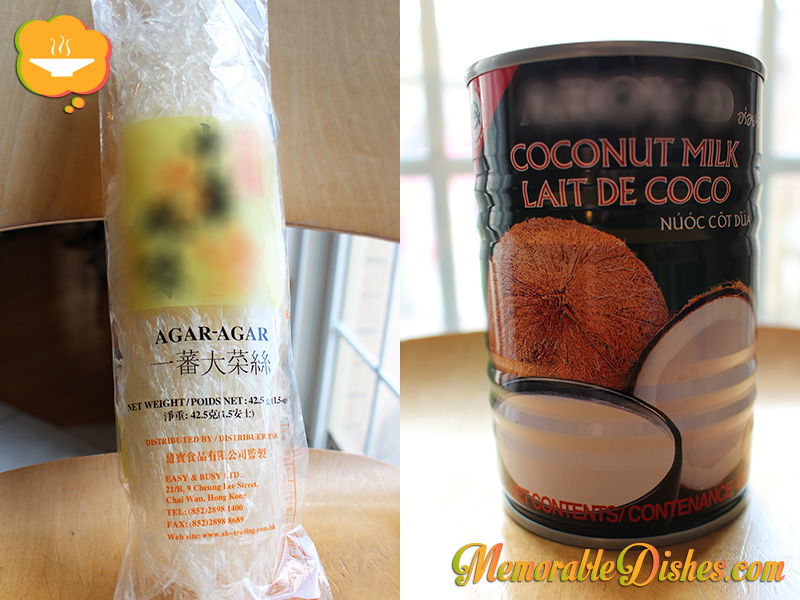
I found different recipes online that use gelatin powder but this wasnā€™t what my mother used. She used agar-agar instead. Agar-agar is sold dry but when reconstituted, it becomes jelly-like. Lots of Asian desserts use agar-agar to create a jelly-like effect. This recipe combines my motherā€™s recipe along with my own experimenting. It tastes great and has the agar-agar texture that I expected. Next time Iā€™m going to experiment with gelatin powder and see what that would be like. This Memorable Dish has become more like a science experiment than cooking šŸ˜‰ .Asian Coconut Pudding

Asian Coconut Pudding (ꤰ걁ē³•)

Prep Time: 10 minutes

Cook Time: 5 minutes

Total Time: 15 minutes

16 Squares

Ingredients

  • 1/2 oz agar-agar
  • 1 cup Water
  • 2 cups Coconut Milk
  • Ā½ cup Sugar
  • 1 Egg White

Preparation

  1. In a medium pot, heat 1 cup of water and agar-agar using low to medium heat. (Make sure the water is never boiled but at a low simmer.)
  2. Whisk agar-agar in the water until itā€™s dissolved. Add sugar and mix.
  3. In a small bowl, beat egg white gently. Pour egg white in the coconut milk. Then pour this mixture into the pot and simmer gently until everything is mixed. (About a minute or two.)
  4. Pour coconut milk mixture in a 8x8 glass pan (to be cut into squares) or into different molds to set.
  5. Put it into the fridge to chill and set.
  6. Cut into squares.

Notes

Note #1: I divided my 1.5 oz agar-agar into thirds to get my 1/2 oz by cutting it with kitchen shears.

Note #2: If you want to make the texture extra smooth, strain the mixture before putting it in the pan or molds.

https://www.memorabledishes.com/asian-coconut-pudding/

Agar-Agar & Coconut Milk

Agar-Agar & Coconut Milk

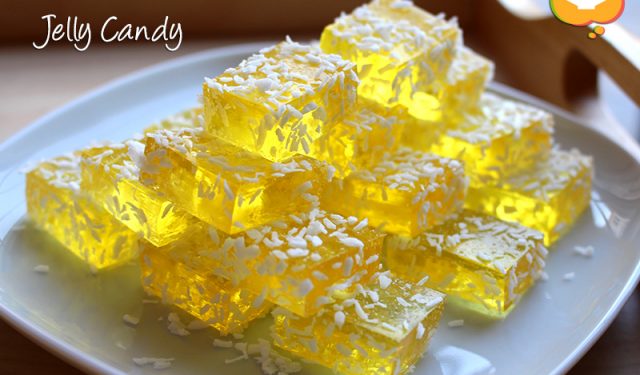
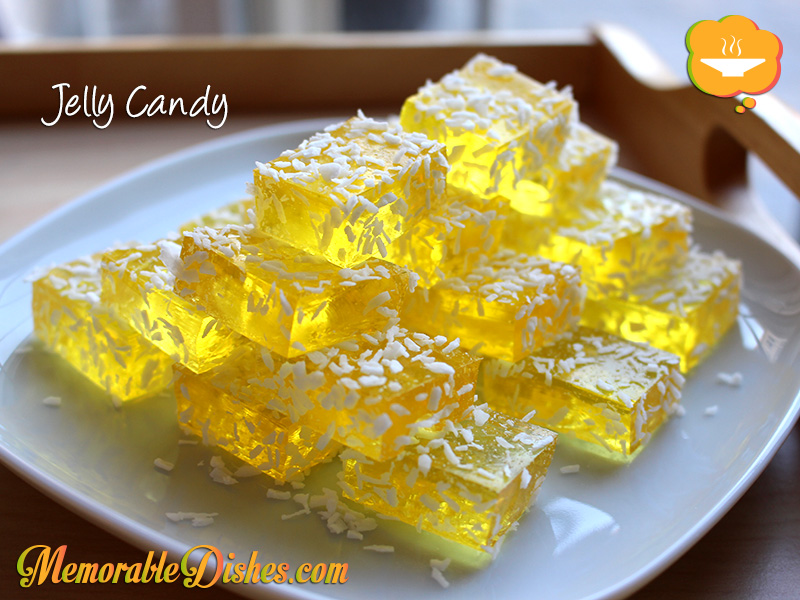
Jelly Candy

Jelly Candy

When I saw different flavours of jello such as mango and lychee at the Asian grocery store, it triggered childhood memories of jelly candies my mom used to make for us. She called them jelly candies or jello candies. Theyā€™re not really candies because theyā€™re not actually hard. But we know them here as Jello Jigglers or Knox Blocks.

My mom made these for us, for potlucks she used to host, or to bring to friendsā€™ houses. She would cut them into little squares and coat them with shredded coconut. I donā€™t know why she coated them with coconut but I think she found a recipe from a newspaper or magazine from back in the day. They might have suggested that coating jelly candies with coconut makes them extra fancy to serve at parties šŸ˜‰ .

Even though this is obviously not a fancy Memorable Dish, I remember eating them fondly. My mom also layered the jello in different flavours to make the jelly candy more fun. The effect looks amazing but of course is more time consuming to make. My friend also reminded me that her mom used to make it layered with evaporated milk. I should definitely try to make it that way when I have more time. But I really love the look of the colourful layered jello. It always brings a smile to my face because it reminds me of my mother making it for us when we were kids šŸ˜€
Jelly Candy

Jelly Candy

Prep Time: 10 minutes

Total Time: 10 minutes

16 Squares

Ingredients

  • 1 box flavoured Jelly Powder (80 grams)
  • 2 envelopes of Gelatin
  • 2 cups Boiling Water
  • 1/4-1/2 cup finely shredded Coconut

Preparation

  1. In a medium bowl, mix jelly powder and gelatin with boiling water.
  2. Stir with spoon or whisk until all the powder is dissolved.
  3. Pour liquid into a 8" x 8" pan.
  4. Put in the fridge to cool it completely.
  5. Cut them into small squares and coat them with shredded coconut.
https://www.memorabledishes.com/jelly-candy/

Robertsons Jelly Powder

Lychee and Mango Jelly Powder

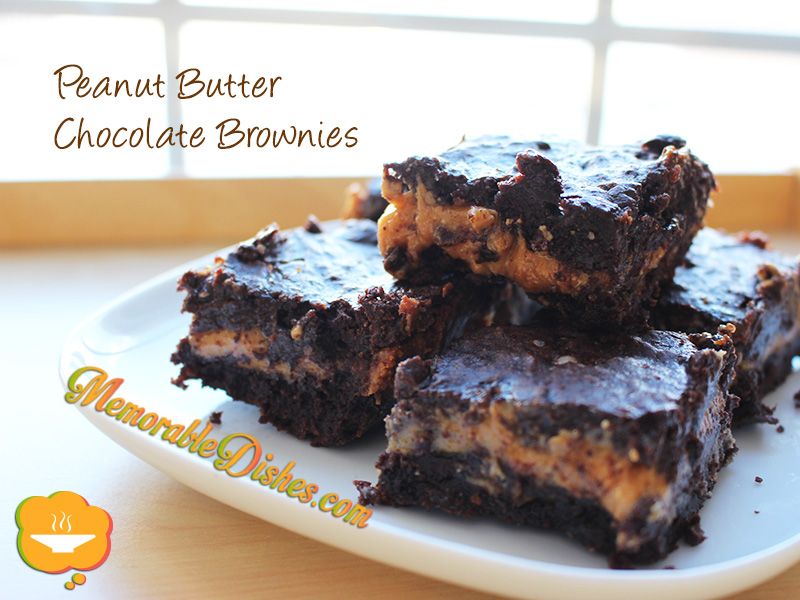
Peanut Butter Chocolate Brownies

Peanut Butter Chocolate Brownies

I originally found this Memorable Treat when I was looking for dairy-free desserts for a dinner party I was attending. I love Texanerin.com because of the healthier versions of delicious desserts on their site. Iā€™ve had desserts which are supposed to be healthier but taste like cardboard. Iā€™d rather skip dessert if it tastes crappy. The whole point of having dessert is to treat ourselves. And because I donā€™t have desserts everyday, when I have one it better be darn good!

These peanut butter chocolate brownies are a great compromise between delicious and healthier brownies because theyā€™re made with whole wheat flour and coconut oil. The sugar is on the high side. However, she did mention using honey wouldnā€™t work but you could try using coconut sugar. You can always test it using less sugar to suit your taste.

Now where was I? Yes, my dinner party dessert. I decided on choosing this recipe because my husband loves the peanut butter and chocolate combination and also this recipe is pretty easy to make with ingredients I have on hand already. This is a Memorable Dish times three because within the span of one week, I made this recipe three times! The original one for the dairy-free dessert dinner party. Then the next day, I made another one to bring to a friendā€™s house. And, because my husband complained that I kept making these brownies for our friends and he didnā€™t have enough, I made another batch mid-week just for ourselves. These peanut butter chocolate brownies are not only delicious but easy enough to make three times a week!Peanut Butter Chocolate Brownies

Peanut Butter Chocolate Brownies

Prep Time: 15 minutes

Cook Time: 25 minutes

Total Time: 40 minutes

16 Brownies

Ingredients

  • Filling
  • 1 cup salted natural Peanut Butter
  • 1/3 cup Honey
  • 1/4 cup Coconut Oil, room temperature (normal butter works for a non-dairy-free version)
  • Brownies
  • 1/2 cup Coconut Oil or Olive Oil (or Canola)
  • 1 cup Granulated Sugar or Coconut Sugar
  • 3 large Eggs, room temperature
  • 2 teaspoons Vanilla Extract
  • 3/4 cup Dutch-process cocoa powder
  • 3/4 cup Whole Spelt, Whole Wheat Pastry or Whole Wheat Flour
  • 1/4 tsp Salt

Preparation

  1. Preheat your oven to 350Ā°F. Line an 8" x 8" pan with parchment paper or spray the pan with baking spray.
  2. Combine filling ingredients (peanut butter, honey and coconut oil) and place in fridge while you prepare the brownie batter.
  3. In a medium bowl, stir together the oil and sugar. Add the eggs and vanilla and beat just until combined.
  4. In a small bowl, mix together the cocoa powder, flour and salt. Add the flour mixture to the wet mixture. It will be really thick, but that's okay. Only stir until combined!
  5. Spread half of the batter into the prepared pan. To get the peanut butter filling somewhat evenly into the pan, I rolled the filling into balls and smushed them to make them flat, and then used those to cover the first half of the brownie batter. Cover the peanut butter filling with the rest of the brownie batter. Bake for 20 to 25 minutes.
  6. Take them out when they are set in the middle. The top will be shiny and may look strange but it has nothing to do with how done they are. They should not be the least bit cakey, but really, really fudgy. Both the brownie part and peanut butter part won't appear to be done when you take it out of the oven, but it is.
  7. Let it cool and then put them in the fridge. They will firm up and get fudgy in there.

Notes

Original Recipe from Texanerin.com.

https://www.memorabledishes.com/peanut-butter-chocolate-brownies/

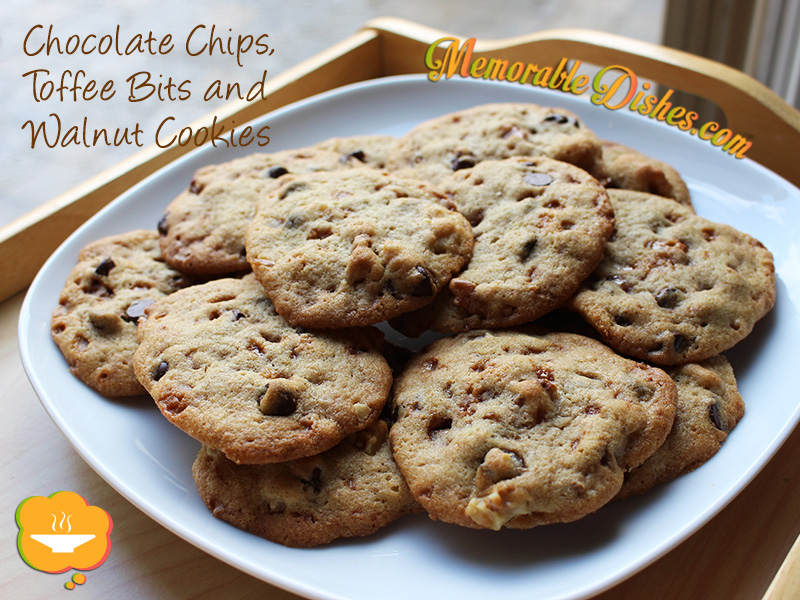
Chocolate Chips, Toffee Bits and Walnut Cookies

Cookies! C is for cookie and itā€™s good enough for meā€¦ This song sung by Cookie Monster is in my head more than I would like because my toddler girl is obsessed with her Sesame Street songs. But the cookie monster at my house is not herā€”itā€™s my husband! He absolutely loves cookies and is constantly hounding me to make them. With the limited time I have writing a food blog post every week, taking care of the kids, working from home, plus cooking meals everyday for my family of five, I cannot possibly be baking cookies everyday! (Believe me, Iā€™m no Martha Stewart Ā  šŸ˜‰ .) However, I would like to create the illusion that Iā€™m a good homemaker so when people come to visit, I greet them wearing a frilly apron serving freshly baked cookies.

Thatā€™s what happened when I went over to one of my friendā€™s house (minus the frilly apron). She would bake fresh cookies for me on the fly. She says she always has a mixed batch of cookie dough in the fridge. So when people come over she just scoops the dough and bakes a small batch of cookies just enough for the guests to eat. This way she always serves freshly baked cookies! How clever is that?

These cookies made it as a Memorable Dish because absolutely everyone in my family requests them. Iā€™ve perfected this recipe by combining chocolate chips, toffee bits and walnuts. My mouth waters just thinking about them. I tried making these cookies with just coconut oil to be a little healthier but I found theyā€™re just not quite the same. So I compromised by using half butter and half coconut oil and really love the result. Cookies without the buttery taste are just not cookies! I also use half white and half whole wheat flour.

I would like to say that if unexpected guests come to visit they will be lucky enough to get some freshly baked cookies. Technically, I should have a stash of frozen cookie balls waiting to be baked and served. But if my family knows cookie balls are in the freezer, they would pace around the freezer like a bunch of hungry wolves every night waiting for those cookies to be baked. I donā€™t think they would rest until all the cookie dough is gone. Soooo the unexpected guests might not be so lucky to taste this Memorable Treat afterall šŸ˜‰ .Chocolate Chips, Toffee Bits and Walnut Cookies

Chocolate Chips, Toffee Bits and Walnut Cookies

Prep Time: 20 minutes

Cook Time: 10 minutes

Total Time: 30 minutes

48 Cookies

Ingredients

  • 1/2 cup Butter, softened
  • 1/2 cup Coconut oil
  • 1/2 cup Packed Brown Sugar
  • 1/2 cup Granulated Sugar
  • 2 Eggs
  • 1 1/2 tsp Vanilla Extract
  • 1 cup All-purpose Flour
  • 1 cup Whole Wheat Flour
  • 1 tsp Baking soda
  • 1/2 tsp Salt
  • 1 cup Semi-sweet or Dark Chocolate Chips
  • 1 cup Toffee bits
  • 1 cup Chopped Walnuts

Preparation

  1. Heat oven to 375Ā°F.
  2. In a large bowl, beat softened butter, coconut oil, brown sugar and granulated sugar until fluffy.
  3. Beat in eggs and vanilla until creamy.
  4. In a medium bowl, mix together flour, baking soda and salt.
  5. Gradually blend the dry ingredients into the wet ingredients.
  6. Stir in chocolate chips, toffee bits and chopped walnuts.
  7. Drop approximately 1 tablespoon of cookie dough onto ungreased cookie sheet.
  8. Make sure you have enough space in between the cookie dough because it will spread.
  9. Bake 10 to 12 minutes until golden brown.

Notes

Note #1: If youā€™re planning ahead (and if you remember), take the butter out of the refrigerator the night before so that the butter is at room temperature when baking. For best results, eggs should be room temperature too.

Note #2: If you want to make a larger batch to freeze, scoop the dough out into little balls and place them onto a cookie tray. Freeze the dough balls until they are hard. Then put them into freezer bags. When you are ready to eat them, place them on the cookie tray to bake. If you bake them frozen, cook them a little longer. If you defrost them to room temperature, bake them like you would normally would.

https://www.memorabledishes.com/chocolate-chips-toffee-bits-and-walnut-cookies/

Chinese Sesame Cookie Balls
(ē¬‘å£ę£—ļ¼‰

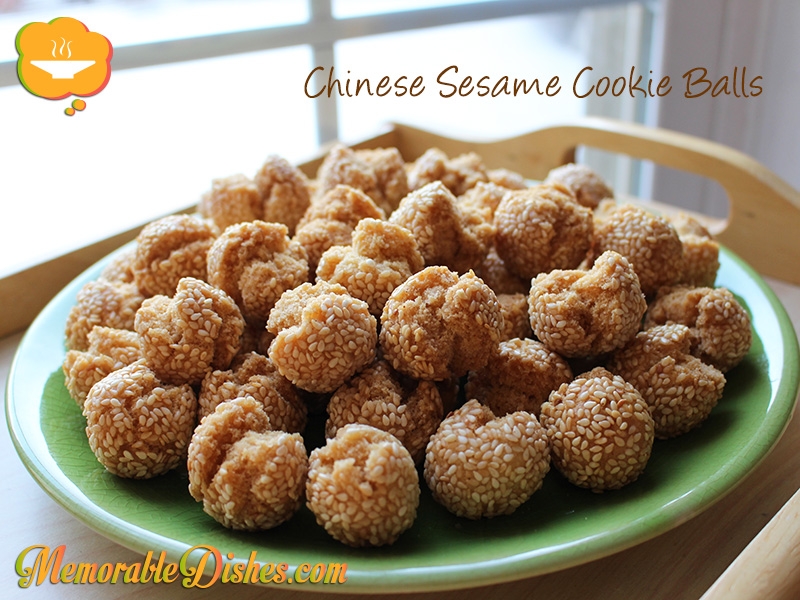
Chinese Sesame Cookie Balls

Making Chinese New Year cookies with my mom is a yearly family tradition. We make two types of cookies and Sesame Cookie Balls is one of them. When we were young, my cousins would come over and and we would make an afternoon out of it. The fun and novelty of making these cookies wore off once we were older. However, my mom would still make a small batch every year to be festive.

When the boys were old enough to sit still, we attempted to make these cookies with them. It usually started calmly and they would listen to directions. They really enjoyed shaping and rolling the balls into the sesame. Chaos would start after five minutes of the whole process. Now that the boys are older, they donā€™t really listen to our instructions any more. So we have to make them extra dough for them to play with while we make the cookies ourselves. But they have fun nonetheless.

My mom follows an old recipe that she copied from some magazine or somewhere. She keeps the recipe in her little notebook. However, I find the measurements are a bit off. She uses a Chinese soup spoon to measure so Iā€™m never sure if itā€™s quite right. I found a few recipes online that I think are close to my momā€™s original recipe. I particularly like this recipe and used it as a guide. Start making this Memorable Treat for Chinese New Year and enjoy your special memories with your family!Chinese Sesame Cookie Balls

Chinese Sesame Cookie Balls
(ē¬‘å£ę£—ļ¼‰

Prep Time: 30 minutes

Cook Time: 15 minutes

Total Time: 45 minutes

Approximately 60 cookie balls

Ingredients

  • 2 cups All-Purpose Flour
  • 1 tsp Baking Powder
  • Ā½ tsp Baking Soda
  • 1/2 cup Granulated Sugar
  • 3 tbsp Hot Water
  • 3 tbsp Vegetable Oil
  • 1 Egg
  • 3/4 cup Raw White Sesame Seeds
  • Vegetable oil for frying

Preparation

  1. In a large bowl, mix flour, baking powder and baking soda.
  2. In a small bowl, add 3 tbsp hot water to sugar and stir until dissolved. Allow to cool slightly before adding in 3 tbsp oil, and then the egg. Mix well.
  3. Add the sugar and egg mixture to the flour and stir together. Using your hands, knead the mixture until it forms a dough. Wrap the dough with cling wrap and refrigerate for about 30 mins.
  4. Roll out the dough and cut into small pieces (approx. 1.5 cm) and form them into balls.
  5. In batches, place the balls into a sieve and dip them into cold water briefly. Shake off excess water and roll them in the sesame seeds. Roll them lightly again before frying to ensure the sesame seeds stick to the balls.
  6. Fill a large pot or pan with 2 inches of vegetable oil and heat until hot.
  7. Add the sesame cookie balls into the hot oil and deep fry at a low temperature, about 4 to 5 minutes, turning the balls in the oil as they cook.
  8. If the heat is too high, the exterior will turn brown too quickly and the inside will be soft and raw. Just when they are about to turn golden brown, remove from heat and drain. They will continue to cook further and will crisp up when cooled.
https://www.memorabledishes.com/chinese-sesame-cookie-balls/

Carrot Cake

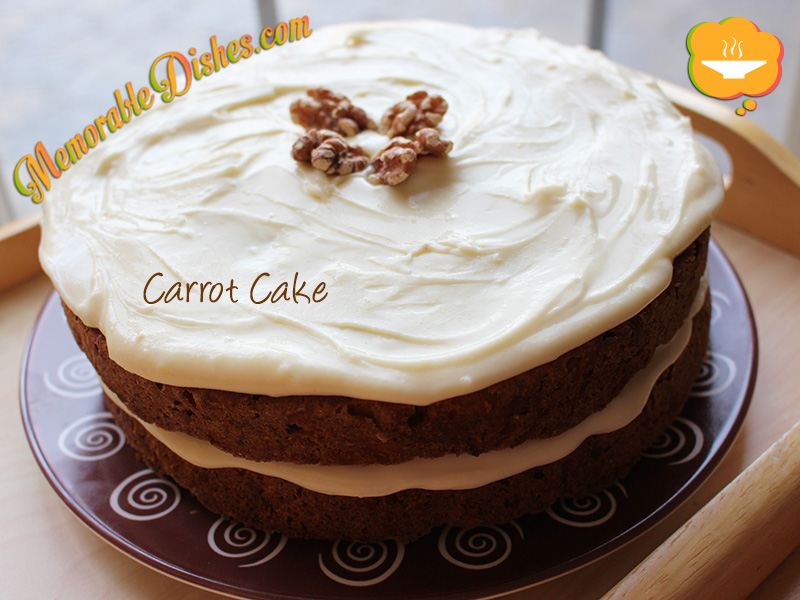
Carrot Cake

Carrot cake is one of my husbandā€™s favourite Memorable Treats. He always wants to eat or make carrot cake. He got this particular recipe from a lady he used to work with. Yes, my husband likes to chat it up with the ladies for sweet treat recipes šŸ˜‰

He doesnā€™t cook very much but he has a sweet tooth so he likes to bake whenever he can. I remember the first time I witnessed him preparing to bake his carrot cake. He bought all the ingredients and laid everything on the kitchen counter looking like a serious baker. I didnā€™t want to interfere and left him to his own devices. After awhile, I wondered why he took so long to bake the cake. The ingredients and instructions are fairly straightforward. So I peeked in to see what he was up to. Little did I know that he was cracking shells for fresh walnuts! When I saw him cracking walnut shells, I thought to myself, he mustā€™ve really cared for freshness. Later I learned that he didnā€™t know you could buy shelled walnuts from a pack.

This carrot cake recipe has become my go to recipe. The ingredients are straightforward and the cake always turns out yummy! Now that my husband has become a veteran at carrot cake baking, he uses packaged walnuts. Maybe I shouldnā€™t have said anything and maybe heā€™d continue to crack fresh walnuts for the carrot cake for extra freshness šŸ˜‰Carrot Cake

Carrot Cake

Prep Time: 30 minutes

Cook Time: 1 hour

Total Time: 1 hour, 30 minutes

1 Cake

Ingredients

  • 1 cup Butter, softened
  • 1 cup Granulated Sugar
  • 1 cup Packed Brown Sugar
  • 4 Eggs
  • 2 cups All-Purpose Flour
  • 2 tsp Baking Powder
  • 1 tsp Salt
  • 1/2 tsp Baking Soda
  • 2 tsp Cinnamon
  • 1 tsp Nutmeg
  • 3 cups Carrots, grated
  • 1/2 cups Raisins (optional)
  • 1/2 cups Pecans or Walnuts, chopped (optional)
  • Frosting
  • 1 package of Cream Cheese (250g), softened
  • 3 cups Icing Sugar
  • 1 tsp Vanilla

Preparation

  1. Preheat the oven to 350 degrees F.
  2. Cream butter, white and brown sugars and eggs in large bowl at medium speed with electric mixer until light and creamy.
  3. Combine flour, baking powder, salt, baking soda and spices in separate bowl.
  4. Add the flour mixture to the creamed mixture and mix on low speed just until blended. Stir in remaining ingredients. Mix well.
  5. Spread in cake pan.
  6. Bake for 50 to 60 minutes.
  7. Check if the cake is done by inserting toothpick in the middle of the cake. When it comes out clean, itā€™s done.
  8. For Frosting
  9. Beat cream cheese, icing sugar and vanilla until smooth.
  10. Frost the cake once itā€™s cooled.

Notes

Note #1: I divided the batter into 2 shallow cake pans and cook for lesser time. If youā€™re using shallow cake pans, cook for less time and check

Note #2: I used less icing sugar than the recipe called for. So add enough to your taste.

https://www.memorabledishes.com/carrot-cake/

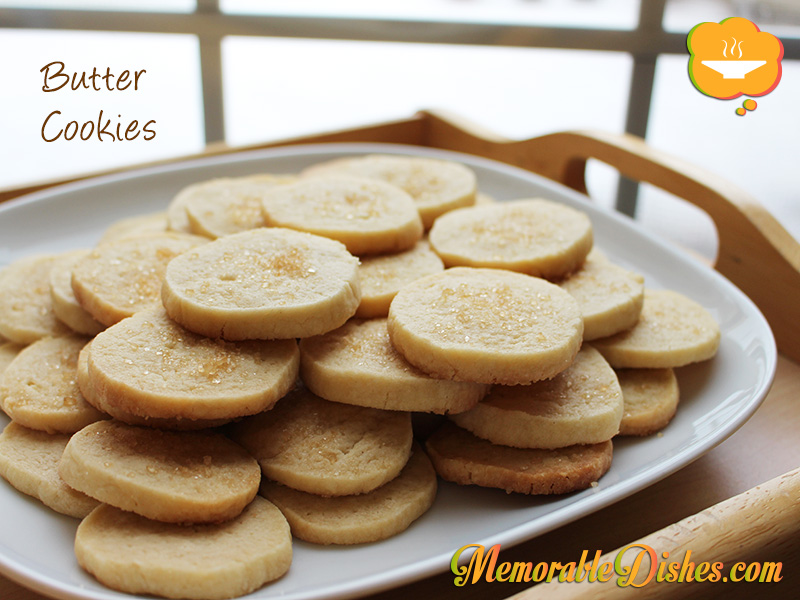
Butter Cookies

Butter Cookies

Itā€™s almost Christmas time and if you havenā€™t done your Christmas baking yet, hereā€™s a great butter cookies recipe. My friend originally found and shared this recipe with me and I have been using it since for my Christmas butter cookies. I love how easy it is to make and the results are always great!

Iā€™ve been making this butter cookies recipe for years and everyone really enjoys them. Usually I roll the dough into a log, slice and bake them. Iā€™ve also rolled them out and cut them into shapes and used icing to decorate them. Being not too keen on sweets, I use a half cup of sugar and use the whole egg instead of what the original recipe calls for. If you just use the egg yolk, the cookie turns out more shortbread-like, which is delicious too.

The kiddies always look forward to this Memorable Treat around Christmas time. I roll them out into a thinner roll and the cookies end up being smaller. The size is great for the kiddiesā€™ hands. However, I end up eating more of them because theyā€™re smaller šŸ˜‰Butter Cookies

Butter Cookies

Prep Time: 20 minutes

Cook Time: 20 minutes

Total Time: 40 minutes

48 Cookies

Ingredients

  • 8 ounces unsalted Butter
  • 3/4 cup granulated Sugar
  • 1/4 tsp Salt
  • 1 1/2 tsp pure Vanilla Extract
  • 1 large Egg yolk
  • 2 cups all-purpose Flour

Preparation

  1. Beat the butter, sugar, salt and vanilla together until smooth and creamy.
  2. Mix in the egg yolk until well incorporated, scraping down the sides of the bowl at least once.
  3. Add the flour and mix just until incorporated.
  4. Scrape onto a lightly floured board and knead a few times, just until the dough smooths out.
  5. Turn onto a sheet of plastic wrap and roll into a log, wrap up and refrigerate for several hours or freeze.
  6. Before baking, preheat the oven to 325Ā°F.
  7. Line your baking sheets with parchment.
  8. Slice the dough into slices about 1/8" thick and place them on the sheets about an inch apart (they won't be spreading very much, but they need air room around each cookie).
  9. Bake until JUST beginning to turn golden around the edges, about 16-18 minutes.
  10. Note: you can do many things with these cookies.
  11. You could roll the dough out and cut shapes.
  12. You could slice them even thinner and sandwich them with chocolate or jam or lemon curd.
  13. You could make them and then dip them half into chocolate.
  14. You could just make them and eat them, which is my favorite.
  15. Whatever you do, they will be delicious.

Notes

For best results, make sure butter and egg should be at room temperature.

Original recipe from: Food.com

https://www.memorabledishes.com/butter-cookies/

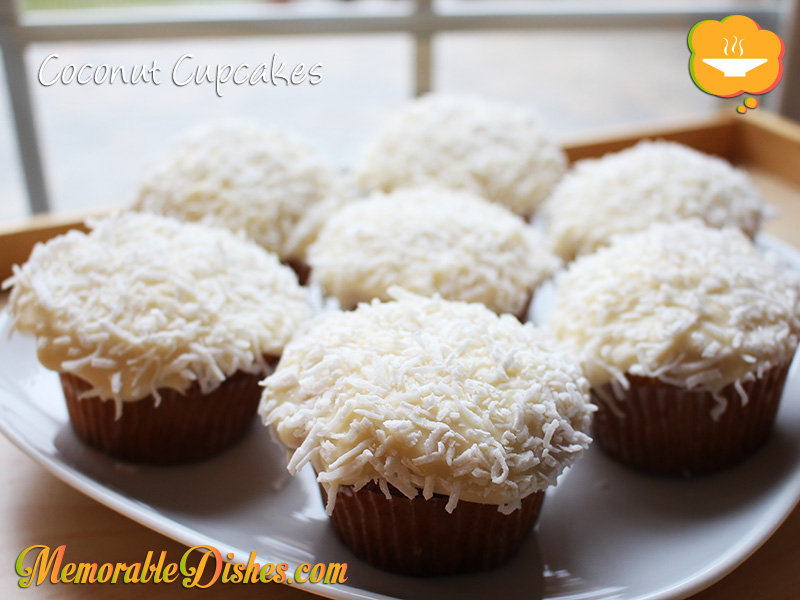
Coconut Cupcakes

Coconut Cupcakes

I absolutely adore these coconut cupcakes. After watching them on Ina Gartenā€™s show, Barefoot Contessa, I HAD to make them. Iā€™ve made them for my own parties and Iā€™ve made them to bring over to my friends. Everyone absolutely loves these cupcakes! When I first saw them on Inaā€™s show, I couldnā€™t find the recipe online so I purchased her cookbook. But Iā€™ve since found her recipe on the Food Networkā€™s site. I love that the recipe makes so many cupcakes that you can always save a few for yourself. šŸ˜‰

When I eat this Memorable Treat, I picture myself sitting at a Paris cafĆ©, having a cafĆ© au lait (I know the French drink this for breakfast but itā€™s my fantasy so Iā€™m having it with my afternoon cupcake šŸ™‚ .) and devouring this giant coconut cupcake in large bites. Then reality hits and one or all of my kids are nearby and I have to share my cupcake with them. The giant cupcake that I was supposed to have for myself diminishes into mere crumbs after each child takes a bite. They must have radar to sense that Iā€™m eating something sweet and decadent.

These cupcakes are actually a great holiday treat! The creamy icing with shredded coconut reminds me of snow-capped houses. After baking them, I canā€™t wait for them to cool off. So I usually end up eating one without the icing. Yum!Coconut Cupcakes

Coconut Cupcakes

Prep Time: 1 hour

Cook Time: 35 minutes

Total Time: 1 hour, 35 minutes

18-20 Large Cupcakes

Ingredients

  • 3/4 pound (3 sticks) unsalted butter, room temperature
  • 2 cups sugar
  • 5 extra-large eggs at room temperature
  • 1 1/2 teaspoons pure vanilla extract
  • 1 1/2 teaspoons pure almond extract
  • 3 cups flour
  • 1 teaspoon baking powder
  • 1/2 teaspoon baking soda
  • 1/2 teaspoon kosher salt
  • 1 cup buttermilk
  • 14 ounces sweetened, shredded coconut
  • For cream cheese frosting:
  • 1 pound cream cheese at room temperature
  • 3/4 pound (3 sticks) unsalted butter, room temperature
  • 1 teaspoon pure vanilla extract
  • 1/2 teaspoon pure almond extract
  • 1 1/2 pounds confectioners' sugar, sifted

Preparation

  1. Preheat the oven to 325 degrees F.
  2. In the bowl of an electric mixer fitted with the paddle attachment, cream the butter and sugar on high speed until light and fluffy, about 5 minutes.
  3. With the mixer on low speed, add the eggs, 1 at a time, scraping down the bowl after each addition.
  4. Add the vanilla and almond extracts and mix well.
  5. In a separate bowl, sift together the flour, baking powder, baking soda, and salt.
  6. In 3 parts, alternately add the dry ingredients and the buttermilk to the batter, beginning and ending with the dry. Mix until just combined. Fold in 7 ounces of coconut.
  7. Line a muffin pan with paper liners. Fill each liner to the top with batter.
  8. Bake for 25 to 35 minutes, until the tops are brown and a toothpick comes out clean. Allow to cool in the pan for 15 minutes. Remove to a baking rack and cool completely.
  9. Meanwhile, make the frosting. In the bowl of an electric mixer fitted with the paddle attachment, on low speed, cream together the cream cheese, butter, and vanilla and almond extracts.
  10. Add the confectioners' sugar and mix until smooth.
  11. Frost with cream cheese frosting and sprinkle with the remaining coconut.

Notes

Note #1: I used unsweetened coconut because I find that everything else is sweet enough.

Note #2: You can divide the batter to make 24 regular size cupcakes.

Note #3: I also used less icing sugar than the recipe called for. So add enough to your taste.

Recipe courtesy of The Barefoot Contessa Cookbook, 1999 All Rights Reserved Read more at: Foodnetwork.com

https://www.memorabledishes.com/coconut-cupcakes/

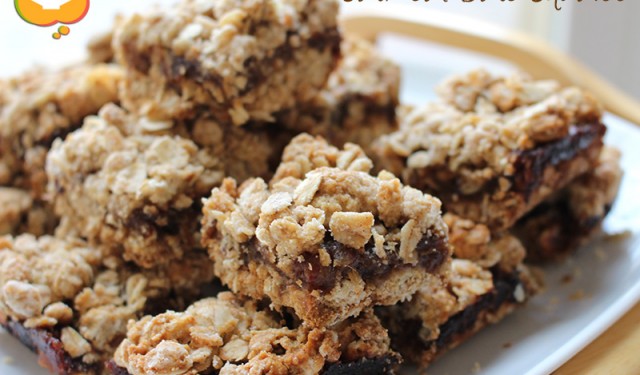
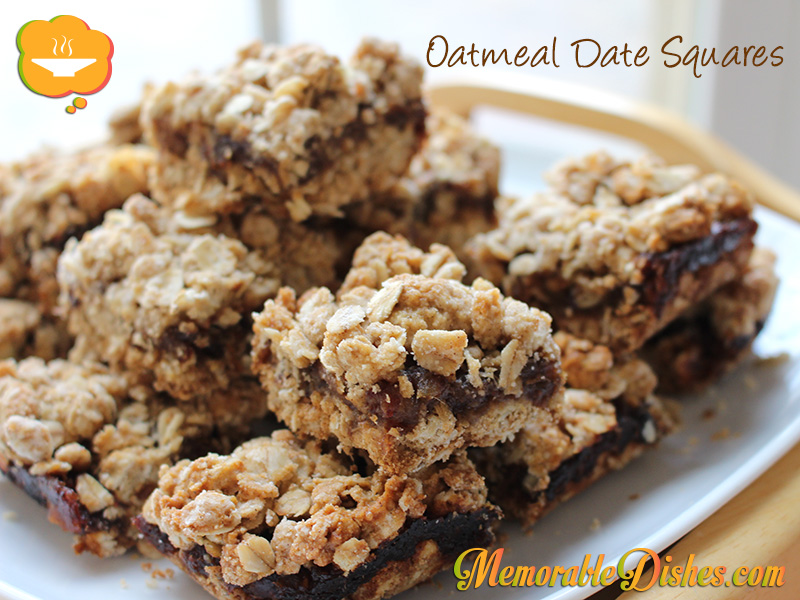
Oatmeal Date Squares

Oatmeal Date Squares

When I just had one child, I had all the time in the worldā€”I organized play dates, matched outfits, and made homemade meals all the time. Instead of buying store-bought cookies and treats, I would bake homemade ones. I used to make oatmeal date squares and other treats for my oldest son all the time. I even experimented with making granola ā€œballsā€. That recipe was very time-consuming and involved rolling hot granola mixture into balls with my hands super speedily so that I didnā€™t burn myself šŸ˜› Now that I have three children, I cannot leisurely bake as much anymore. But I still like to bake them semi-healthy treats as much as possible.

I havenā€™t made this Memorable Dish for awhile. While sifting through my printed recipes, I came across this one. The original recipe I found said to cook the dates with sugar but I found it unnecessary because the dates are sweet enough already. I cut down the amount of sugar from the original recipe to our familyā€™s taste because I usually find baked goods recipes super sweet for me.

This oatmeal date squares recipe is fairly easy to make and a great nut-free snack to bring to school. Now with three children, I donā€™t know how long these oatmeal date squares will last! Thatā€™s why I cut them smaller to make them seem to last longer šŸ˜‰Oatmeal Date Squares

Oatmeal Date Squares

Prep Time: 25 minutes

Cook Time: 35 minutes

Total Time: 1 hour

16 Squares

Ingredients

  • 1 1/2 cups pitted Dates, chopped
  • 3/4 cup Water
  • 1 1/2 cups Oats
  • 1 cup All-purpose Flour
  • 1/2 tsp baking soda
  • 1/4 tsp Cinnamon
  • 1/2 cup packed Brown Sugar
  • 1/4 tsp Salt
  • 1/3 cup Butter, melted
  • 1 Egg

Preparation

  1. Position rack in middle of oven. Preheat oven to 350Ā°F.
  2. In a small pot, combine dates and water. Bring the liquid to a boil.
  3. Once the water comes to a boil, turn down heat and uncover pot.
  4. Cook date mixture for approximately 5 minutes or until itā€™s thickened.
  5. Stir and mash up dates while theyā€™re cooking. Turn off heat once the liquid has evaporated.
  6. In large bowl, mix oats, flour, baking soda, cinnamon, brown sugar, and salt until combined.
  7. Stir in melted butter and egg until everything is blended.
  8. In a buttered 8-inch square pan, pat half of the oat mixture on the bottom.
  9. Spread the date mixture onto the oat mixture carefully.
  10. Then gently pat the remaining oat mixture over the date mixture.
  11. Bake for 20-30 minutes or until lightly brown.
  12. Cool on a rack and cut into squares.

Notes

If I remember and have time, I bake the squares for 15 minutes and then rotate the pan and bake for another 15 minutes. This helps to cook it evenly.

https://www.memorabledishes.com/oatmeal-date-squares/

Show Buttons
Hide Buttons