Category Archives: Dessert

Recipes of Desserts

Chocolate Chip Banana Bread

At one time or another we have overripe bananas that we don’t know what to do with. Hence, a lot of us have our go-to banana bread recipes that we use to make leftover bananas into something delicious. This one is my all-time favourite banana bread recipe. I originally found this recipe online but have adapted it to our family’s taste. Since I make this for the kiddies as a snack, I try to use healthier ingredients such as coconut oil and whole wheat flour. However, if you don’t like the taste of coconut oil or whole wheat flour, you can use butter and all-purpose flour instead.

I find that even if I use coconut oil and whole wheat flour, it’s a very tasty bread. You can also use half of the healthier ingredients and another half with not so healthy ingredients. I’ve tried all combinations of healthy and not so healthy ingredients and the results are pretty similar.

The boys enjoy making this Memorable Dish with me because they get to sneak chocolate chips in their mouths here and there as I’m making it. Of course they enjoy licking the coveted spatula, whisk, spoon and bowl with the leftover batter. As soon as I start making banana bread, my second son brings his little chair to prop himself up to help me.

Sometimes I make this into a loaf or sometimes into muffins. So I include the recipe for both. You just have to adjust the baking time a bit. If you have a good banana bread recipe, please share. I’m always trying to find new ways to make old favourites.
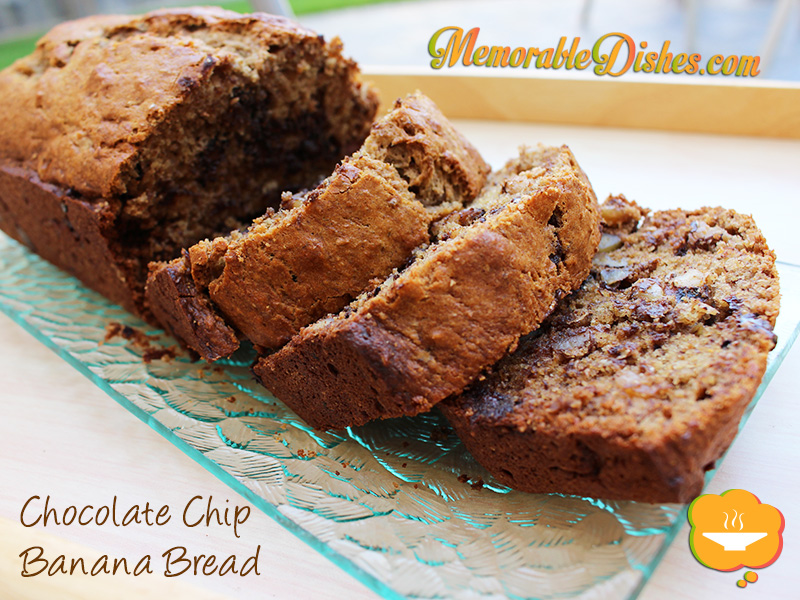
Chocolate Chip Banana Bread

Chocolate Chip Banana Bread

Prep Time: 15 minutes

Cook Time: 60 minutes

Total Time: 1 hour, 15 minutes

1 loaf or 12 muffins

Ingredients

  • 2 large or 3 medium sized peeled Bananas (very ripe)
  • 1/3 cup melted Butter or Coconut Oil
  • 1/3 cup of Sugar
  • 1 Egg, beaten
  • 1 tsp Vanilla Extract
  • 1/2 cup semi-sweet Chocolate Chips
  • 1 cup toasted chopped Walnuts (optional)
  • 1 1/2 cups of all-purpose or whole wheat Flour
  • 1 tsp Baking Soda
  • 1/2 tsp of Cinnamon
  • 1/8 tsp Salt

Preparation

  1. Preheat oven to 350°F.
  2. Butter the 4x8 inch loaf pan or line 12-cup muffin pan with paper liners.
  3. In large bowl, whisk flours, baking soda, cinnamon and salt.
  4. In another bowl, mash bananas with a wooden spoon or whisk.
  5. Add melted butter/coconut oil, sugar, egg and vanilla extract to the mashed bananas to combine.
  6. Then mix in chocolate chips and walnuts (if using).
  7. Pour the wet ingredients into the dry ingredients. Mix the batter but don't overmix (use a fork if you need to). Pour batter into loaf pan or muffin cups.
  8. Bake until loaf or muffins are puffed and wooden pick inserted into center comes out clean, about 20-30 minutes for muffins and 45 minutes to 1 hour for loaf.
  9. Cool for 5 minutes in the pan before taking it out. Continue cooling it on the rack until it’s cool enough to eat.

Notes

You can freeze overripe bananas to be used later. Make sure it’s fully defrosted when making the banana bread.

https://www.memorabledishes.com/chocolate-chip-banana-bread/

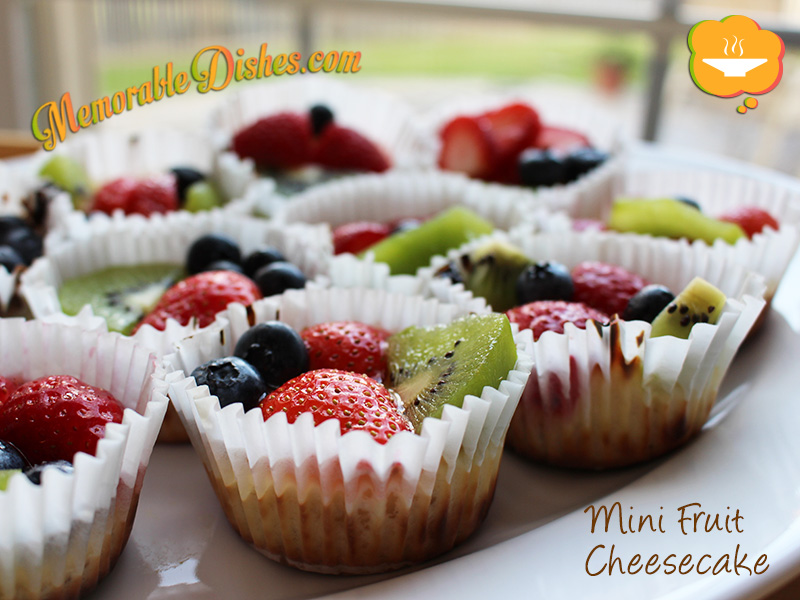
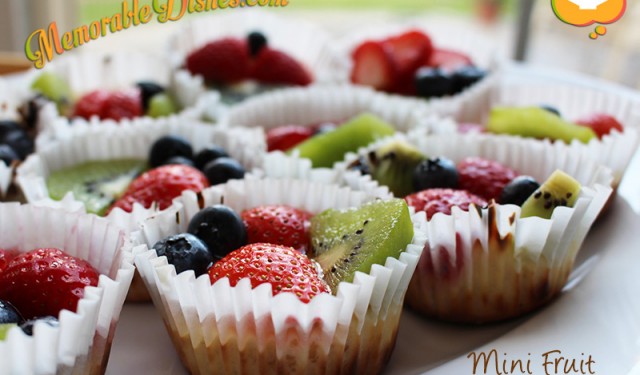
Mini Fruit Cheesecake

Mini Fruit Cheesecake

Recently my mom mentioned to me how she used to make these mini fruit cheesecakes for us. We had already moved to Canada by then and were in our teens except for my much younger brother. Back in the day when one couldn’t trade recipes by email, my mom would often write her recipes on pieces of paper on hand. (She continues to write recipes on pieces of paper that were lying around because she doesn’t use computers.)

When I asked my mom for the recipe, she handed me this folded and wrinkled piece of paper. This particular recipe was written on the back of a children’s menu where my mom used to work. The kids’ meals were between $2.95 to $3.95. Each meal came with a beverage, choice of sides and a small sundae. (You could imagine how old this recipe was.) A co-worker of hers brought these mini cheesecakes to work and my mom, as curious about new foods as always, asked her for the recipe. Since then, she has been making them for our family on many occasions. I even remember my cousin used her recipe and made these yummy cheesecakes for us too.

Then I thought to myself, “Yeah! My mom used to make these for us all the time! Why hasn’t she made it in awhile?” I remember getting very excited about these colourful fruity mini cheesecakes when she used to make them. I decided to transfer her paper recipe into electronic form hoping that my little ones get as excited as we were when we had this Memorable Dish.Mini Fruit Cheesecake

Mini Fruit Cheesecake

Prep Time: 30 minutes

Cook Time: 20 minutes

Total Time: 50 minutes

24 mini cheesecakes

Ingredients

  • 2 packs light Cream Cheese (250 grams each)
  • 2 Eggs
  • 1/2 cup Sugar
  • 1 tsp Vanilla Extract
  • Fruits, sliced (Strawberries, Blueberries, Kiwis, etc.)
  • 2 packets unflavoured Gelatine (each packet is equivalent to 1 tablespoon)
  • 2 cups Apple Juice
  • 24 Vanilla Wafers

Preparation

  1. Beat cream cheese until smooth, add 1 egg and 1/4 cup of sugar at a time. Then add 1 teaspoon of vanilla extract until everything is mixed together.
  2. Line two 12-cup muffin pans with cupcake liners. Put vanilla wafers on the bottom of each cup.
  3. Fill each cup with about 1 tablespoon of cream cheese first and then distribute the rest evenly.
  4. Bake at 350°F for 20 minutes.
  5. Wait until it’s cooled, then top the mini cheesecakes with fruit.
  6. In a small pot, mix the apple juice with the gelatin. Whisk and boil at medium heat until the colour turns clear.
  7. Cool the glaze for 1 minute. Spread the glaze on top of the fruit with a pastry brush or small spoon.
  8. Refrigerate to cool completely.

Notes

Note #1: You can also find unflavoured gelatine from the bulk food store.

Note #2: If you are short on time, bake cheesecake cups a day ahead and top fruit and glaze the same day of serving.

https://www.memorabledishes.com/mini-fruit-cheesecake/

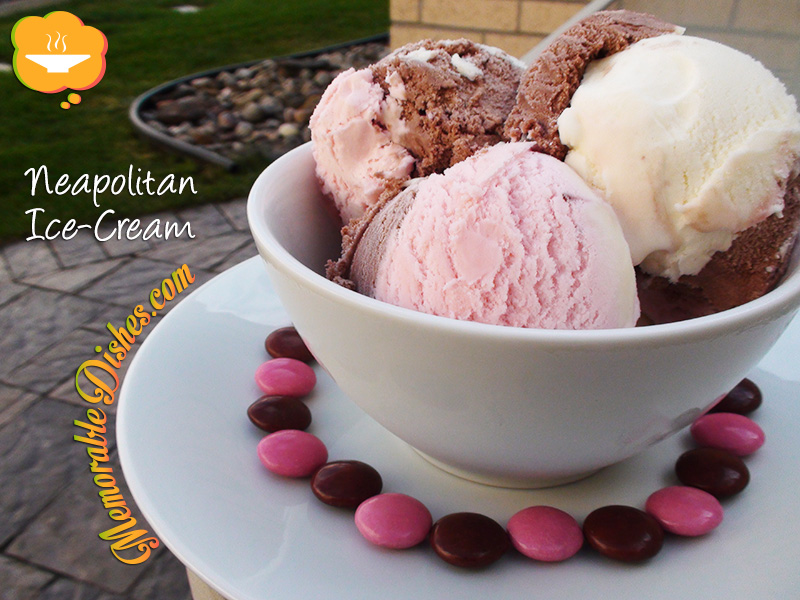
Neapolitan Ice-Cream – My Grandfather’s Favourite!

Neapolitan Ice-Cream

As I searched the grocery store for my grandfather’s favourite ice-cream, the Neapolitan, I thought to myself, do stores still carry this flavour? Have they ousted the common Neapolitan in favour of some new fancy schmancy flavour? But alas, I found it residing harmoniously with all the other ice-creams, common and fancy alike.

Who would’ve thought that flavours such as the Neapolitan still has a place in an ice-cream world of Häagen-Dazs® and Ben and Jerry’s? With all the new flavours and premium ice-cream readily available, it’s easy to forget this “Family Classic” as it is labelled on the Neapolitan carton.

If you are aware of Chinese food culture, people in the older generation don’t like eating cold things. They don’t like eating cold salads or drinking cold water let alone eating frozen ice-cream! Somehow, anything cold is deemed to be not good for you.

Thinking back, it is not surprising how my grandfather embraced eating ice-cream. He was brought up with more Western influences compared to most Chinese men from his generation. He even learned some English and could speak a few words. I feel that my upbringing has been greatly influenced by my grandparents’ progressive thinking for that generation.

As I was taking bites of this ice-cream, for research purposes of course, all the childhood memories came back to me. When we lived in Hong Kong, my grandfather always treated us with a bowl of ice-cream after dinner. When my family briefly moved to the States, he always had ice-cream in the freezer as well. At that time, he upgraded to a new favourite flavour, Rocky Road. But once in awhile, we still got to taste the classic Neapolitan. My grandfather insisted that he bought the ice-cream for us kids but we all knew he really bought it for himself 😉

Neapolitan Ice-Cream

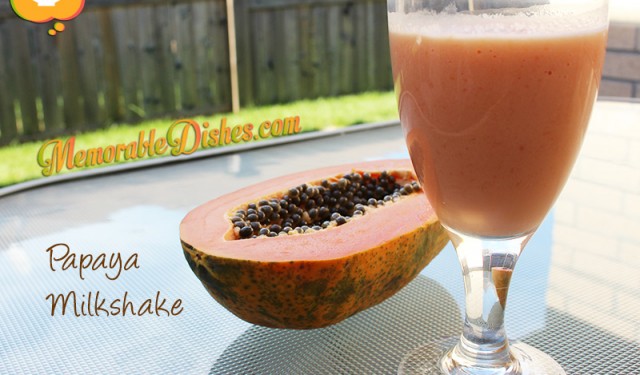
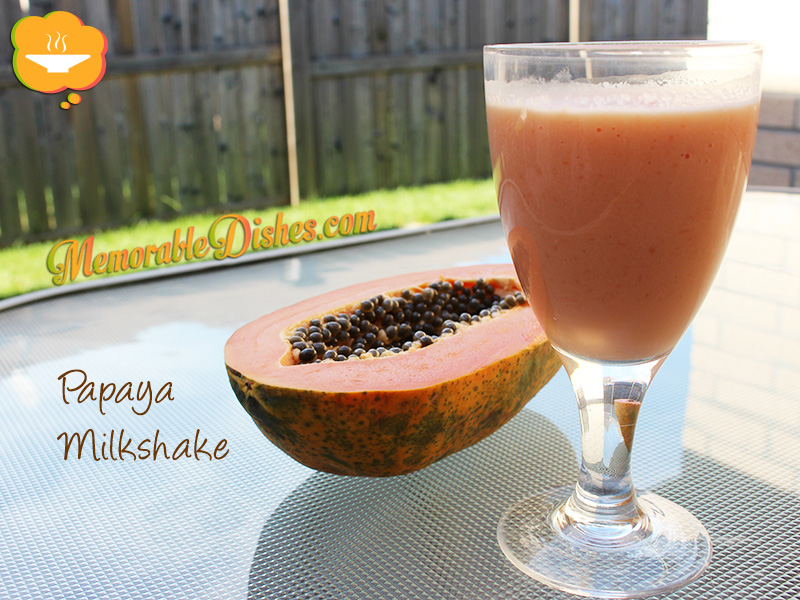
Papaya Milkshake

Papaya Milkshake

Oh how I miss buying papaya milkshakes from Hong Kong vendors and drinking it as I stroll down the streets… In Hong Kong there are lots of food stalls everywhere. One of the things I miss most are the fruit juice stands. They are not really stands but actual small shops that are exposed to the outside. Since Hong Kong is a subtropical city, the vendors are able to sell things this way all year around.

This Memorable Drink triggered memories of my dad always buying us carrot juice from these shops. As a kid, I grew up really liking carrot juice and look forward to getting it every time we go. However, I reminisce about the sweet taste of the papaya milkshake more. I still remember the sound of the supersonic blender as the vendor prepared our made-to-order milkshakes. It’s not the fancy juice bars that you might be familiar with nowadays. Picture a guy, usually wearing a wife-beater shirt (sorry to be politically incorrect) and making our drinks super fast and fresh.

That’s one of the things I miss about living in Hong Kong, when you get thirsty while walking around, boom, there are fresh juice stands (shops) everywhere. As I recreate this Memorable Drink from home, I recollect walking around in the super humid weather of Hong Kong. Even the hot weather could be unbearable at times, the thought of getting a papaya shake sweetens the day.Papaya Milkshake

Papaya Milkshake

Prep Time: 5 minutes

Total Time: 5 minutes

Ingredients

  • 2 cups Papaya, chopped
  • 1 cup Milk (Whole or 2%)
  • 1 tbsp Honey
  • 2-4 Ice Cubes

Preparation

  1. Blend all the ingredients together in a blender.
  2. Imagine yourself in subtropical weather (only pertains to those who live in subarctic climate).
  3. Drink and enjoy!
https://www.memorabledishes.com/papaya-milkshake/

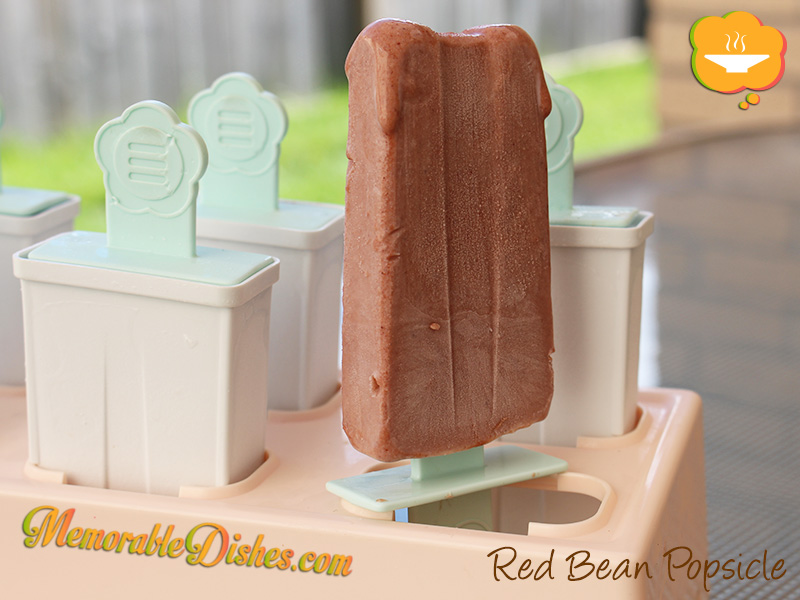
Red Bean Popsicle

Red Bean Popsicles

This Memorable Dish is a derivative of a popular Chinese dessert, red bean soup. It is made from boiling red beans or adzuki beans into a soup sweetened with sugar. Actually, I’m not too crazy about this ubiquitous dessert that can be found at every Cantonese restaurant. Maybe it’s because we tend to get it as a complimentary dessert when we order a set meal. That’s why I’m a little bored by it. However, I love red bean popsicles!

Red bean popsicles trigger fond memories of hot summer days in Hong Kong when my mom made them for us as kids. Believe it or not, I still have her original popsicle molds—these plastic molds have lasted for over 30 years! I find that the plastic popsicle molds nowadays are not as durable. I bought new ones a couple of years ago and they cracked already.

Since red bean soup itself is not a favourite dessert of mine, I don’t have the inclination to boil the red beans for this recipe. 😛 Inventive entrepreneurs have allowed me to recreate this Memorable Dish with their canned sweetened red bean paste. How convenient!

My recipe for red bean popsicle has coconut milk in it. Some Chinese restaurants do serve a contemporary version of red bean soup with coconut milk. I tend to like this version better. This super easy popsicle recipe uses only three ingredients.

Red Bean Popsicles

Red Bean Popsicle

Prep Time: 10 minutes

Total Time: 10 minutes

6 Popsicles

Ingredients

  • 1 cup canned sweetened Red Bean Paste
  • 1/2 cup of Condensed Milk
  • 1 cup of Coconut Milk

Preparation

  1. Blend all the ingredients together in a blender.
  2. Fill the popsicle molds.
  3. Freeze for at least 6 hours or overnight.

Notes

My recipe is based on my own popsicle molds with a little extra leftover. Adjust the amount of ingredients accordingly for your own molds.

https://www.memorabledishes.com/red-bean-popsicle/

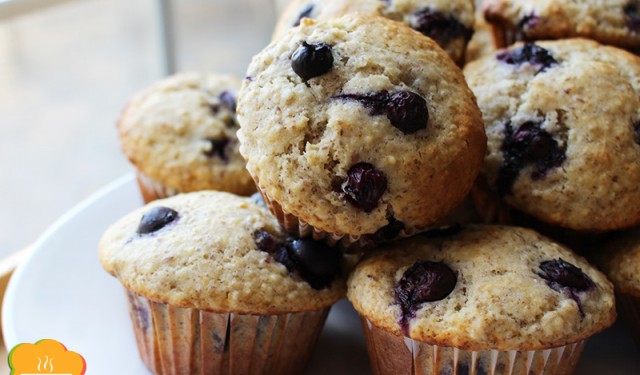
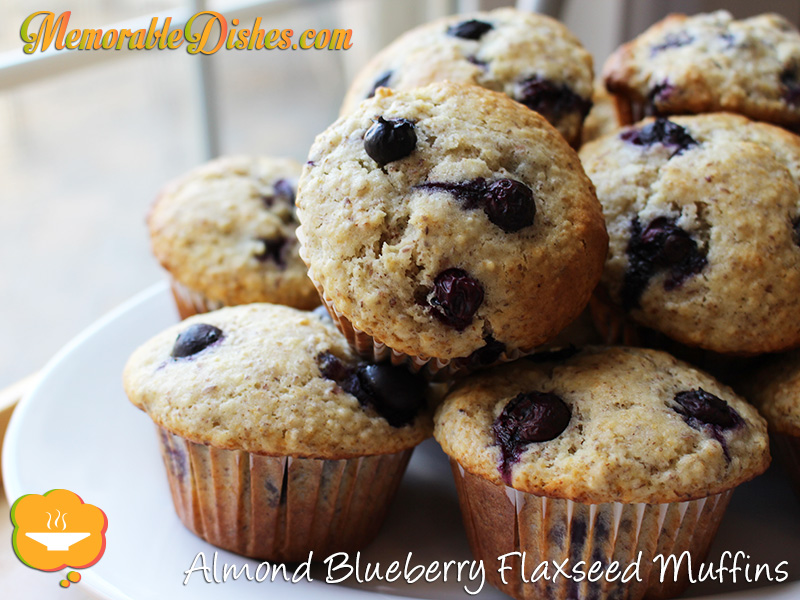
Almond Blueberry Flaxseed Muffins

Almond Blueberry Flaxseed Muffins

This Memorable Dish has become my go-to muffin recipe. It’s healthy, not too sweet, and light and fluffy. I don’t remember where it originated from. Surprisingly, I didn’t find this recipe online. I think I initially found this recipe from a newspaper—how retro! I’ve modified the original recipe to suit my family’s liking as usual because we don’t like things too sweet.

This Memorable Dish has been a notorious success with my family. I’d make it when my cousins from the States visited. But I preferred to make them ahead of time so that my cousins would have something to eat for breakfast the next morning. One of my cousins enjoyed them so much she asked for the recipe so that she could make it at home. When we had our Canadian and US families gathered for brunch, she made them here in Canada for us! She really likes these muffins 🙂

This Memorable Muffin is made from almond flour (ground almonds) so the kids cannot bring them to school due to a nut-free policy. However, we make them for home and the kids have them for breakfast or as a snack. Now, my third little one will get to taste this yummy muffin for the first time!

Almond Blueberry Flaxseed Muffins

Almond Blueberry Flaxseed Muffins

Prep Time: 15 minutes

Cook Time: 20 minutes

Total Time: 35 minutes

12 Muffins

Ingredients

  • 1 3/4 cup All-purpose Flour
  • 1/2 cup Almond Flour (ground almonds)
  • 4 tsp Baking Powder
  • 1/2 tsp Salt
  • 1/4 cup Ground Flaxseed
  • 1 1/2 cup fresh Blueberries
  • 2 large Eggs
  • 1 cup 2% Milk
  • 2/3 cup Sugar
  • 1/3 cup Almond oil
  • 1 tsp Vanilla Extract

Preparation

  1. Position rack in middle of oven. Preheat oven to 400°F.
  2. Line 12-cup muffin pan with paper liners.
  3. In large bowl, whisk flours, baking powder, salt, and flaxseed to combine. Add berries and stir to coat.
  4. In another bowl, whisk eggs, milk, sugar, oil, and vanilla extract to combine.
  5. Pour egg mixture into berry mixture and gently mix with a fork to moisten dry ingredients. Don't overmix (a few lumps in batter are normal). Pour batter into muffin cups.
  6. Bake until muffins are puffed and wooden pick inserted into center comes out clean, about 20 minutes. Cool 5 minutes on rack before serving.

Notes

Note #1: If you don’t have almond oil on hand, you can also use a neutral tasting oil such as canola oil.

Note #2: I have also used frozen blueberries and the results are the same except the whole muffin turns blue 🙂

https://www.memorabledishes.com/almond-blueberry-flaxseed-muffins/

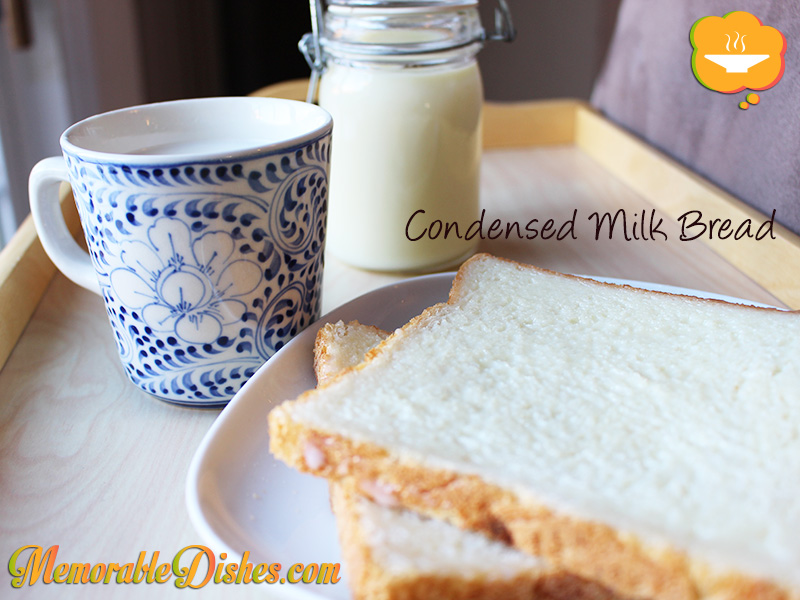
Condensed Milk Bread

Condensed Milk Bread

I don’t know if it’s a Hong Kong British thing but when I was growing up my grandmother used to spread condensed milk on top of white bread for us to eat. We would have it for breakfast or as a snack. Nowadays, it would be considered an unhealthy snack let alone a breakfast for kids! Sweetened condensed milk full of sugar on top of white bread – the horror! I’m surprised my older brother and I weren’t bouncing off the walls nor obese despite this fairly frequent indulgence.

I did a quick search online for condensed milk bread and saw that others have created the same treat! Here, the author called it condensed milk toast and got the recipe from Rachel Ray magazine. They both used fancy brioche toast. My grandmother just spread the condensed milk on top of plain soft, fluffy, untoasted white bread bought from an Asian-Western style bakery.

Not only was this condensed milk bread the best thing ever, but my grandmother also created another treat out of the condensed milk. There was no way we could finish a whole can of condensed milk spread on bread in one sitting (or could we? 😉 ) She would pour the leftover can of condensed milk into a glass jar and store it in the fridge. It was impossible to scrape off all the residual thick condensed milk still stuck inside of the can. So my resourceful grandmother put boiling water inside the can and swished it around. And voilà! Condensed milk as a drink! I think I loved this sweetened milk drink more than the bread itself.

This is one of those Memorable Dishes that is so simple yet brings back the fondest of memories. I don’t buy condensed milk very often. But every time I see a can of it at the grocery store I think of my grandmother’s condensed milk bread and drink.

Condensed Milk Bread

Condensed Milk Bread

Prep Time: 5 minutes

Total Time: 5 minutes

4

Serving Size: 4

Ingredients

  • 4 slices of White Bread (If possible, get it from an Asian-Western style bakery.)
  • 1 can of Condensed Milk

Preparation

  1. Spread the condensed milk on bread and enjoy!
  2. For Condensed Milk Drink Preparation
  3. Pour leftover condensed milk in a glass jar and refrigerate.
  4. Pour boiled hot/warm water in the condensed milk can, filling half of the can only.
  5. Scrape the sides of the can and stir with a spoon.
  6. Pour diluted milk into a cup and fill the cup with more water.
  7. Add more condensed milk into cup to taste.
  8. Stir and enjoy!
https://www.memorabledishes.com/condensed-milk-bread/

Show Buttons
Hide Buttons