Category Archives: Main Course

Recipes of Main Courses

Ratatouille

Ratatouille

I have never been a fan of ratatouille. Maybe I’ve only had bad ratatouille. Until my George Brown College cooking class when my teacher opened my eyes to what good ratatouille could taste like, I avoided it like the plague. Before then, my encounter with ratatouille had not been a favourable one. I might have had mushy ratatouille as a side dish at restaurants but I don’t quite recall how I have come to block this dish from my culinary memory.

Coincidentally, while I was prepping to write this blog post, I came across a ratatouille recipe from Anthony Bourdain’s cookbook and he shared my own sentiments about ratatouille. He mentioned that he couldn’t stand that “ratatouille is traditionally sort of sludgy.” I couldn’t agree more. Because you cook all the vegetables together without taking into consideration of each vegetable’s cooking time, the dish ends up being one big mushy vegetable stew. Bourdain’s recipe requires you to cook each vegetable separately and then mix in the seasonings afterwards. This prevents the vegetables from over cooking.

Mushy vegetables stewed together in one big pot was what I knew to be ratatouille until my George Brown culinary teacher introduced me to a new way of cooking it. He separated the vegetables like Bourdain’s recipe but he kicked it up a notch by roasting the vegetables. I couldn’t believe my tastebuds when I had the ratatouille tasting in my class after he prepared it. Wow!

Ratatouille has now become my all-time favourite vegetable dish. This Memorable Dish is not difficult to make. It’s just a bit more time consuming because you have to roast each vegetable separately. However, it’s a great dish to make ahead of time even overnight. All you have to do is reheat it in the oven until it’s warmed through. It tastes best at room temperature. If you have a phobia of ratatouille, please give this dish a try because it will change what your mind and taste buds think of traditional ratatouille.
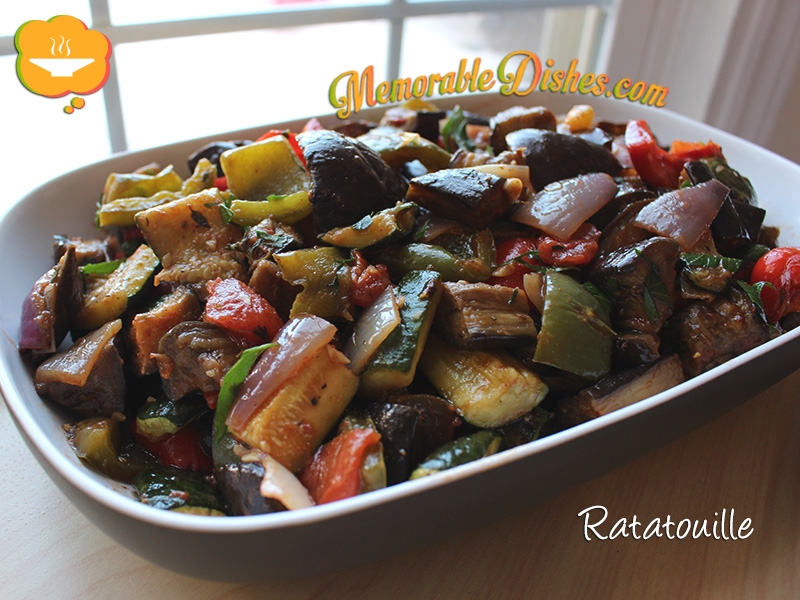
Ratatouille

Ratatouille

Prep Time: 20 minutes

Cook Time: 1 hour, 10 minutes

Total Time: 1 hour, 30 minutes

Serving Size: 6-8

Ingredients

  • 2 Red Peppers
  • 2 Green Peppers
  • 1 Eggplant
  • 2 green Zucchinis
  • 2 yellow Zucchinis
  • 2 Roma Tomatoes
  • 1 Onion (medium)
  • 4 cloves of Garlic, chopped
  • Few sprigs of fresh Thyme
  • Basil (optional)
  • Olive Oil
  • Salt & Pepper
  • 2 tablespoon Tomato Paste
  • 1/4 cup Stock (chicken or vegetable)

Preparation

  1. Preheat oven to 450°F and line roasting pan with foil.
  2. Cut all vegetables in 3/4 inch cubes.
  3. In a bowl, toss each vegetable separately with olive oil and salt & pepper.
  4. Roast each type of vegetable separately until they are done. (Red and green peppers together, then eggplant, and then green and yellow zucchinis.) It’ll take approximately 20 minutes for each type of vegetable depending on your oven. Check and toss vegetables around with a spatula if needed.
  5. Mix the tomatoes and onions together to roast. When roasting the tomatoes and onions, cook them when they are 3/4 done (approx. 10-15 min.) Then toss in the chopped garlic and thyme sprigs and continue roasting until done.
  6. Put all the cooked vegetables into one large bowl and set aside.
  7. In a small saucepan, bring chicken/vegetable stock to a simmer and then add tomato paste and bring them to a boil.
  8. Pour the tomato paste mixture and basil (if using) and gently mix with the vegetables so they don’t break apart.
  9. Eat at room temperature.

Notes

Note #1: I didn’t have basil on hand when I made this recipe. Instead, I used flat-leaf parsley. Of course the flavour is different but using parsley gives the dish a more refreshing taste.

Note #2: To save time, you could roast the vegetables in different pans and put them in the oven at the same time. However, you’ll have to adjust the cooking time because the vegetables on the top rack will take longer to roast.

https://www.memorabledishes.com/ratatouille/

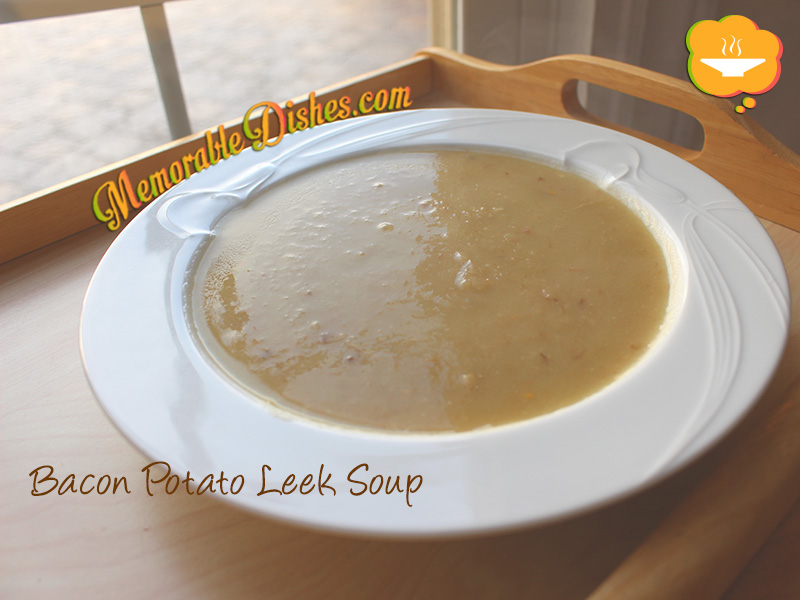
Bacon Potato Leek Soup

Bacon Potato Leek Soup

My kids love soup. However, growing up in a Chinese family, soup equates to something you drink at the beginning or at the end of a meal but never as a meal itself. Usually, the soup we drink is a broth that cleanses our bodies and helps us stay healthy. My kids were also introduced to drinking cleansing broths at my mother’s house. Later on, I learned my mom’s cleansing soup recipes and made them for my kids too. So my kids are growing up drinking cleansing broths like me.

When I initially introduced thicker soups as meals, my boys were flabbergasted. They thought it was weird that the soup was so thick and considered them non-soups. As a mom, I would keep on making foods that my kids originally rejected hoping that they would eventually respond well to them. After making my Roasted Butternut Squash Soup a few times along with bribing them with my Grilled Cheese Sandwiches (Finish the soup first, THEN you can have the grilled cheese!), they slowly opened themselves up to drinking or eating soup that is less brothy.

So when I made this Bacon Potato Leek Soup, they were in heaven. They declared that it was the best soup I ever made. I concluded when you add bacon to any food, kids would eat them. I dedicate this Memorable Dish to all the moms with kids who claim to have aversions to certain foods but eventually embrace them. (Yay for moms due to their nagging, I mean persistent effort!)Bacon Potato Leek Soup

Bacon Potato Leek Soup

Prep Time: 20 minutes

Cook Time: 20 minutes

Total Time: 40 minutes

Serving Size: 6

Ingredients

  • 3-4 Leeks, white and light green parts only, roughly chopped (approximately 6 cups)
  • 2 lbs Potatoes (Yukon gold or Russet), peeled, diced into 1/2 inch pieces
  • 6 cups Chicken Stock
  • 1 cup Smoked Bacon, small dice
  • 1 Bay Leaf
  • Salt & Pepper to taste

Preparation

  1. In a large pot, brown the smoked bacon. (You could add a bit oil to render the fat if you want to but not necessary.)
  2. Strain the bacon and leave 1 tbsp of bacon fat in the pot.
  3. Add the leeks to the pot and cook them until softened (approx. 5 min).
  4. Add potatoes, bacon, stock and bay leaf. Bring to a boil and cook until potatoes are softened (approx. 15 min).
  5. Turn the heat off.
  6. Use an immersion blender to blend until smooth.
  7. Bring the puréed soup to a boil.
  8. Add salt and pepper to taste.

Notes

Note #1: Clean the leeks thoroughly by cutting off the top and dark green parts. Then cut the leek in half, lengthwise and rinse out any dirt in between the leek

Note #2: If you don’t have smoked bacon, just use a few slices of regular bacon.

https://www.memorabledishes.com/bacon-potato-leek-soup/

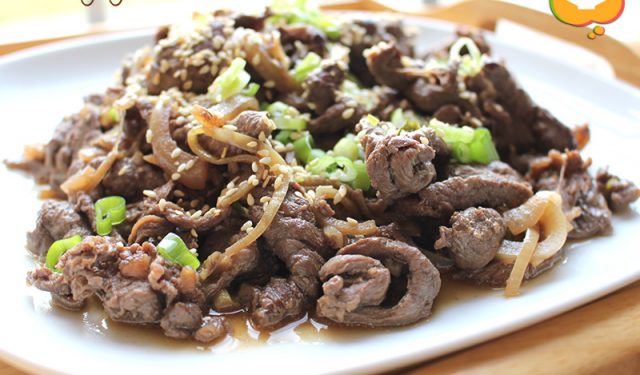
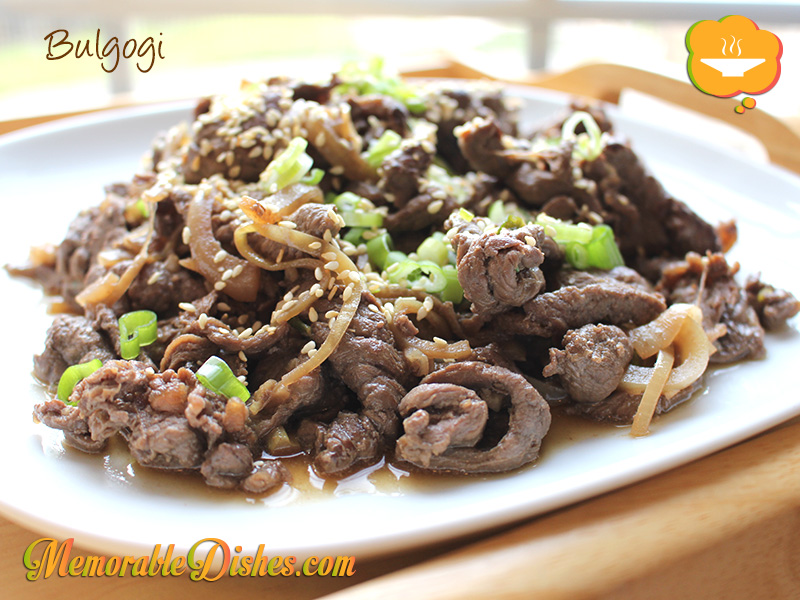
Bulgogi

Bulgogi

I don’t claim this to be an authentic Bulgogi recipe because I’m not Korean (although Koreans have mistaken me for one 🙂 ). I don’t quite remember how this Memorable Dish became a staple in our Chinese/Macedonian household. Maybe it’s because my mom had this Korean food craze where we had Korean meals for Sunday dinners. (She took some Korean cooking lessons at our local Korean grocery store. They were taught in Cantonese to lure Chinese home cooks into experimenting with cooking Korean foods.) Or maybe all the kids love this dish and we just kept on making it because it’s so easy. Either way, the whole family adores this Memorable Dish.

You can buy frozen thinly sliced ribeye beef at your local Chinese or Korean grocery store. People usually use this thinly sliced beef for hot pot. If not, you can buy a big piece of ribeye beef and thinly slice it yourself. The tip is to freeze the piece of beef in the freezer until it’s a bit hard and you can slice it easier with a sharp knife.

Try this easy bulgogi recipe and make this a Memorable Dish for your family 🙂 .Bulgogi

Bulgogi

Prep Time: 15 minutes

Cook Time: 10 minutes

Total Time: 25 minutes

Ingredients

  • 1 pound Ribeye Beef, thinly sliced
  • Marinade:
  • 2 tbsp Green Onions, sliced
  • 3 tbsp reduced-sodium soy sauce
  • 1 tbsp Honey
  • 1 tbsp Sesame Oil
  • 2 tsp Garlic, minced
  • 2 tsp Ginger, minced
  • 1 tbsp Oil
  • 1 small Onion, sliced
  • 1 Spring Onion, sliced for garnish
  • Black and/or White Sesame Seeds, toasted

Preparation

  1. Marinate beef with all the marinating ingredients for at least 30 minutes.
  2. Heat oil in a wok or a large frying pan.
  3. Sauté the onions until they are translucent (about 5 minutes).
  4. Add beef to the wok and stir-fry until it’s cooked.
  5. Garnish with sliced green onions.
https://www.memorabledishes.com/bulgogi/

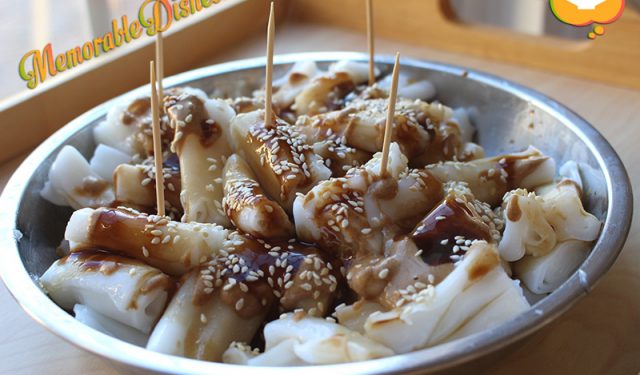
Steamed Rice Roll (豬腸粉)

Steamed Rice Roll

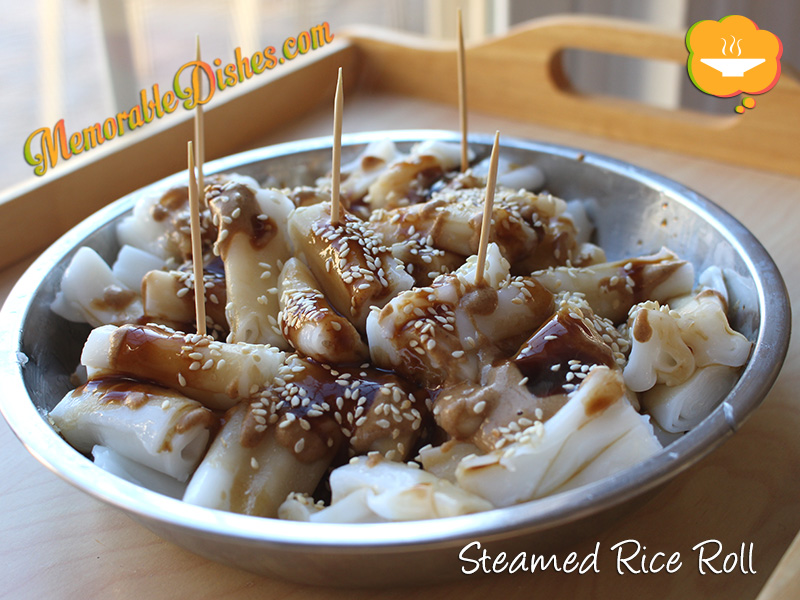
Hearing the clanging sounds of Chinese scissors and smelling rice roll being steamed bring back childhood memories of eating this Memorable Dish on the side of the road. The street vendor lines a brown parchment-like paper on top of a metal dish and cuts each strip of rice roll perfectly for each mouthful. Then he drizzles hot oil and gives us the option of adding the amount of soy sauce we want. The sesame sauce and hoisin sauce are diluted perfectly so it allows easy drizzling over the top of the steamed rice roll. There’s hot sauce available as well. I love hot sauce normally but I usually don’t put any in my steamed rice roll. I think the hot sauce overpowers the yummy combination of the oil, soy sauce, hoisin and sesame sauce.

Growing up in the mid-80s Hong Kong, food hawker carts were still on the streets at that time. Now, all the street vendors have moved into mini-mall food courts or they actually have a store alongside on the street. Eating breakfast on the street was a regular thing to do. I remember some schools didn’t allow kids wearing school uniforms eating on the street because they didn’t want a bad reputation for their school. But we didn’t care, we ate on the streets anyways. It wasn’t like there was uniform police who arrested us 😛 .

Recently, I heard a snippet about steamed rice roll from a Chinese radio food show. He talked about an amazing steamed rice roll place being closed down in Hong Kong and people just loved eating the rice roll from that place. It was the magic of the sauce that kept bringing people back. Apparently the lady who owns the place told the radio announcer that she renders pork fat and mixes it with the hot oil. That’s their secret weapon to bring their customers back time and time again. (Oooops for the vegetarians/vegans who eat their steamed rolls and think it’s a vegetarian/vegan dish.)

Even with my non-pork fat oil version, I almost devoured the whole package of steamed rice rolls myself! I think it’s the texture of the rice roll mixed with the combination of sauces that heightens my sense of the umami taste. My kiddies love eating this steamed rice roll as well. It’s too bad that they won’t be able to experience eating this Memorable Dish like I did because food carts like this are no longer on the streets. Their memory of eating this would be being served at restaurants or at home.Steamed Rice Roll

Steamed Rice Roll (豬腸粉)

Prep Time: 10 minutes

Cook Time: 5 minutes

Total Time: 15 minutes

Ingredients

  • 1 package of Fresh Rice Roll (can be found at your local Chinese grocery store)
  • 1 tbsp Chinese Sesame Paste
  • 2 tbsp Hot Water
  • 2 tbsp Hoisin Sauce
  • 1 tbsp Hot Water
  • 1/4 cup Premium Soy Sauce
  • 1/4 cup Water
  • 2 tbsp Sugar
  • 1 tbsp Toasted Sesame Seeds
  • 1 tbsp Oil, heated

Preparation

  1. Make the sauce by diluting 1 tablespoon of Chinese sesame paste with 2 tablespoon of hot water and 2 tablespoon of hoisin sauce with 1 tablespoon of hot water. Set aside.
  2. In a small pot, heat 1/4 cup premium soy sauce, 1/4 cup water and 2 tablespoon of sugar until the sugar dissolves. Set aside.
  3. Cut the fresh rice roll into 1 inch pieces and place them on a metal or ceramic plate.
  4. To steam the rice rolls, put approximately 1-2 inches of water in a large pot and bring it to a boil.
  5. Once the water is boiled, place bamboo steamer on top and place plate inside steamer and cover.
  6. Steam until rice roll is heated through (5 minutes or longer depending on how fresh rice roll is or if it’s in the fridge).
  7. Drizzle heated oil, toasted sesame seeds and enough sauce and soy sauce to taste.

Notes

You can make your own toasted sesame seeds by placing raw seeds in a shallow pan and heating them gently on top of the stove. Mix and watch carefully because once it starts toasting, they can heat up pretty fast.

https://www.memorabledishes.com/steamed-rice-roll/

Chinese Fuzzy Squash and Pork Meatballs Stew

Chinese Fuzzy Squash and Pork Meatballs Stew

As an inexperienced gardener/farmer, last year I planted zucchinis that happened to overtake my small garden box. This year it was the Chinese fuzzy squash that took over the box. I didn’t get a chance to buy anything to plant and yet my garden box was full of crops. Between my father and my father-in-law, they bought me seedlings of tomatoes, cherry tomatoes, cucumbers, basil (which were in separate planters), peppers and Chinese fuzzy squash. I even had a sunflower growing in that box (don’t ask me how it got there.)

In that garden box, I got a few cucumbers, a few tomatoes, a fair amount of cherry tomatoes but the peppers never grew. However, the fuzzy squashes just keep on giving. My husband recently picked two ginormous squashes because I could never find them hidden underneath the big leaves. He even said there’s another small one growing right now (thanks to our mild weather this fall).

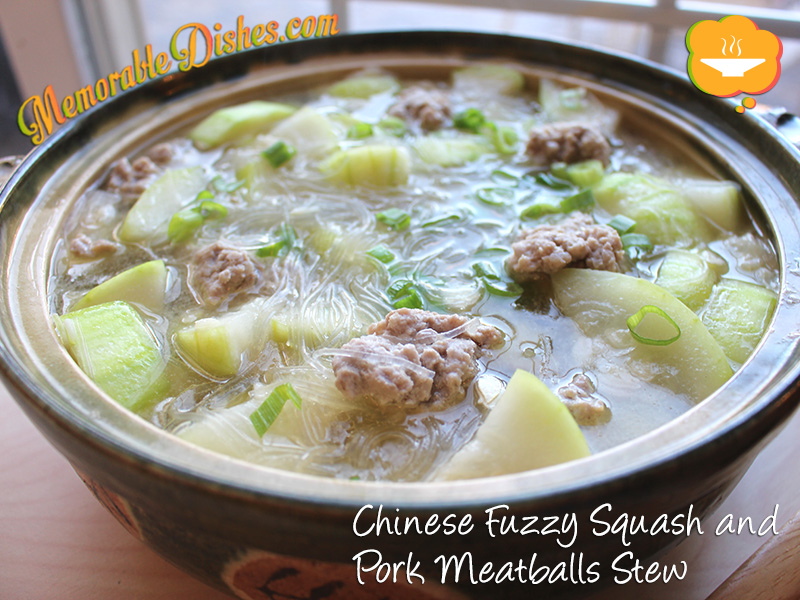
This Memorable Dish is one of my favourite childhood dishes. I remember my mom making it quite a bit. This dish is great for the kiddies because it’s brothy, noodle-ly and made with meatballs. What kid doesn’t love meatballs! Although they’re not too crazy about the squash part of the stew, they hesitantly eat it due to my daily propaganda of the importance of eating vegetables. This Chinese fuzzy squash and pork meatballs stew definitely brings me back warm, fuzzy and cozy memories 🙂 .Chinese Fuzzy Squash and Pork Meatballs Stew

Chinese Fuzzy Squash and Pork Meatballs Stew

Prep Time: 20 minutes

Cook Time: 20 minutes

Total Time: 40 minutes

Serving Size: 4-6

Ingredients

  • 1 1/2 pounds of Ground Pork
  • 1 tbsp of Soy Sauce
  • 1/2 tsp of Salt
  • 1/2 tsp of Sugar
  • 1 tsp of Cornstarch
  • 1/8 tsp of White Pepper
  • 1 tsp of Sesame Oil
  • 2 slices of Ginger
  • 1 Fuzzy Squash, cut into 2-inch, length-wise chunks
  • 2 cups Cellophane Noodles
  • 4 cups of Chicken Broth (add more if needed)
  • 1 tbsp of Oil
  • 1 sliced Green Onion for garnish

Preparation

  1. Marinate pork with soy sauce, salt, sugar, cornstarch, white pepper, sesame oil for at least 30 minutes.
  2. Reconstitute the dry cellophane noodles by soaking them in cold water.
  3. Shape pork into golfball sized meatballs or smaller and set aside.
  4. Heat 1 tbsp of oil in a large pot. Once the pot is heated, put 2 slices of ginger and stir fry along with the fuzzy squash for a bit until you get a bit of colour.
  5. Add the chicken broth and once it’s brought to a boil, slowly add the pork meatballs one by one.
  6. Cover and lower heat once the broth boils again.
  7. Cook for approximately 10 minutes until fuzzy squash is tender.
  8. Bring heat back up again and put cellophane noodles in the broth.
  9. Once it’s boiled again, turn heat off and garnish with green onions.

Notes

I cook my stew in a Chinese ceramic pot that is great for moving from stove to table 🙂 .

https://www.memorabledishes.com/chinese-fuzzy-squash-and-pork-meatballs-stew/

Shepherd’s Pie

Shepherd's Pie

I don’t exactly remember the first time I had Shepherd’s Pie. Growing up in an Asian household, Shepherd’s Pie was definitely not a staple. But my adventurous food-loving mother made this Memorable Dish for us at home and we’ve been loving it ever since.

Shepherd’s pie is supposed to be made with ground lamb and cottage pie is supposed to be made with ground beef. But in North America, we use the term shepherd’s pie synonymously with cottage pie. This recipe isn’t my mom’s original recipe (she probably got hers from a friend or magazine). I remember one of my friends who was studying to be a chef was making shepherd’s pie while I was at his house. He used cumin and nutmeg and I really liked the taste.

This Memorable Dish is definitely an all-time favourite dish in our household. Everyone loves it. It can be a bit time-consuming to make. To break up the process a bit, I make the mashed potatoes a day before so I don’t spend all day making it 😉 .Shepherd's Pie

Shepherd’s Pie

Prep Time: 30 minutes

Cook Time: 1 hour

Total Time: 1 hour, 30 minutes

Serving Size: 6-8

Ingredients

  • For Potatoes:
  • 4 baking Potatoes (about 3 lbs), cut into 1-inch chunks
  • 2 cloves Garlic, peeled
  • 1 cup milk, warm
  • 1 tbsp butter
  • Salt for boiling potatoes
  • Salt & Pepper to taste
  • For Vegetables:
  • 1 cup Onion, diced (about 1 medium)
  • 4 cloves Garlic, minced
  • 3/4 cup Carrot, diced carrot
  • 2 stalks Celery, diced
  • 1/2 cup frozen Corn
  • 1/2 cup frozen Peas
  • 1 tbsp Extra-virgin Olive Oil
  • For Meat:
  • 2 1/2 lbs Ground Beef
  • 1/2 tsp Ground Cumin
  • 1/4 tsp Ground Nutmeg
  • 1 tsp Onion Powder
  • 1½ tsp Garlic Powder
  • 1 tsp Kosher salt
  • 2 cups of Beef Stock
  • 1 tbsp All-purpose Flour
  • 1 tbsp Extra-virgin Olive Oil

Preparation

  1. Place potatoes and whole garlic clove in a large pot of salted water. Bring to a boil and cook for about 15 minutes, or until tender. Drain, return to the pot and set aside.
  2. Brown ground beef in a large frying pan with 1 tbsp of olive oil.
  3. Once the meat is brown, scoop it onto a large plate lined with paper towels to drain excess fat.
  4. Heat 1 tbsp of olive oil in the frying pan over medium-high heat. Add the onion and sauté for 5 minutes or until transparent and soft. Scrape the bottom of the pan to remove the yummy bits. (If it’s too dry, you can add a bit of water to remove the bits.)
  5. Add the chopped garlic, carrot and celery. Reduce the heat to medium and sauté for 5 minutes.
  6. Return the cooked beef to the vegetable mixture, add the spices (cumin, nutmeg, onion and garlic powder) and 1 tsp of salt.
  7. Add the beef stock, mix and break down the meat with a wooden spoon as much as you can. Cook for approximately 10 minutes.
  8. Add 1 tbsp of flour and stir until thickened. Stir in the corn and peas and turn off heat.
  9. Preheat the oven to 400°F.
  10. Place the pot of drained potatoes over low heat. Add the warm milk and butter. Mash potatoes with a potato masher or hand-held mixer.
  11. Spoon the meat and vegetable mixture into a 13 x 9-inch large baking dish. Spread the potato mixture on top in an even layer.
  12. Bake for 20 minutes, or until the top is golden brown.

Notes

If the pie starts bubbling but the top hasn’t browned yet, you can put it under the broiler to be browned for a few minutes.

https://www.memorabledishes.com/shepherds-pie/

Korean BBQ Beef Ribs (Kalbi)

Korean BBQ Beef Ribs (Kalbi)

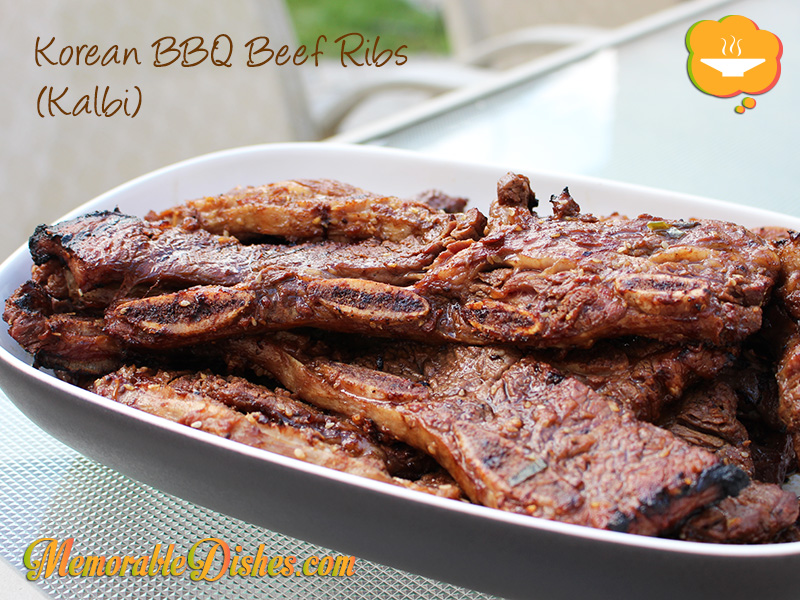
This is one of my favourite things to barbecue in the summer when I have friends over. Usually, I make this Memorable Dish several times each summer. Now that I have my third child, I think I’ve made it only once this summer. Yikes! Over the years I have perfected my recipe for kalbi. I adapted a recipe I found, modified it, and used it ever since. I assume it’s a pretty authentic recipe (if it isn’t please let me know 🙂 ) .

My husband and I have become a kalbi partner in crime cooking team. I do the marinade and he barbecues them. He’s been burning the kalbi less and less and making it just the way our family likes it. It’s hard to tell you exactly how long to barbecue the beef ribs for. It really depends on your grill, the thickness of the meat, and how cooked your family likes it.

As you can see, I am trying to hold on to the flavours of summer! But of course you could make this anytime of the year. Don’t despair if your kalbi doesn’t turn out the way you like. It has taken us lots of trial and error to perfect the recipe and cook them the way we like it. Even at times, we would burn or overcook them (usually it’s the first time each summer 😛 ) Make summer last all year long by making this Memorable Dish!
Korean BBQ Beef Ribs (Kalbi)

Korean BBQ Beef Ribs (Kalbi)

Prep Time: 20 minutes

Cook Time: 10 minutes

Total Time: 30 minutes

Serving Size: 4-6

Ingredients

  • 4 pounds Beef Short Ribs, (ask the butcher to cut them just under 1/2 inch)
  • Marinade:
  • 1 cup Soy Sauce
  • 2 tbsp Sesame Oil
  • 1 tbsp Honey
  • 2 tbsp Brown Sugar
  • 1/4 tsp ground black pepper
  • 1 tbsp Korean Ground Red Pepper
  • 2 tbsp Sesame Seeds, toasted
  • 1 Asian Pear, grated
  • 1 small Onion, grated
  • 1 tbsp Ginger, grated
  • 2 tbsp Garlic, minced
  • 2 Green Onions, sliced
  • Add to meat 30 minutes before barbecuing:
  • 2 Kiwis, pureed

Preparation

  1. In a large bowl or baking dish, mix all the marinating ingredients together (except for the pureed kiwis).
  2. Marinate beef short ribs with all the marinating ingredients for at least 1 hour or preferably overnight.
  3. Take your ribs out 30 minutes before you’re ready to barbecue them. Add pureed kiwis to the marinade and meat and mix well. (Do not leave kiwi on the meat for longer or it’ll break down the meat too much.
  4. Heat your grill to high. Remove the meat from the marinade.
  5. Once your grill is heated, barbecue the ribs until tender, lightly charred and to the doneness that you desire.
  6. Serve with rice and kimchee.

Notes

Note #1: I don’t usually put ground red pepper in my recipe because I have young kids and don’t want it too spicy. Even without it, the kalbi is mighty tasty 🙂 .

Note #2: I use an extra large ziploc bag with a bowl underneath to marinade my ribs and rotate the meat around every few hours.

https://www.memorabledishes.com/korean-bbq-beef-ribs/

BBQ Flattened Chicken

BBQ Flattened Chicken

When I first made this Memorable Dish, I cut out the back and rib bones as recommended by recipes I found online. When serving it to my mom and aunt, who both love sucking on meat and fish carcasses, they were disappointed that there were no bones to suck on from my flattened chicken. If you are a food lover, you know the tastiest part of the meat is close to the bone.

My boys used to love eating chicken and meat off the bone. As they’ve grown older, they just like eating the meat part (I think they’ve become lazy and just want to eat quickly so they can go off and play.) Now my oldest son is finally starting to eat the meat off the bones again. My daughter is still young and has the patience to eat the whole chicken drumstick right to the bone!

It is so easy to barbecue flattened chicken after doing the initial prep. I use seasoning from my Perfect Roast Chicken recipe but you can use any seasoning you want. Even simple salt, pepper and garlic powder taste great. Now I don’t dare to cut out the back and rib bones anymore in case my family pop by to eat my flattened chicken 😛 .BBQ Flattened Chicken

BBQ Flattened Chicken

Prep Time: 15 minutes

Cook Time: 45 minutes

Total Time: 1 hour

Serving Size: 4-6

Ingredients

  • 1 Chicken whole (approximately 4 pounds)
  • 1 tbsp Kosher Salt
  • ½ tsp Pepper
  • 1 tsp Garlic Powder
  • 1 tsp Poultry Seasoning

Preparation

  1. Mix salt, pepper, garlic powder and poultry seasoning in a small bowl. Set aside.
  2. Cut chicken in half and tuck the wings in. If desired, cut out the back and rib bone with kitchen shears.
  3. Sprinkle herb and salt mixture all over chicken.
  4. Heat your whole barbecue up to high heat.
  5. Once it’s heated, place chicken on the barbecue skin side down.
  6. Grill on high for 5-10 minutes until you get grill marks. Watch carefully so you don’t get flare ups.
  7. Turn heat off on the side where you have the chicken on and leave the other side of the barbecue on high. (You’ll be cooking by indirect heat.)
  8. Flip the chicken (skin side on top now) and barbecue on indirect heat for 30-45 minutes until chicken is done.
  9. Let the chicken rest for 10-15 minutes before cutting.
https://www.memorabledishes.com/bbq-flattened-chicken/

Vietnamese Salad Rolls

Vietnamese Salad Rolls

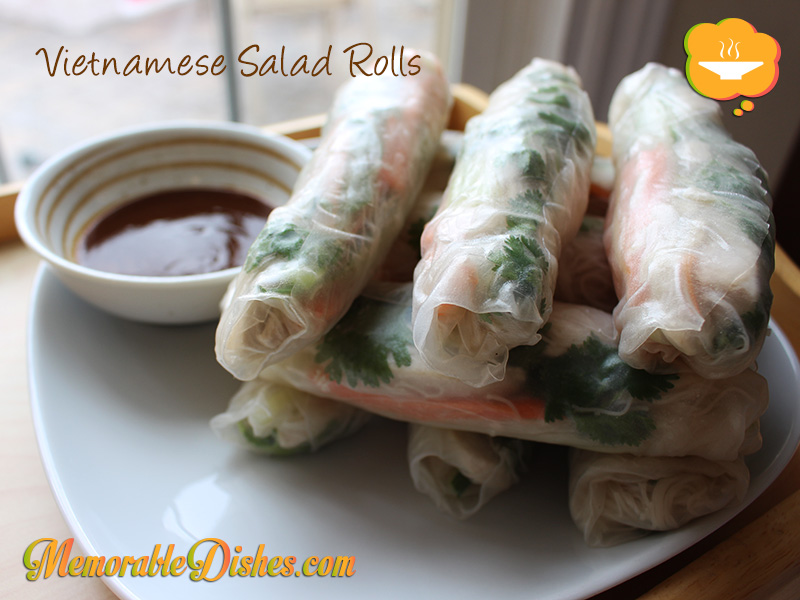
I remember being introduced to Vietnamese food when my uncle married my aunt. We were living in the States at the time. My aunt is from Vietnam but she’s native Chinese. And the foods she grew up eating in Vietnam were different than the ones I was used to. So when she prepared these salad rolls and other Vietnamese dishes, I was very excited about trying them. The traditional rolls use Vietnamese sausage or shrimp but I used poached chicken instead. I also used a simple hoisin and sesame paste dipping sauce instead of the watery one with the fish sauce. I believe you could use either.

Our kids used to find it awkward to eat when they were little. But as they’ve grown older, they’ve come to love this dish. It’s a bit time consuming to make because I’m an amateur roller 😉 When it’s really hot outside, I like to eat something cool. So this is the perfect dish to make in the summer and great to take on a picnic. This is one of my all-time favourite summer Memorable Dishes to make. So crunchy and refreshing!Vietnamese Salad Rolls

Vietnamese Salad Rolls

Prep Time: 30 minutes

12-14 Rolls

Ingredients

  • 1 pound poached Chicken Breast, sliced
  • 2 cups Carrots, julienne
  • 2 cups Cucumbers, julienne
  • 2 cups cooked Rice Vermicelli
  • 1 cup Cilantro
  • 1 package Rice Paper
  • Boiling Water
  • Dipping Sauce
  • 1 tbsp Chinese Sesame Paste
  • 1/4 cup Hoisin Sauce
  • 1/4 cup Hot Water

Preparation

  1. Poach the chicken and prepare the rice vermicelli according to the package. Rinse the vermicelli in cold water to prevent from sticking.
  2. Have all your ingredients ready and prepare to wrap.
  3. Use 2-3 large plates on the table to wrap the rolls in.
  4. Put boiling water in a large bowl, enough water to submerge the rice paper in.
  5. Place 1 rice paper in the boiling water. Make sure the whole paper is submerged.
  6. Take rice paper out and place it on a plate. (It takes a few minutes for it to become pliable to work with.) Do the 2nd rice paper and place it on the 2nd plate.
  7. Go back to the 1st place and start adding ingredients to the roll, some chicken, cucumbers, carrots, rice vermicelli and cilantro. Don’t over stuff.
  8. Roll it up like a spring roll and place it on the plate.
  9. Repeat steps 5-8 until all the ingredients are used up. (If the hot water is not hot enough, replace it with freshly boiled water.)

Notes

To keep the rolls moist, line the plate with dampened paper towel and place finished rolls on top. Cover with another dampened paper towel. You’re able to keep the rolls moist for at least one day in the fridge.

https://www.memorabledishes.com/vietnamese-salad-rolls/

Steamed Minced Pork and Egg

Steamed Minced Pork and Egg

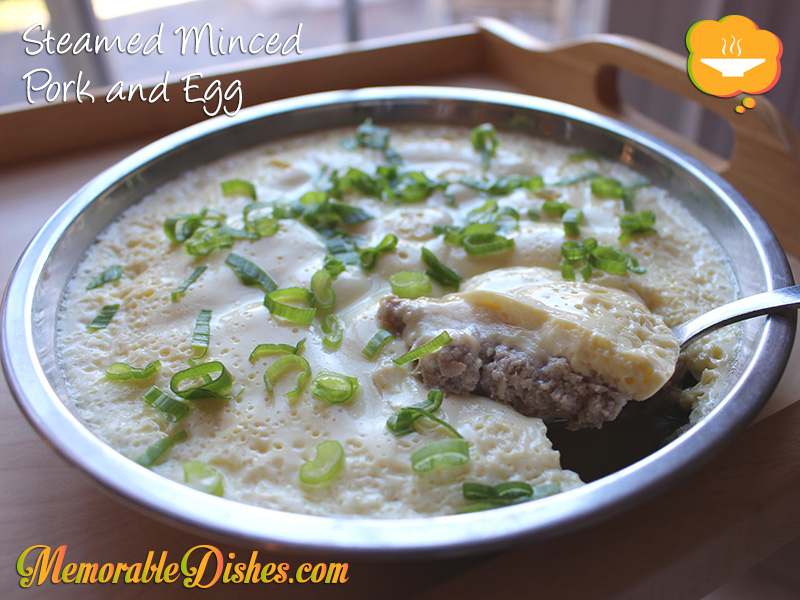
Sometimes the most simplest food gets overlooked. I can’t believe I didn’t write a blog post about this Memorable Dish sooner! Steamed minced pork and egg was a childhood staple for me. I used to and still love eating this simple dish mixed with rice.

Growing up in Hong Kong, I remember eating this dish quite a bit. Even after moving to Canada and the United States, my mother continued making it for us. It uses simple ingredients that you can find anywhere so the comfort of this childhood dish can be made in a pinch.

Our family loves this Memorable Dish with the exception of my oldest son. He likes the pork but doesn’t like the custardy egg. He thinks it’s tofu (which he doesn’t like). I would say most kids love it though because of its silky egg. Every time I have this dish it reminds me of being a little girl gobbling it with rice.Steamed Minced Pork and Egg

Steamed Minced Pork and Egg

Prep Time: 10 minutes

Cook Time: 10 minutes

Total Time: 20 minutes

Serving Size: 4

Ingredients

  • 1/2 pound of Ground Pork
  • 1 tsp of Soy Sauce
  • 1/2 tsp of Cornstarch
  • 1/4 tsp of Sugar
  • 1/2 tsp Shaoxing Wine or Cooking Wine
  • Dash of White Pepper
  • 3 large Eggs
  • 3/4 cup Chicken Broth
  • 1/8 tsp Salt
  • Green Onions, sliced, for garnish

Preparation

  1. Marinate ground pork with soy sauce, cornstarch, sugar, shaoxing wine, and white pepper for at least 30 minutes.
  2. In a stainless steel or ceramic wide and shallow dish, spread the ground pork mixture on the bottom of the dish as thin as possible.
  3. In a small bowl, beat the eggs, chicken broth and salt.
  4. Pour egg mixture on top of the ground pork.
  5. Steam for 8-10 minutes after the water has boiled.
  6. Garnish with sliced green onions.
https://www.memorabledishes.com/steamed-minced-pork-and-egg/

Show Buttons
Hide Buttons