Category Archives: Main Course

Recipes of Main Courses

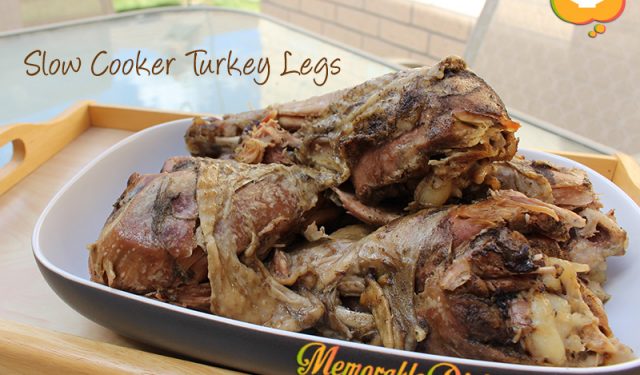
Slow Cooker Turkey Legs

Slow Cooker Turkey Legs

I’m not much of a slow cooker user. I know some people love it and I know it’s a useful vessel to cook meals for the family because you can set it and forget it. Somehow, I never have embraced the slow cooker as much as I’d like. Maybe it’s because you usually throw everything into it without browning the meat and it doesn’t have the depth of flavour that like. (I know I could brown the meat first then put it into the slow cooker but using more than one pot to cook a stew dish is just too much hassle.) I have been looking for ways to use my slow cooker lately because I had some delicious slow cooker ribs at a friend’s house and they were delicious!

Now back to my turkey legs. I made turkey legs in the oven before and it was quite a mess. I had to cook them for a long time to get them tender and the kiddies didn’t seem to like them. But cooking turkey legs in the slow cooker is an easy way to get them nice and tender. This recipe is super easy and delicious. My favourite part of cooking the turkey legs in the slow cooker is the juices they produce. If you’re nervous about putting the legs in the cooker without any liquid, pour 1/4 cup of water (but you really don’t have to).

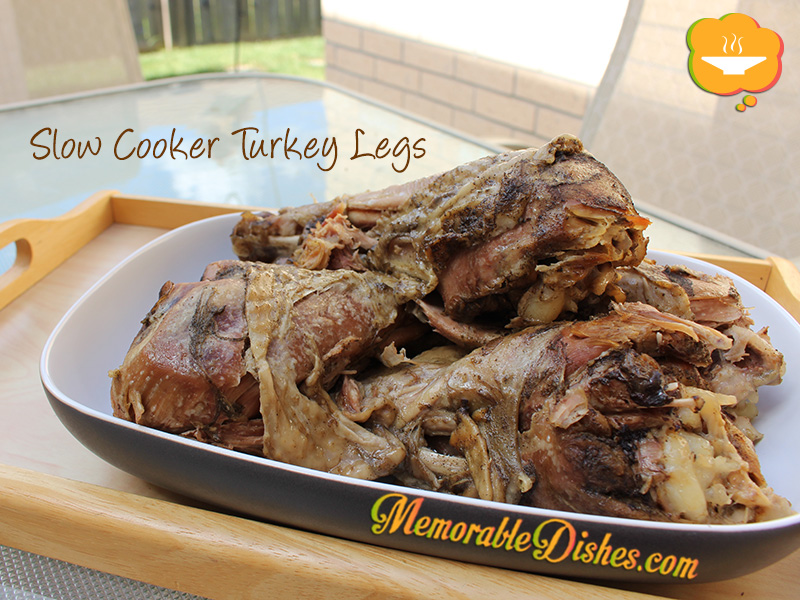
After they’re cooked, don’t be deceived by the beige-looking turkey legs, they are delicious! If you like to brown them a bit in the oven before serving go right ahead. You can also reduce the sauce into a thicker gravy but I like the taste and consistency of the sauce after the legs have been rendering in the slow cooker for six hours. This Memorable Dish gets everyone’s mouth watering. Being Chinese, of course I serve my turkey legs with rice. But you can also break up the meat and mix it up with the sauce as a ragu and serve it over pasta.
Slow Cooker Turkey Legs

Slow Cooker Turkey Legs

Slow Cooker Turkey Legs

Prep Time: 5 minutes

Cook Time: 6 hours

Total Time: 6 hours, 5 minutes

Serving Size: 4-6

Ingredients

  • 4 Turkey Legs
  • 2 tsp Kosher Salt
  • 1 tsp Poultry Seasoning
  • 1 tsp Garlic Powder
  • 1/2 tsp Black Pepper

Preparation

  1. Mix all the salt and seasonings in a small bowl.
  2. Coat all the turkey legs generously with the spice mix.
  3. Set slow cooker at Low for 6 hours.

Notes

Here’s the seasoning portion for one turkey leg: 1/2 tsp Salt, 1/4 tsp Poultry Seasoning, 1/4 tsp Garlic Powder, 1/8 tsp Black Pepper.

https://www.memorabledishes.com/slow-cooker-turkey-legs/

Grilled Whole Fish

Grilled Whole Fish

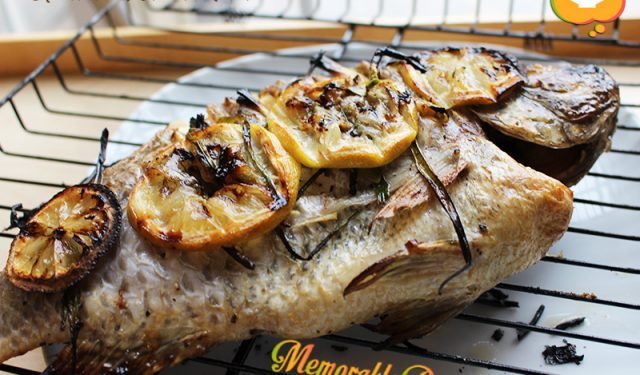
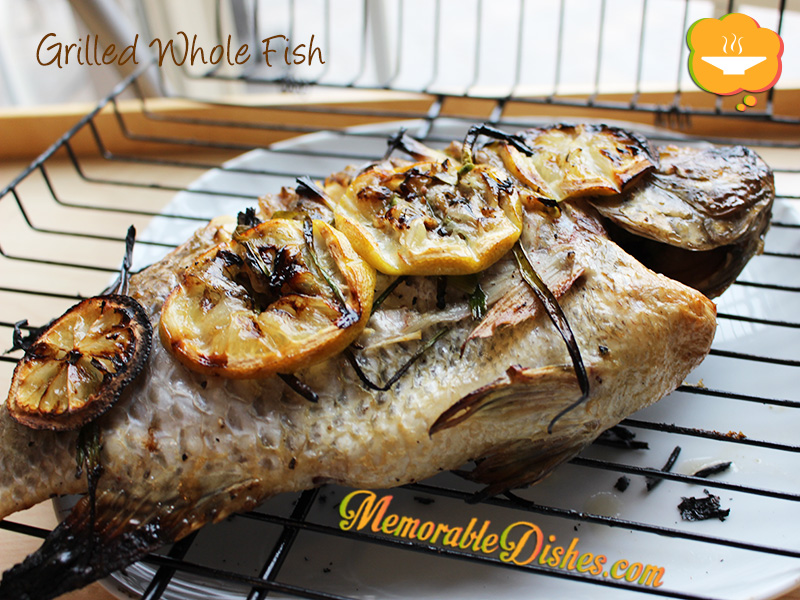
Being Cantonese, you would think I’d have a post about steamed whole fish already! We practically eat steamed fish at every Chinese dinner. But alas, I have a grilled fish post first because it’s barbecue season! I absolutely love grilled fish. I love the smell of the charred fins and smoky taste of the fish when you grill it.

This Memorable Dish was inspired by the sea bream I saw at our local Chinese supermarket. The sign says, “Sea Bream, European”. I don’t usually see sea bream on sale so I snatched one up right away. The sea bream brought back memories of visiting Greece on my honeymoon. Being a seafood lover, Greece was a fresh seafood paradise. Every restaurant I went to, I ordered grilled whole fish. Every time I asked what type of fish it was the waiter would say, “It’s sea bream.” Before visiting Greece, I’d never heard of sea bream before. But apparently it’s a very popular fish to eat in Europe. So when I saw it at the supermarket in Canada, I was super ecstatic and bought it to grill. I wanted to test grill it first before my post because I didn’t want to screw it up 😀 .

The sea bream I grilled turned out great so I proceeded to grill a whole tilapia for this post. If your fish is a bit thicker in certain parts, cut some slits so it’ll cook more evenly. I also had some fresh garlic stalks from my in-laws’ garden that I stuffed the fish with. When I brought the cooked fish into the house, the kids all cheered. (Maybe they were happy that I didn’t burn down the house when they saw smoke coming out of the barbeque 😛 .) Fish is always a favourite in our household. I think the kids enjoy the grilled fish as much as I do since it’s a nice change from our usual steamed fish.Grilled Whole Fish

Grilled Whole Fish

Prep Time: 5 minutes

Cook Time: 15 minutes

Total Time: 20 minutes

Ingredients

  • 1 Whole Fish (Sea Bream or Tilapia approximately 1 1/2 pounds)
  • 6 Lemon slices
  • 1-2 stalks of fresh Garlic, cut the thick parts to thinner pieces
  • Salt & Pepper
  • Olive Oil

Preparation

  1. Preheat grill on high.
  2. Cut the thick parts of the fish with 2-3 diagonal slits.
  3. Coat the fish on both sides with olive oil.
  4. Sprinkle fish with salt and pepper.
  5. Stuff the cavity with fresh garlic stalks and put some into the slitted parts of the fish.
  6. Place 3 lemon slices on the large fish grilling basket. Then place the fish on top. Then place the other 3 slices on top. Close the grilling basket.
  7. Grill fish on high heat until the fins are a bit charred (approximately 5-10 minutes).
  8. Then flip and grill for another 5-10 minutes.

Notes

Note #1: If you don’t have fresh garlic stalks, you could use chives or any other aromatics that you like.

Note #2: The amount of time to cook the fish depends on how big or thick your fish is and also your barbecue. Please check the thickest part of the fish for doneness. Also, the fish will continue to cook once you take it off the grill. So take it off as soon as it’s done and let it sit for 5 minutes before serving.

https://www.memorabledishes.com/grilled-whole-fish/

Stir Fry Paneer Masala

Stir Fry Paneer Masala

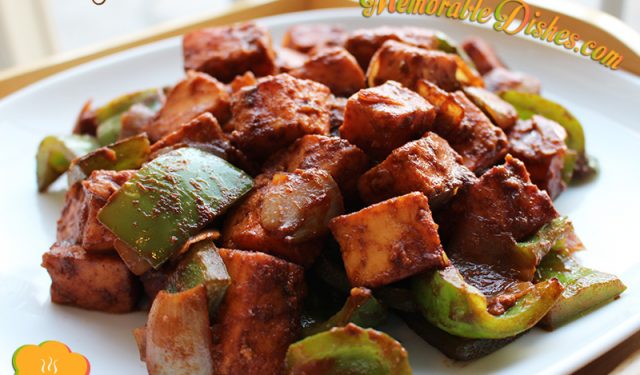
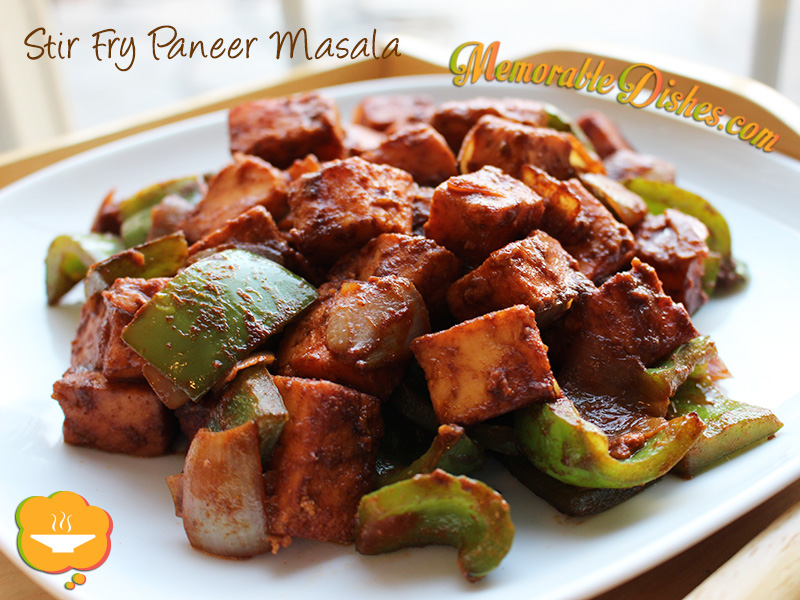
I first tasted this Memorable Dish at a summer picnic barbeque at a park with our friends. It’s a big group and we try to get together once or twice a year. But it’s insane because the group was huge to begin with. And now that almost all of us have children it’s even crazier. Mind you, not everyone can make it but it’s still a very large group to have hosted at one person’s house.

We all bring something to the barbeque to eat and share. Most of us bring hot dogs and hamburgers but when someone brings something different, I get very excited. My friend brought this yummy stir fry paneer dish. Our family loves Indian food so being a curious cook, I asked her what was in it. She told me this super easy recipe and I’ve been making it ever since. She calls the dish paneer tikka but being Chinese, I call it Stir Fry Paneer Masala because it deviates from the traditional paneer tikka.

Although my oldest son loves Indian food, he’s not crazy about paneer which he says is like tofu. My second son loves it because it’s like a cheesy tofu, and he just loves tofu. My toddler girl loves everything cheesy. So even though this recipe is a tad spicy, she devours it. Of course both my husband and I love this Memorable Dish. It’s always great to discover new easy dishes to make for a weeknight dinner that everybody in the family loves (minus one) 😉 .Stir Fry Paneer Masala

Stir Fry Paneer Masala

Prep Time: 10 minutes

Cook Time: 10 minutes

Serving Size: 2-4

Ingredients

  • 1 400g package Paneer, cut into 1/2 inch cubes
  • 1 tbsp & 1 tsp Tandoori Masala
  • 1 tbsp & 1 tsp Soy Sauce
  • 1 tsp Ketchup
  • 1/4 cup Water
  • 1 tbsp Vegetable Oil
  • 1 Green or Red Pepper, 1 inch pieces
  • 1 small Onion, cut into large dice

Preparation

  1. Marinate paneer with 1 tablespoon soy sauce and 1 tablespoon tandoori masala for at least 1 hour.
  2. Heat wok or large frying pan with vegetable oil.
  3. Fry onions and green peppers until softened but still has a bit of crunch to it.
  4. Add paneer and stir.
  5. Add water and 1 teaspoon of each: tandoori masala, soy sauce, ketchup.
  6. Stir fry until the paneer is warmed through.
https://www.memorabledishes.com/stir-fry-paneer-masala/

Alphabet Soup

Alphabet Soup

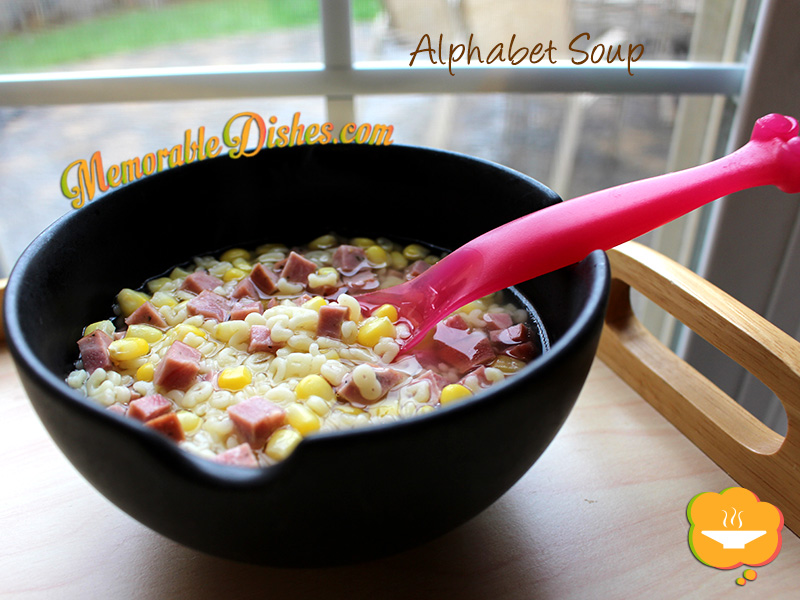
This Memorable Dish was requested by my second son because he was sick this past week. It was definitely a sick soup week for all. When one person in the family gets sick, at least two out of the five (but usually more) will also get sick. Luckily (or maybe unluckily) I never get sick, which means I am the one taking care of the sickies. Growing up Chinese, when we get sick, we eat congee such as my Century Egg and Pork Congee. We also avoid certain foods. For example, when we get a cough, we never eat oranges or drink cold drinks. We also make special drinks or soups to nourish ourselves when we’re sick. So on top of making the specially requested alphabet soup, I have also been making drinks and soups using Chinese herbs. But we’ll save special nourishing Chinese soups for another post. Now back to alphabet soup…

I love that the boys request certain foods depending on what mood they are in. They have equated soupy noodles as foods that they like to eat when they are sick. My second son requests special foods quite often. He has been requesting Spaghetti and Meatballs and macaroni and cheese and even offered to help me cook them because he loves these dishes so much. I love to get reminders on what to make from time to time. With busy weekdays, I often make my usual go-to dishes (some kind of meat/fish with rice and veggies). It’s nice to hear special requests because that means they enjoy the food I make for them 🙂 .

When I told the boys that I’m making Alphabet Soup, they all cheered. Sickies and non-sickies alike enjoy this Memorable Dish. Even though you could make this soup with any shaped pasta, using the alphabet pasta was extra special to them. They always ask for seconds for this simple and quick dish. I don’t know why I don’t make it more often because this dish really makes them so happy! Then again, if I make it often, it might not be so special afterall 😉 .Alphabet Soup

Alphabet Soup

Prep Time: 10 minutes

Cook Time: 10 minutes

Total Time: 20 minutes

Serving Size: 1

Ingredients

  • 1/2 cup of cooked alphabet pasta
  • 1/2 cup diced Ham (or whatever leftover meats you have on hand, I’m using turkey Kolbassa this time)
  • 1/2 cup frozen Corn (defrosted)
  • 2 cups Chicken Broth (Homemade or your favourite store-bought brand)
  • Splash of Vegetable Oil
  • Salt and White Pepper to taste

Preparation

  1. Prepare alphabet pasta according to package instructions.
  2. Drain pasta in colander, add vegetable oil and mix to prevent from sticking.
  3. Bring the chicken broth to a boil and add pasta, ham, and corn.
  4. Once the broth boils again, it’s ready to serve.
https://www.memorabledishes.com/alphabet-soup/

Chinese Dumplings

Chinese Dumplings

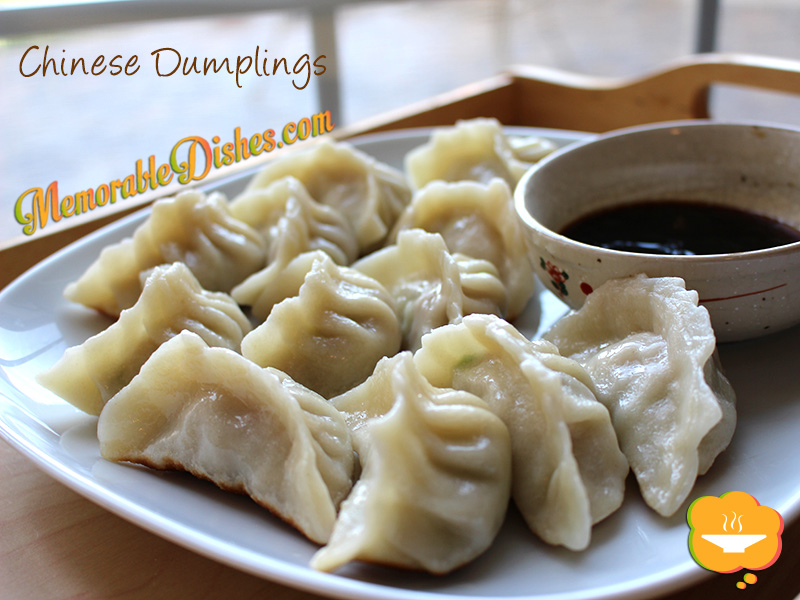
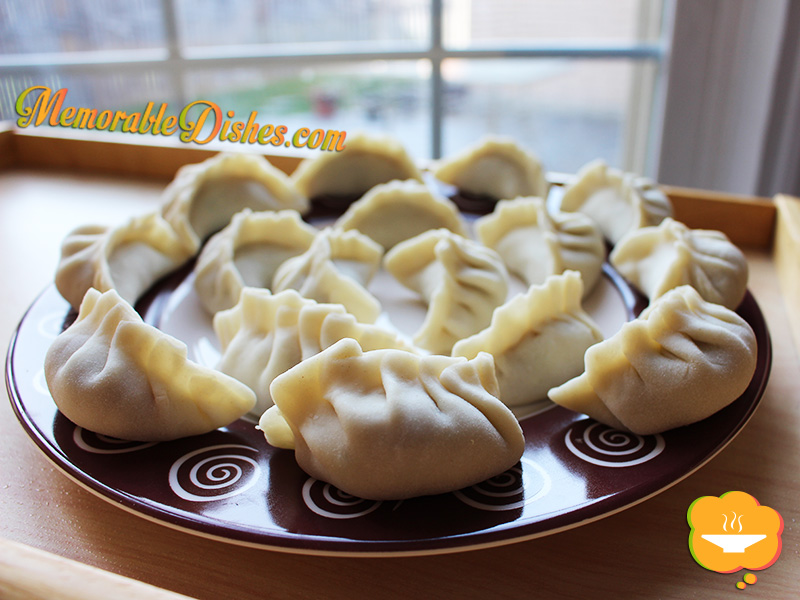
As a child I remember going to my maternal grandmother’s house on Sundays to wrap Chinese dumplings. As southern Chinese people, we don’t usually eat a lot of dumplings and are not very skillful in making the dough from scratch. So I can’t quite understand why we make dumplings on a fairly regular basis. My mother says it’s because my maternal grandfather’s friend (who we call great uncle) is an expert dumpling maker who used to own a dumpling shop. What a treat for me as a child! To witness my great uncle transforming flour and water into dough and then into dumpling wrappers was like magic.

Northern Chinese are known for their expertise in dumpling making. As southerners, we are not, hence we recruit other family members for the task to make the process go faster. Plus, it’s a great social event and gives us a chance to talk and bond. It’s like spending quality time and making something delicious to eat at once—a two for one deal!

While I was making these dumplings, my boys were eager to help. (I think they just wanted to play with the dough 😉 .) I told them they could help next time. My mother and I were making very “slow progress”, as quoted by my second son, and any interference would make the process even slower. We are not skillful dumpling makers but I must say I am looking forward to making this Memorable Dish again soon. The more I make it, the better I will become and in no time I will be as fast as the dumpling makers I see at the Chinese dumpling shops! (Yeah right! But I can’t wait to make it again soon. I’ll see how long the boys will last and see if they will actually finish making the dumplings from start to finish 🙂 .)

Chinese Dumplings

Chinese Dumplings

Chinese Dumplings

36 dumplings

Ingredients

  • Dumpling Dough
  • 2 cups All Purpose Flour
  • 1 cup Boiling Water
  • Filling
  • 2 cups Napa Cabbage, julienne
  • 3 tsp Salt (2 tsp for cabbage and 1 for pork)
  • 1 pound Lean Ground Pork
  • 1/4 cup Green Onions, thinly sliced
  • 1 tbsp grated Ginger
  • 1 tbsp minced Garlic
  • 1 tbsp Chinese Cooking Wine
  • 1 tsp Cornstarch
  • 1 tsp Sesame Oil
  • 1/8 tsp White Pepper
  • Dipping Sauce
  • 2 tbsp Soy Sauce
  • 2 tbsp Vinegar
  • 1 tsp Sesame Oil
  • Water for boiling dumplings
  • 1 1/2 tbsp Vegetable Oil

Preparation

  1. In a medium bowl, mix 2 teaspoons of salt into the napa cabbage. Set aside for 5 minutes and squeeze out the excess moisture with a paper towel.
  2. In a large bowl, mix the napa cabbage, pork, green onions, ginger, garlic, wine, cornstarch, sesame oil, white pepper and the remaining 1 teaspoon salt. Set aside.
  3. In a large bowl, mix the flour and 1 cup of boiling water together. Mix until a soft dough forms. Knead the dough on a lightly floured surface until smooth, about 5 minutes.
  4. Divide the dough in half and shape each into a roll approximately 12 inches long. Cut each roll into half inch slices.
  5. Roll 1 slice of dough into a 3-inch circle. The dough shouldn’t be too thin nor too thick.
  6. Place 1 tablespoon of pork mixture in the center of the circle.
  7. Lift up the edges of the circle and pinch into pleats to create a pouch. Pinch the top together. Repeat with the remaining slices of dough and filling.
  8. Heat a large pot with water. Once the water is boiled, put approximately 12 dumplings at a time to boil.
  9. Once the dumplings float to the top, boil for another 2 minutes. Drain and set aside.
  10. Heat a nonstick wok or skillet until very hot. Add 1/2 tablespoon vegetable oil
  11. Place 12 dumplings in a single layer in the wok and fry 1-2 minutes, or until the bottoms are golden brown.
  12. For the dipping sauce, mix the soy sauce, vinegar and 1 teaspoon of sesame oil in a small bowl. Serve with the dumplings.

Notes

Note #1: You can make and store extra dumplings by freezing them on a tray lined with parchment paper. Put them into bags after they’re frozen. You don’t need to defrost them when boiling. Just boil them a little longer since they are frozen.

Note #2: If you cannot enclose the dumplings by creating pleats mentioned above, just pinch the dumplings tightly closed so the filling doesn’t leak out.

https://www.memorabledishes.com/chinese-dumplings/

Chinese Dumplings - Raw

Chinese Dumplings (Raw) – You can see my amateur skill at pleating the dough 🙂

Stir Fry Shrimp with Eggs
(蝦仁炒蛋)

Stir Fry Shrimp with Eggs

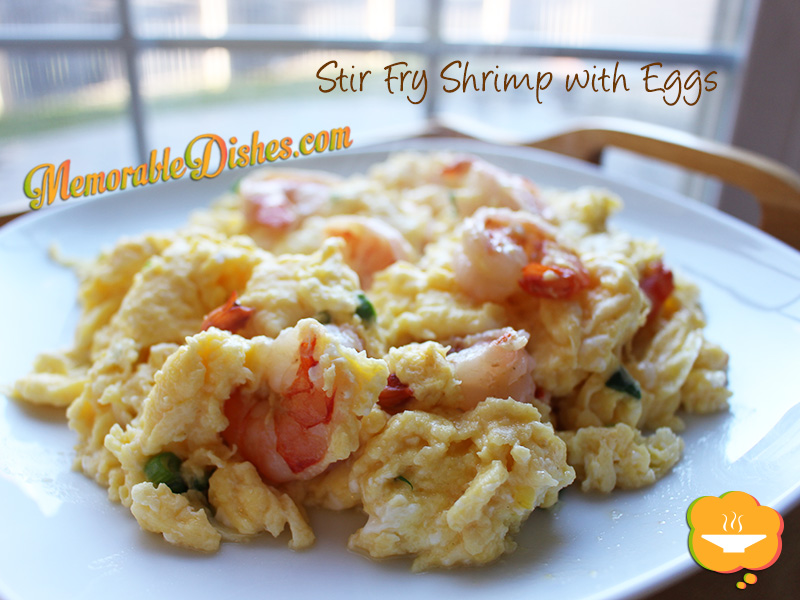
When I was growing up my mother often made this Memorable Dish for us. Now as a mother myself, this simple dish has become a staple at my house as well. When I run out of time or don’t know what to make for dinner, I prepare Stir Fry Shrimp with Eggs. We always have eggs and we always have frozen shrimp in our freezer. Of course it’s tastier to use fresh shrimp but we don’t live near the ocean and frozen shrimp is the next best thing. It’s still mighty tasty though.

Eggs are considered to be a simple and humble dish. However, when you add shrimp it jazzes it up to something wonderful. This homestyle dish is so versatile and popular that it also appears on Chinese restaurant menus.

Requested by my boys who love shrimp and seafood, my mother has continued the tradition of making this Memorable Dish for her grandkids. Stir Fry Shrimp with Eggs make an appearance at my mom’s Sunday night dinners quite often 🙂

I know lots of people resort to eggs for an easy to make dinner. Add this to your repertoire and give this quick but yummy Memorable Dish a try!
Stir Fry Shrimp with Eggs

Stir Fry Shrimp with Eggs
(蝦仁炒蛋)

Prep Time: 10 minutes

Cook Time: 5 minutes

Total Time: 15 minutes

Serving Size: 2-4

Ingredients

  • 1/4 pound Shrimp, peeled and deveined
  • 1/4 tsp Sesame Oil
  • 1/8 tsp Kosher Salt
  • Dash of White Pepper
  • 8 large Eggs, beaten
  • 2 tbsp Water
  • 1/2 tsp Kosher Salt
  • 1 sliced Green Onion for garnish (optional)
  • 1 tbsp Vegetable Oil

Preparation

  1. In a bowl, mix sesame oil, salt and pepper with the shrimp.
  2. In a larger bowl, gently beat the eggs with 2 tbsp of water. Then add the 1/2 tsp of salt and mix.
  3. Heat 1 tbsp of oil in a non-stick wok or large frying pan.
  4. Stir-fry shrimp in the wok and cook until they just turn from translucent to slightly opaque.
  5. Then add the egg and gently mix and flip the egg using a spatula.
  6. Mix in the green onions (if using). Be sure not to brown the eggs.
  7. Cook until all the eggs are done but slightly runny and fluffy.
https://www.memorabledishes.com/stir-fry-shrimp-with-eggs/

Thousand Island Shrimp (千島蝦)

Thousand Island Shrimp

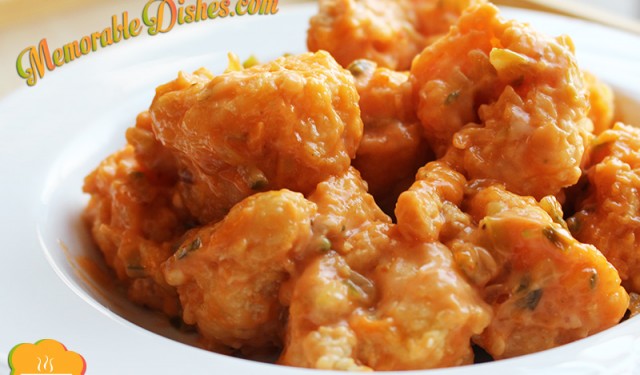
Thousand Island Shrimp – how can I forget this Memorable Dish? It’s not only one of my favourite from my uncle, who is a professional Cantonese cuisine chef, but it’s all my brothers’ and my Canadian cousins’ favourite too! My cousins could be impartial because my uncle is their dad 😉

I just love eating this crunchy on the outside and juicy and tender on the inside shrimp smothered with semi-secretive thousand island sauce.

Every time we went to the restaurants my uncle has worked at, we would order this dish. Sometimes it wasn’t even on the menu but if we requested it, he would cook it for us. There were times when we were expecting to have this yummy shrimp dish but my family didn’t order it. The parents would say, “Always the same dish! Try something different!” But we love it and just have to have it. It’s almost like an addiction! I’m thinking about it as I’m writing this and realize we haven’t had it in awhile! I need to have my dose of thousand island shrimp now!

My mom had made this dish at home so I inquired about the recipe for the homemade version. You can never compare nor re-create Cantonese restaurant dishes properly from home because you don’t have the crazy fiery wok to cook from. People always think Chinese food is oily. But it’s because they’ve only eaten at restaurants. Home-cooked Chinese food is fairly healthy because we use less oil. Cooking this dish from home would not do it justice but it’s pretty close. Unless you rent a Cantonese restaurant and try to replicate this dish from a professional chef, I guess you’ll have to go to my uncle’s restaurant to check it out for yourself!Thousand Island Shrimp

Thousand Island Shrimp (千島蝦)

12 Shrimp

Ingredients

  • 12 Large Shrimp, peeled and deveined
  • 1/2 tsp Sesame Oil
  • 1/4 tsp Kosher Salt
  • 1/4 tsp White Pepper
  • 2 Eggs, beaten
  • 1/2 cup Cornstarch
  • 1/2 to 3/4 cup Thousand Island Dressing (If you don’t have it on hand, quick recipe below.)
  • Quick homemade Thousand Island Dressing
  • 1/2 cup mayonnaise
  • 1/4 cup ketchup
  • 1/2 cup sweet pickle relish
  • Vegetable Oil for deep frying

Preparation

  1. Preheat oil in a deep fryer or deep skillet to 375°F.
  2. Depending on which vessel you use, make sure the oil is deep enough to submerge the shrimp.
  3. Mix sesame oil, salt and pepper with the shrimp.
  4. Coat shrimp in cornstarch and shake off excess.
  5. Then coat shrimp in beaten egg.
  6. Finally, coat shrimp in cornstarch one last time.
  7. Deep fry the shrimp until golden brown for 2-3 minutes depending on the size of your shrimp.
  8. Make sure you don’t overcrowd the shrimp. Fry in batches if you’re not using a deep fryer with lots of oil.
  9. Once the shrimp are done, place them on a plate lined with paper towel to absorb excess oil.
  10. In a wok or large skillet, heat up your thousand island dressing.
  11. Put the fried shrimp in the wok and mix until all the shrimp is coated with the dressing.

Notes

Note #1: If you want the shrimp to be extra crunchy, refry them a second time before adding the sauce. However, if you decide to fry them twice, under fry the shrimp the first time.

Note #2: Depending on the size of your shrimp, put between 1/2 to 3/4 cup of the sauce. You can heat up part of the sauce and add more as needed.

https://www.memorabledishes.com/thousand-island-shrimp/

Potato Sausage Bake

Potato Sausage Bake

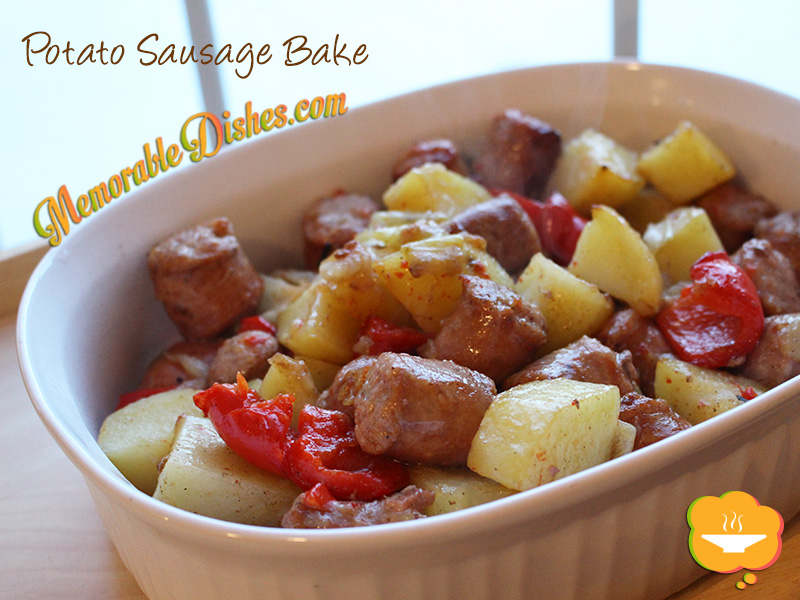
This is one of those dishes that I came up with on the fly because of what I had on hand. Often I make dishes from things I find in the fridge and not with the intention of making anything great. More often than not, my husband would say, “This is so good! Remember it for next time!” I tell him it’s nothing special and I’m sure I’ll remember it next time. I also like to challenge myself to come up with recipes in a pinch so I don’t write it down for that very purpose! 😛

One of the things I learned from one of my cooking class teachers about baking food (not baking sweets) is you can bake at a higher temperature if you’re short on time. One of the students asked the chef how long we should bake a dish for. The chef answered, “it depends on how much time you have. If you have more time, you can use the standard 350 degrees and if you have less time, put the temperature higher to speed up the process. Just watch the oven”. I never thought of that. When I read a recipe for baking food, I always follow the temperature precisely. When I cook on the stove, I adjust the temperature throughout to speed up the process. So it makes sense that you can do it for baking food as well. It is great advice from my teacher and I hear her voice assisting me every time I bake something savoury.

This experimental Memorable Dish is a quick one-dish dinner that could be made fairly quickly. It’s perfect for a weeknight dinner. I made this dish at 350 degrees for an hour the first time and this time, I baked it at 400 degrees for a shorter time. I kept an eye on it and it turned out great both times. I hope you try to experiment making different dishes with whatever food you have on hand. Please share and let me know how your experimental dish turns out 🙂

Potato Sausage Bake

Potato Sausage Bake

Prep Time: 15 minutes

Cook Time: 45 minutes

Total Time: 1 hour

Serving Size: 4

Ingredients

  • 3 medium Potatoes, large cubes
  • 1 medium Onion, large dice
  • 1 Red Pepper, large
  • 1/2 tsp Salt
  • 1/4 tsp Black Pepper
  • 1 tbsp Olive Oil
  • 4 pieces of your favourite Sausages, cut into 1-inch pieces

Preparation

  1. Preheat oven to 400°F
  2. Place and mix all the vegetables, salt, pepper and oil in a large baking dish.
  3. Put the cut up sausages with the vegetables and mix.
  4. Bake for 30-45 minutes until slightly brown. Mix the sausages and vegetables halfway.
  5. Depending on how big you cut your vegetables and sausages, it can take longer or shorter to bake.
https://www.memorabledishes.com/potato-sausage-bake/

Century Egg and Pork Congee
(皮蛋瘦肉粥)

Century Egg and Pork Congee

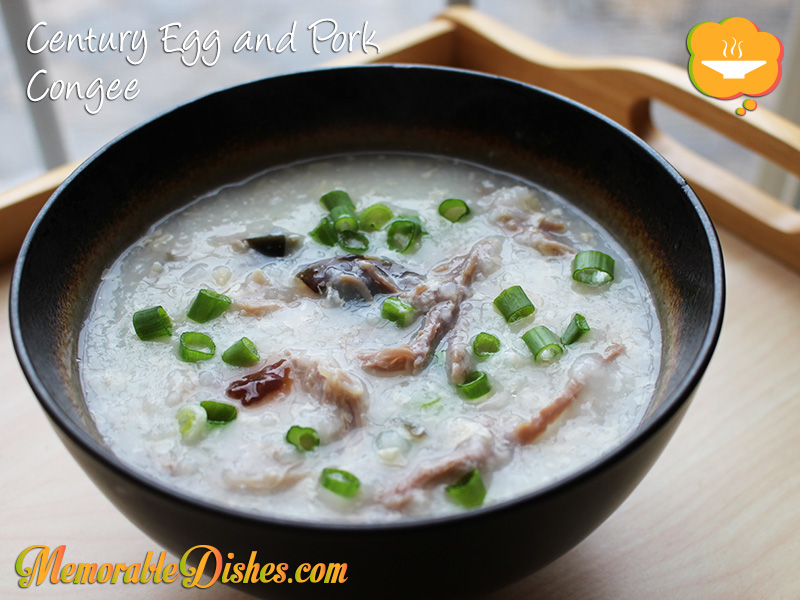
Congee is a comfort food that many Asians grew up eating. It’s a rice porridge that is typically served for breakfast or lunch if you accompany it with other heartier foods such as noodles. You’ll get full pretty fast if you’re eating congee but you’ll get hungry pretty soon too because it’s liquidy. It’s also a great meal to eat when you’re feeling sick because it’s warm and nourishing. Congee is like North American’s chicken soup.

I’m sure a lot of Chinese children grew up eating this Memorable Dish whether they grew up in Asia, North America or any other part of the world. If they are able to buy century eggs, their moms or grandmothers would’ve made them this congee when they were children.

My mother uses a couple of Chinese ingredients that may not be common to some. So if you can’t find them or don’t want to use them, it’s OK. One ingredient is conpoy (dried scallop) because it gives the congee a better taste. You won’t find good quality conpoy at your Chinese grocery store. We usually buy it from a Chinese dried seafood shop (海味店). She also mixes dried bean curd sheet (腐竹) with the rice before boiling it.

At first, my boys didn’t seem to like congee very much. Every time we had it at my mom’s house, they would only eat a few spoonfuls. They ate more of the side dishes of noodles and Chinese cruller. For them, congee equates Chinese cruller; congee is blasphemous without it. As time goes by, they started getting second bowls of congee! I wonder if it’s because of the crunchy Chinese cruller they love dipping the congee into or their taste suddenly evolved into a higher level of adult sophistication.

I’m sure this Memorable Dish brings back childhood memories for a lot of Chinese families. I remember my grandmother making it for us when we were kids and now my mother makes it for us and my kids. When my kids grow up I will teach them how to make this dish for their family with the hopes that they will continue the tradition of congee cooking for their loved ones.Century Egg and Pork Congee

Century Egg and Pork Congee
(皮蛋瘦肉粥)

Prep Time: 15 minutes

Cook Time: 1 hour

Total Time: 1 hour, 15 minutes

Serving Size: 6-8

Ingredients

  • 1 pound Lean Pork, cut into 2 big pieces
  • 2 tsp Salt
  • 1 Century Egg (cut in half)
  • 1 cup Rice
  • 2 slices of Ginger
  • 16 cups Water
  • 3 pieces of Conpoy (Dried Scallop) (optional)
  • 1/2 cup Dried Bean Curd Sheet, crushed up (optional)
  • 1 sliced Green Onion for garnish
  • White Pepper & Salt or Soy Sauce to taste

Preparation

  1. The night before, coat pork pieces with salt and marinate in the fridge.
  2. If using conpoy, soak them in water to reconstitute it.
  3. On the day of making the congee, rinse rice until the water is almost clear.
  4. In a large bowl, mix 1/2 century egg, rice and dried bean curd sheet (if using) together. Set aside.
  5. After conpoy has been softened, break pieces up with a fork or by hand.
  6. In a large pot, put 12 cups of water, pork pieces, ginger slices, and conpoy (if using). Bring everything to a boil.
  7. Once it’s boiled, skim off scum and boil for another 15 minutes.
  8. Put rice mixture into the boiling liquid and once it’s boiled, turn down to medium to medium high heat.
  9. The liquid should be in a rolling boil state.
  10. Keep the pot lid slightly open so the congee won’t boil over,
  11. Cook congee for 15 minutes and add the additional 4 cups of water.
  12. Cook congee for approximately 45 minutes more.
  13. Check and stir the pot periodically to make sure the rice doesn’t stick to the bottom as it thickens.
  14. Once you boil it to the consistency of your liking, the rice should be broken down by now. Turn off heat.
  15. Take the big pork pieces out of the pot and shred it with a fork or by hand.
  16. Cut the other half of the century egg into small pieces.
  17. Put the shredded pork and century egg back into the pot of congee and mix.
  18. Serve in bowls and garnish with green onions, white pepper and salt or soy sauce to taste.

Notes

If you like thicker congee, cook it longer. If you like it thinner, add a bit more water. Make sure you bring it back to a boil if using cold water.

https://www.memorabledishes.com/century-egg-and-pork-congee/

Chinese Hot Pot

Chinese Hot Pot

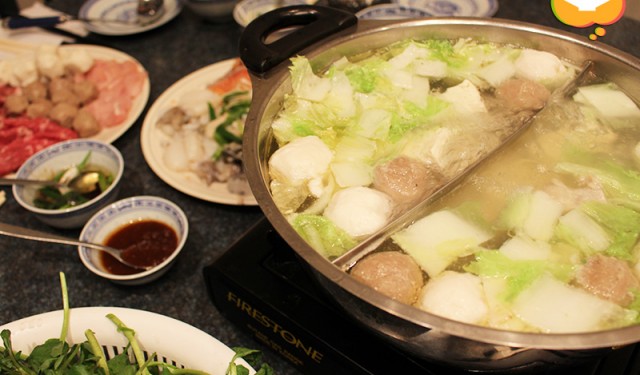
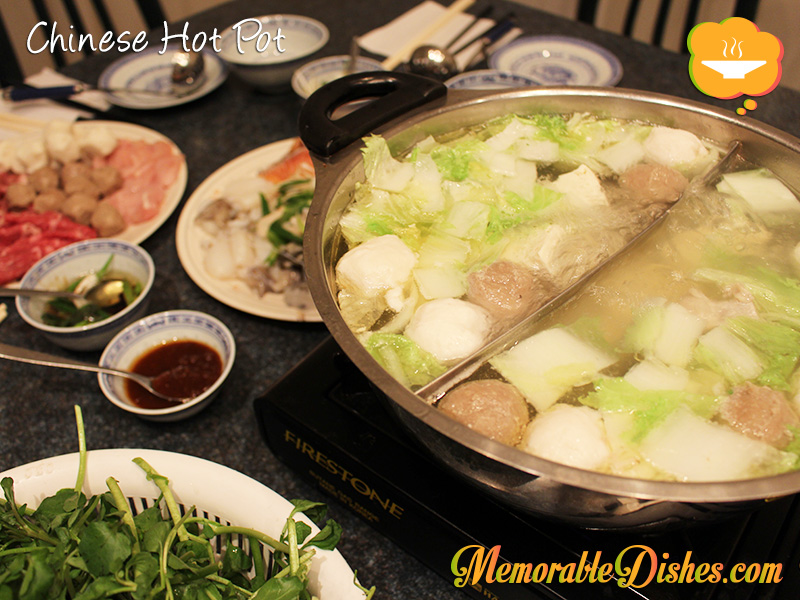
Hot pot is something that I crave during the cold winter months. The boys also look forward to eating it every winter. Chinese hot pot consists of using broth to cook slices of meats, seafood, dumplings and vegetables in a boiling pot of broth. You set this up on the dining table and everyone cooks their own food. It’s like a fondue except you cook with boiling broth.

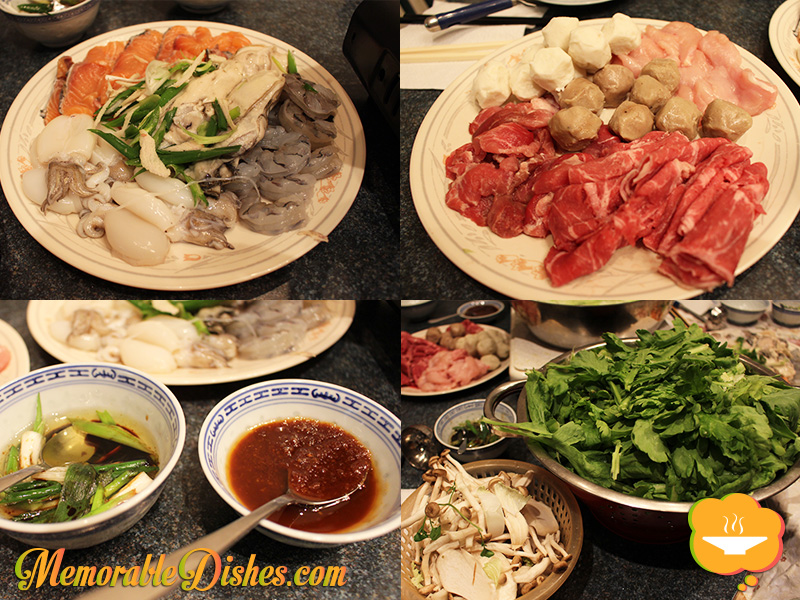
This is definitely a Memorable Dish for our whole family because we all look forward to it during the winter months. Thinking about eating hot pot always makes me hungry. The kids love picking their own pieces of meat and dumping them into the bubbling broth. They especially love the baby cuttlefish. My second son always forgets that the meat is piping hot after it’s just done cooking and usually ends up burning his tongue.

I remember my maternal grandmother used to have hot pot practically every evening during the winter months! In Hong Kong, there’s no central heating because it doesn’t snow and doesn’t get super cold. However, you need to wear thicker clothes inside the house or you might have a space heater if you’re really cold. To keep warm, my grandparents used to have hot pot in this mini pot that just serves one or two people.

We like using plain broth because of the kids. But you can spice it up by making your own spicy broth. If you dare, you can make a mala sauce which consists of Sichuan peppercorns, chilies and various spices. The Sichuan peppercorns create a numbing effect on your tongue – people either love it or hate it. But for now, we’ll stick to our regular broth hot pot.Chinese Hot Pot

Chinese Hot Pot

Prep Time: 30 minutes

Total Time: 30 minutes

Serving Size: Slice about 1/2 pound of meat per person.

Ingredients

  • Slices of Chicken
  • Slices of Beef
  • Slices of Pork
  • Slices of Fish
  • Cuttlefish
  • Shrimp
  • Oysters
  • Tofu
  • Frozen Dumplings
  • Udon Noodles
  • Leafy Vegetables (Spinach, Bak Choy, etc.)
  • Chicken Broth
  • For dipping sauces:
  • Scallions, julienned
  • Ginger, julienned
  • Vegetable Oil
  • Soy Sauce
  • Satay Sauce
  • Hot Sauce

Preparation

  1. Slice up all your meats if you’re not using frozen pre-sliced ones.
  2. For your dipping sauce, put your ginger and scallions in a bowl.
  3. Heat up the oil until it sizzles. You can check by putting a small piece of ginger in it.
  4. Once the oil is heated, pour the hot oil onto the ginger and scallions. Then pour in soy sauce.
  5. You can mix in satay sauce or use the satay sauce on the side.
  6. Set your butane burner on your dining table. (We also have an electric one.)
  7. Heat up your broth in a pot used for hot pot cooking on the stove.
  8. Once the broth is boiled, carefully transfer it onto your butane burner.
  9. Cook your meats in the broth and enjoy.
  10. You can make steamed rice to go with it if you want.
  11. As you cook, the broth will evaporate. Add boiling water to the pot so you’ll have enough liquid to cook the food.

Notes

Note #1: You can find butane burners and hot pot cooking pots at an Asian grocery store. The hot pot cooking pots are usually thinner and may have a divider in the middle so that you can split between a plain or spicy broth.

Note #2: You can purchase thin slices of meat in the frozen section at large Chinese grocery stores.

https://www.memorabledishes.com/chinese-hot-pot/

Chinese Hot Pot Ingredients

Show Buttons
Hide Buttons