Category Archives: Main Course

Recipes of Main Courses

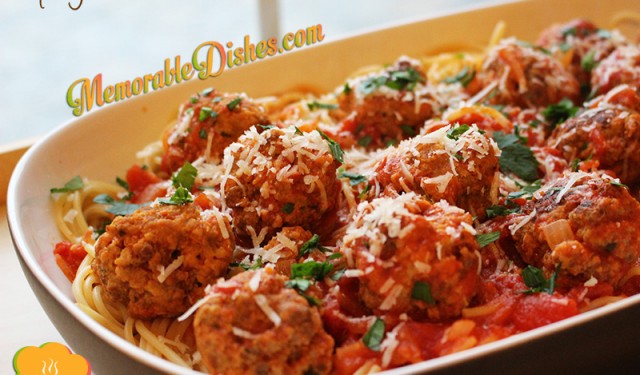
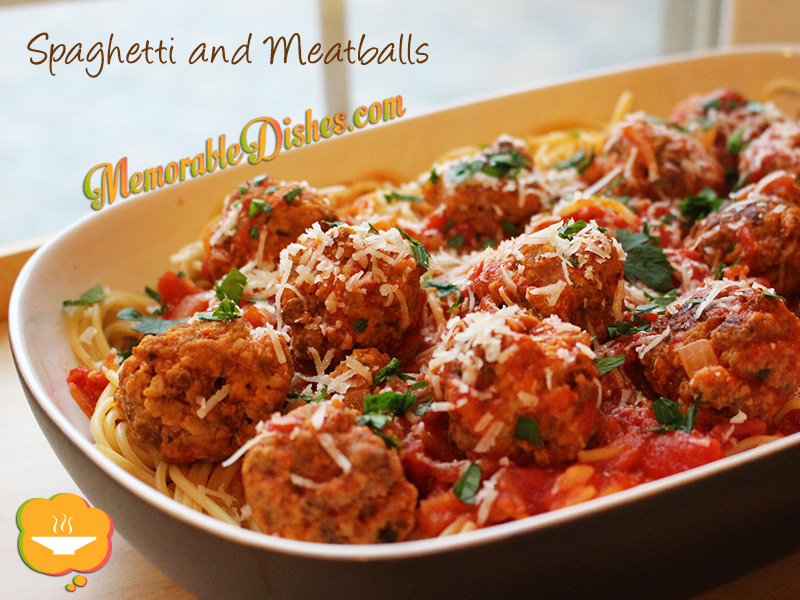
Spaghetti and Meatballs

Spaghetti and Meatballs

My second son has been hounding me to make spaghetti and meatballs. Everytime I said I was going to make them, I ended up making spaghetti and meat SAUCE instead. I know he loves the meatballs but he doesn’t know the time it entails to make them. Meat sauce is easy, fast, and I can make it without much planning. Even though he does help me crush the tomatoes, it doesn’t shave off that much time 😉 Making meatballs, at least good meatballs, takes time.

I’ve made tons of meatballs and followed dozens of recipes in the past. But I find Lidia Bastianich’s recipe easy to make and uses simple ingredients that produce juicy meatballs. I love watching Lidia Bastianich’s show on PBS or the Canadian equivalent of public television. It’s just so comforting watching her describe and cook her Italian dishes. When I search for “Lidia Bastianich meatballs”, lots of different recipes show up. The recipes are all slightly different but I found this one is the closest to the one I saw on her show.

Spaghetti and meatballs is a comforting dish that I wish I could make more often. It always brings a smile to my kids’ faces. When they heard that I was making spaghetti and meatballs, they got so excited and gave me big hugs and kisses. This Memorable Dish is a tribute to my Bubby. This dish definitely describes him to the core. Round (his round face) and comforting. 🙂Spaghetti and Meatballs
Spaghetti and Meatballs

Prep Time: 1 hour

Cook Time: 1 hour

Total Time: 2 hours

Serving Size: 6-8

Ingredients

  • For Meatballs:
  • 1 medium Carrot, coarsely chopped
  • 2 stalks Celery, coarsely chopped
  • 2 medium Onions, coarsely chopped
  • 1 pound ground Beef
  • 1 pound ground Pork
  • 1 pound ground Veal
  • 2 large Eggs, beaten
  • 1/2 cup Parsley, chopped
  • 2 cups Bread Crumbs
  • 1 tbsp Kosher Salt
  • For Sauce:
  • 1/4 cup extra virgin Olive Oil
  • 1 medium Onion, chopped (about 1 1/2 cups)
  • 2 tsp Kosher Salt, plus more as needed
  • 2 Bay Leaves
  • 1/2 tsp Peperoncino
  • 3 (28-ounce) cans San Marzano Plum Tomatoes, crushed by hands in large bowl
  • 1 pound Spaghetti

Preparation

  1. Preheat the oven to 425°F.
  2. In a food processor, combine the carrot, celery and onion. Pulse to make a fine-textured paste or pestata.
  3. Scrape the pestata into a large bowl and add the remaining meatball ingredients.
  4. Mix well with your hands to combine all of the ingredients.
  5. Roll into golf ball sized meatballs and place on baking sheets approximately 1/2 inch apart. You should fit approximately 24 meatballs on your baking tray. This recipe yields about 4 dozen (48) meatballs.
  6. Bake meatballs until browned all over, about 18 to 20 minutes. The meatballs do not need to be entirely cooked through because they will cook more in the sauce.
  7. While the meatballs are baking, begin the sauce.
  8. In a large pot, heat the olive oil over medium heat.
  9. Add the onion and sauté until softened about 5 minutes.
  10. Add 1 teaspoon of salt and peperoncino. Let the peperoncino toast for a minute.
  11. Add the crushed tomatoes. Slosh out the tomato cans and bowl with 4 cups of hot water and add to the pot.
  12. Add bay leaf and remaining teaspoon of salt.
  13. Bring sauce to a simmer while the meatballs finish baking, about 10 minutes more.
  14. When the meatballs have finished baking, gently add them to the sauce and return to a simmer.
  15. Simmer, shaking the pan periodically to move but not break the meatballs, until sauce is thick and flavourful, about 30 minutes.
  16. Add 1 pound of spaghetti to boiling salted water. When the pasta is al dente, drain with tongs and add directly to half of the sauce.
  17. Toss and serve immediately with some grated Grana Padano or Parmesan cheese.
  18. Top with meatballs and extra sauce to your taste.

Notes

Note #1: You could use two out of the three combination of meats. If you like, substitute ground turkey for one of the meats but be aware that the meatballs might be a little bit drier because it has less fat.

Note #2: The original recipe has 1 teaspoon of ground oregano in it. I omitted it so that I can use my extra meatballs for different recipes.

Note #3: After baking the meatballs, I freeze the extra ones to be used in other recipes.

https://www.memorabledishes.com/spaghetti-and-meatballs/

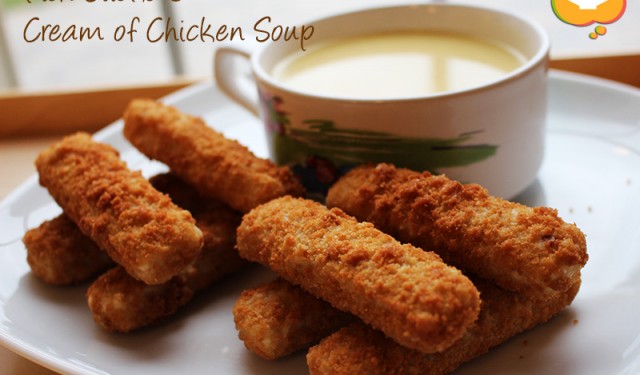
Fish Sticks and Cream of Chicken Soup

Fish Sticks & Cream of Chicken Soup

You would think fish sticks and cream of chicken soup were my childhood staples since I created a blog entry about them. On the contrary, these Memorable Dishes were special treats from my mom when she didn’t have time to make the multiple dishes that comprise every Chinese meal.

In Hong Kong, my mom worked full time and took care of my older brother and me at the time. Most people in Hong Kong do not own a car because it’s fairly expensive to maintain. Plus, the public transit system is amazing. Having said that, my mother still had to travel from one end of of the city to get to work and home by public transit. Everyday she would finish work, go to the market and buy fresh ingredients to cook us dinner. She did that EVERY evening. I don’t know how she did it because I can’t imagine anyone going to the market everyday on top of going to work full time. Not only did she cook us fresh meals every day, she cooked us several dishes including a soup. We always had fish, a meat dish, a vegetable dish, and steamed rice of course.

So every now and then when she was crunched for time, she would take shortcuts like every mom who tries to keep her sanity. When she didn’t have time to get fresh fish, she would bake us frozen fish sticks. I got super excited every time we got to eat this. I know it’s fried and frozen and not particularly healthy. But as a kid, we didn’t know that and it was such a special treat just to have fish sticks!

When she didn’t have enough time to make a soup, she would make a can of cream of chicken soup for us. Cream of mushroom soup either wasn’t available or not as popular as cream of chicken soup in Hong Kong at the time. Of course, I was also super excited about the cream of chicken soup too. My mom didn’t really whisk the soup until it was all smooth and creamy. So the soup would have pockets of creamy chunks which I liked drinking and smashing in my mouth.

This is to all moms out there – give yourself some slack! Don’t stress if you must make your kids frozen and processed foods from time to time. Even my full-time working mom who made dishes from scratch every evening took short cuts when she needed to 🙂Fish Sticks & Cream of Chicken Soup

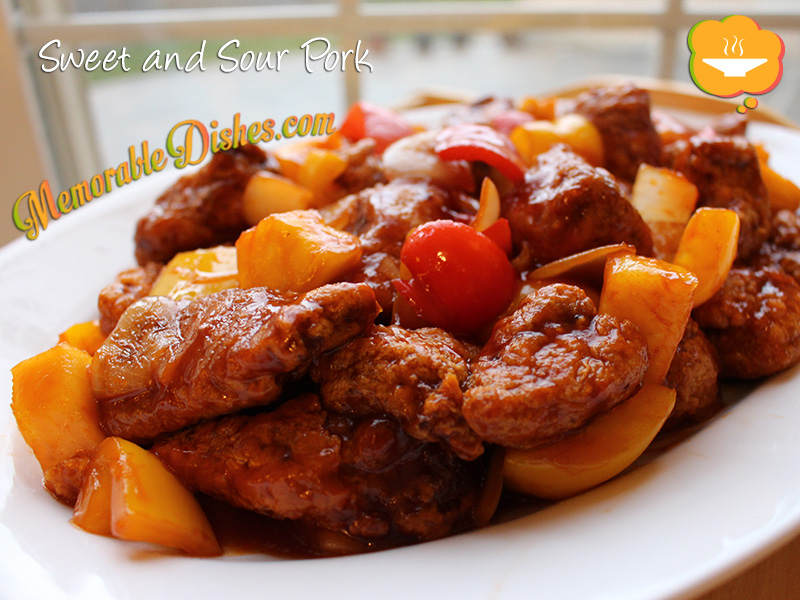
Sweet & Sour Pork

Sweet & Sour Pork

This Memorable Dish is another tribute to my husband. He loves sweet and sour pork. I would think most North Americans who eat Chinese food know about this dish and usually love it.

Believe it or not, this is NOT one of those dishes that was invented by North American Chinese, like chop suey. I believe sweet and sour pork is one of the most well known dishes in Chinese cuisine, both American/Canadian-Chinese and authentic Chinese restaurants alike.

My mom usually makes this for Sunday dinner when she has a bit more time because it’s a two-step process. First you have to deep fry the pork and then stir fry it with the sweet and sour sauce. I always find it a bit cumbersome to deep fry stuff at home. But alas, my mom does it because she enjoys making the food we like to eat.

This version of sweet and sour pork is based on my mom’s homemade version. Every Chinese family has their take on this dish and only certain Chinese restaurants make it well. Try my version but don’t forget to adjust the sweetness or sourness to your family’s liking.Sweet & Sour Pork

Sweet & Sour Pork

Prep Time: 20 minutes

Cook Time: 20 minutes

Total Time: 40 minutes

Serving Size: 4-6

Ingredients

  • 1 1/2 lbs Pork Butt (Shoulder), cut into 1 inch cubes
  • 1 tbsp of Soy Sauce
  • 1 tsp of Sugar
  • 1 tsp of Cornstarch
  • 1 tsp Shaoxing Wine or Cooking Wine
  • 1 small Onion, cut into large dice
  • 1 Pepper (green, red, orange or yellow), 1 inch pieces
  • 1 cup fresh or canned Pineapple,1 inch cube
  • 1/2 cup Ketchup
  • 1/2 cup Apple Cider Vinegar
  • 3 tbsp Sugar
  • 1 tbsp Soy Sauce
  • 1 Egg, beaten
  • 3/4 cup Cornstarch
  • Vegetable Oil for deep frying

Preparation

  1. Marinate pork with soy sauce, sugar, cornstarch, and cooking wine for at least 1 hour.
  2. In a small bowl, mix ketchup, vinegar, soy sauce and set aside.
  3. Preheat oil in a deep fryer or deep skillet to 375°F.
  4. Mix beaten egg with the marinated pork.
  5. Coat pork in cornstarch and shake off excess.
  6. Deep fry the pork until golden brown for about 5 minutes or until it floats.
  7. Make sure you don’t overcrowd the pork. Fry in batches if you’re not using a deep fryer with lots of oil.
  8. Once the pork pieces are done, place them on a plate lined with paper towel to absorb excess oil.
  9. In a wok or large skillet, heat up 1 tbsp of oil.
  10. Fry onions and green peppers until softened, then add ketchup mixture sauce.
  11. Once the sauce starts to boil, add the pineapples and stir.
  12. Put the pork in and mix until everything is coated.

Notes

Taste the ketchup mixture after you mix it. You might want to adjust the sweetness or sourness to your taste.

https://www.memorabledishes.com/sweet-sour-pork/

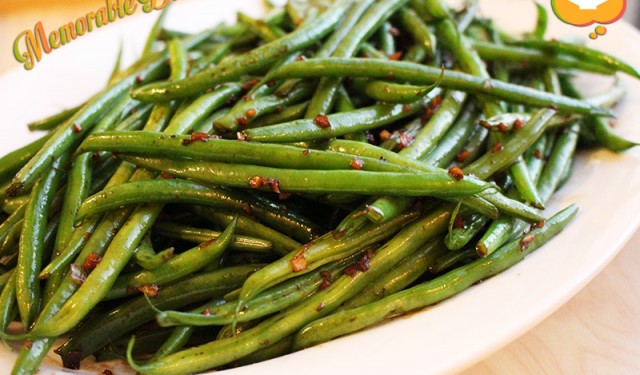
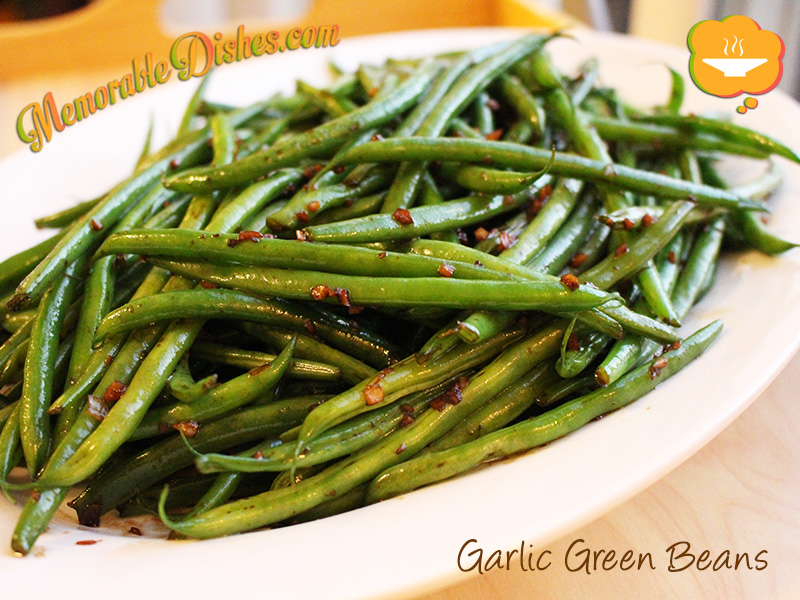
Garlic Green Beans

Garlic Green Beans

My kids insisted that I put this on my Memorable Dishes blog. They absolutely LOVE this dish. In fact, they said these garlic green beans were even better than French fries! I think they were just pulling my leg and trying to butter me up for something they want later 😉 Already, at such a young age, they’ve learned to subdue me with their sugary words…

I remember the days when the boys were not that much into vegetables. Persuading them to eat their veggies was like pulling teeth. Then when I least expected it, they were trying new vegetables! Maybe all the brainwashing horror stories I told them about not eating their veggies finally got to them 😉 I remember distinctly the first time they ate this vegetable. It was at a holiday potluck dinner with friends. We were waiting for other foods to finish cooking or heating up. The boys were super hungry so I told them to eat the garlic green beans our friends brought. I was expecting to hear moans and groans and thought to myself, they’re not going to eat them. I gave it a shot anyway and….lo and behold they ate them without any struggle! In fact, they actually embraced eating them.

I asked my friends what they put in it and all they said was garlic and butter. Since then, I started making this at home and every time they’ve loved it. Recently, I’ve added my own Asian twist to it and use soy sauce instead. Not just your regular soy sauce, mind you, but a good premium soy sauce. That took the green beans to a whole another level and that was when they said it tasted better than French fries.

I never would have thought simple garlic green beans with soy sauce could turn into a Memorable Dish. The trick is to cook the green beans to your liking. Our family likes it with a bit of a crunch to them. If you are able to find the French green beans (which are thinner), they are even better.Garlic Green Beans

Garlic Green Beans

Prep Time: 10 minutes

Cook Time: 10 minutes

Total Time: 20 minutes

Ingredients

  • 1 1/2 lb Green Beans
  • Water for boiling beans
  • Salt for boiling beans
  • 2 tbsp Vegetable Oil
  • 6 cloves Garlic, minced
  • 2 tbsp Soy Sauce

Preparation

  1. Bring water to a boil and add enough salt until you can taste it.
  2. Put green beans in boiling water. Once the water starts to boil again, drain the green beans and set aside.
  3. Heat oil in a wok or large frying pan.
  4. Add garlic and green beans and stir-fry for a few minutes until heated through.
  5. Add soy sauce and stir-fry until soy sauce is coated on all the beans.

Notes

If you end up overboiling the green beans, put them in an ice bath and drain.

https://www.memorabledishes.com/garlic-green-beans/

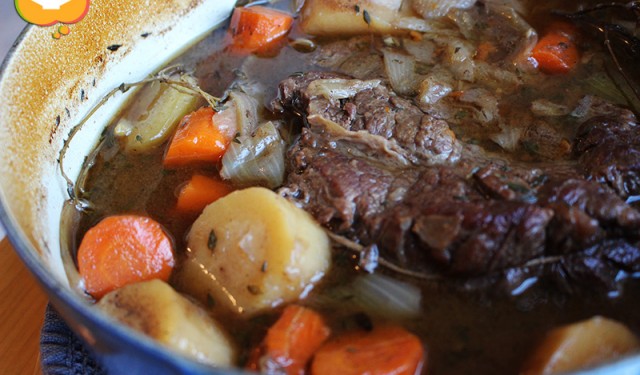
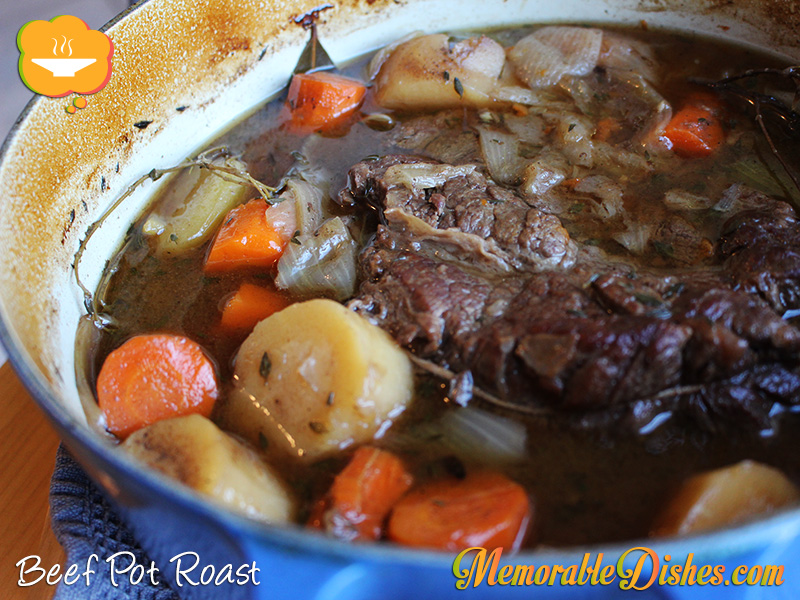
Beef Pot Roast

Beef Pot Roast

This is a comfort food for lots of people who’ve grown up in North America. It also happens to be one of my husband’s favourite Memorable Dishes made from his paternal grandmother. He’s the first to admit that she’s not as good of a cook as his maternal grandmother but nonetheless, her beef pot roast brings back sweet childhood memories. Just add a side of corn and you have a perfect meal to suit every kid’s taste. Soft tender beef and sweet kernels of corn. He remembers she always used to make corn to go with this dish.

Even though I didn’t grow up eating this Memorable Dish, I can feel how comforting eating this pot roast can be. Especially on a chilly day, I crave for hearty and saucy meals. The kids really enjoyed this dish and even my baby girl wanted more of it. I think the tender meaty goodness really ignites her palate and warms up her big belly 🙂

This pot roast might not be the same as my husband’s grandmother’s recipe, but he definitely enjoyed it. If you want the beef to be more tender, just cook it longer. This is a great leftover dish and tastes even better the next day!Beef Pot Roast

Beef Pot Roast

Prep Time: 20 minutes

Cook Time: 3 hours

Total Time: 3 hours, 20 minutes

Serving Size: 6

Ingredients

  • 1 Beef Pot Roast (approximately 3 pounds)
  • 2 Onions cut into quarters
  • 4 cloves Garlic, whole
  • 2 Carrots cut into 2-inch pieces
  • 2 Parsnips cut into 2-inch pieces
  • 2 Celery stalks cut into 2-inch pieces
  • 2 large Potatoes cut into large chunks
  • 2-3 sprigs Thyme
  • 1 Bay Leaf
  • 2 tbsp vegetable oil
  • Salt & Pepper
  • 4 cups Beef Broth

Preparation

  1. Preheat the oven to 325 degrees F.
  2. Pat roast dry and sprinkle it generously with salt and pepper.
  3. Heat oil in Dutch oven and brown all sides of the roast. Set aside.
  4. In the same pot, add onions and garlic.
  5. Deglaze the pot with beef broth and scrape the bottom of the pot.
  6. Put roast back into the pot and add the rest of the vegetables, thyme and bay leaf.
  7. Bring liquid back to a boil.
  8. Taste the broth and add more salt if needed. (Remember the meat and vegetables are going to absorb the salt and if it’s not salted enough, it’s going to taste bland once it’s cooked.)
  9. Cover Dutch oven and bake in the oven for 2 1/2 to 3 hours until beef is tender.
  10. Serve with crusty bread and if you’re Asian, serve with rice 🙂
https://www.memorabledishes.com/beef-pot-roast/


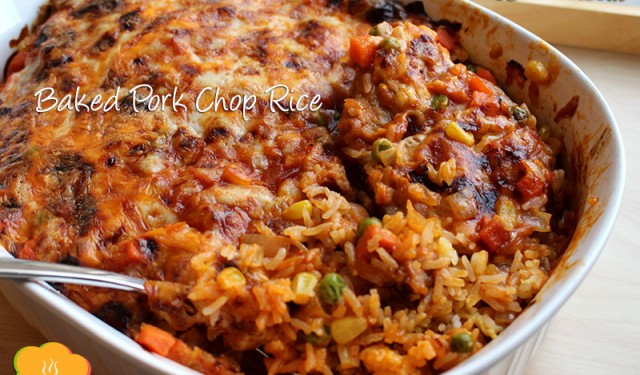
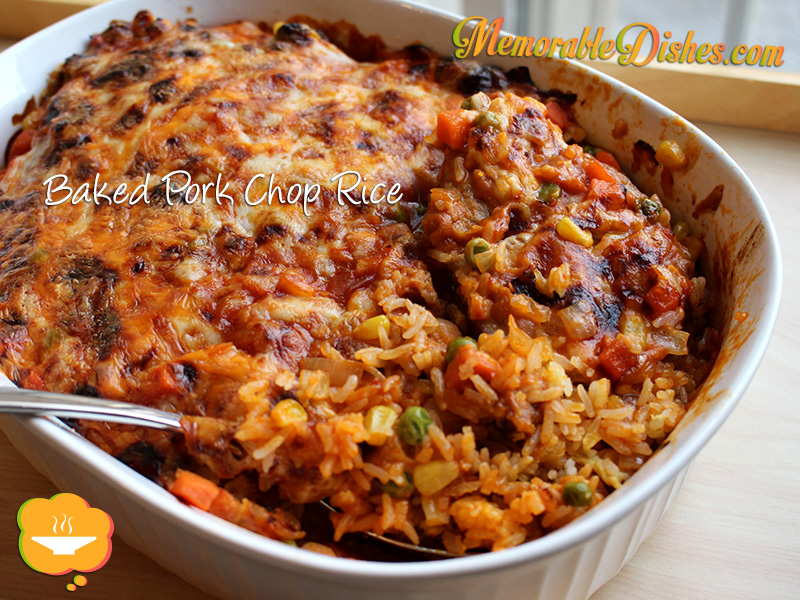
Baked Pork Chop Rice – Hong Kong Style (焗豬扒飯)

Baked Pork Chop Rice

Baked Pork Chop Rice is a much enjoyed and popular dish at Hong Kong-Western style cafés. Until recently, I didn’t know what sauce the cafés used for their baked pork chop rice. Somehow I never questioned where the smooth and pasty tomato sauce that adheres to the top of the pork chops came from. It could be béchamel sauce with tomato paste mixed in? The tomato sauce definitely doesn’t taste like the familiar tomato sauce that goes on top of Italian meatballs. I thought about it for a bit but never gave it much more thought.

Somehow when I was perusing down the canned soup aisle…eureka—canned tomato soup! Yes, food thoughts pop into my head when I least expect it. How could I not have figured this out? Based on the taste, texture and colour, they must use canned tomato soup as their sauce! Don’t quote me on it, the cafés might very well make their sauce from scratch and use their special secret ingredients. But I figure to make this Memorable Dish at home, it’s a great and easy alternative to use canned tomato soup.

This comfort food is enjoyed by many Hong Kongers. Eating out in Hong Kong is the norm because everyone is super busy and food is readily available everywhere. Some cafés deep-fry their pork chops but this homemade version is pan-fried. At the restaurants, they usually use egg fried rice as the base. If it’s too much hassle, just use plain steamed rice. Our kids really enjoyed this Memorable Dish at our home Hong Kong-Western style café! I just have to make a Yinyeung (Hong Kong style coffee and tea) to go with it next time 😉

Baked Pork Chop Rice

Baked Pork Chop Rice – Hong Kong Style (焗豬扒飯)

Prep Time: 20 minutes

Cook Time: 30 minutes

Total Time: 50 minutes

Serving Size: 4

Ingredients

  • 4 pieces of Pork Loin
  • 1 tbsp Soy Sauce
  • 1 tsp Sugar
  • 1 tsp Cornstarch
  • 1 tsp Chinese Cooking Wine (optional)
  • 1/8 tsp White Pepper
  • 1/4 cup Flour
  • Vegetable Oil (enough to cover your pan 1/4 inch deep)
  • 2 cloves minced Garlic
  • 1 small Onion, diced
  • 1 can of Tomato soup
  • 1-2 cups of frozen Peas, Carrots, Corn (thawed)
  • 5 cups cooked Egg Fried Rice or Plain Rice
  • 1/2 cup Mozzarella Cheese, grated
  • 1/2 cup Cheddar Cheese, grated

Preparation

  1. Use a meat tenderizer or the back of a cleaver to tenderize the pork chops.
  2. Marinate pork chops with soy sauce, sugar, cornstarch, cooking wine and white pepper for at least 30 minutes.
  3. Preheat oven to 400°F before frying pork chops.
  4. Lightly flour both sides of the pork chops.
  5. Heat oil and fry pork chops on each side until brown. Set aside.
  6. Drain all the oil except for 1 tablespoon left in the pan.
  7. Sauté onions for a few minutes then add the garlic.
  8. Pour the can of tomato soup into the onions and use a bit of water to rinse out the rest of the soup in the can.
  9. Mix the vegetables into the sauce and turn off heat.
  10. In a glass or ceramic dish, put rice at the bottom, then the pork chops and then top with the tomato sauce.
  11. Sprinkle with cheese and bake for 20 to 30 minutes depending on how thick your pork chops are.
  12. If your cheese is not brown enough, you can put it under the broiler for a few minutes.

Notes

Make sure the oil is hot before frying pork chops. To test if the oil is hot enough, sprinkle a little flour in it. If it sizzles, then it’s hot enough.

https://www.memorabledishes.com/baked-pork-chop-rice/

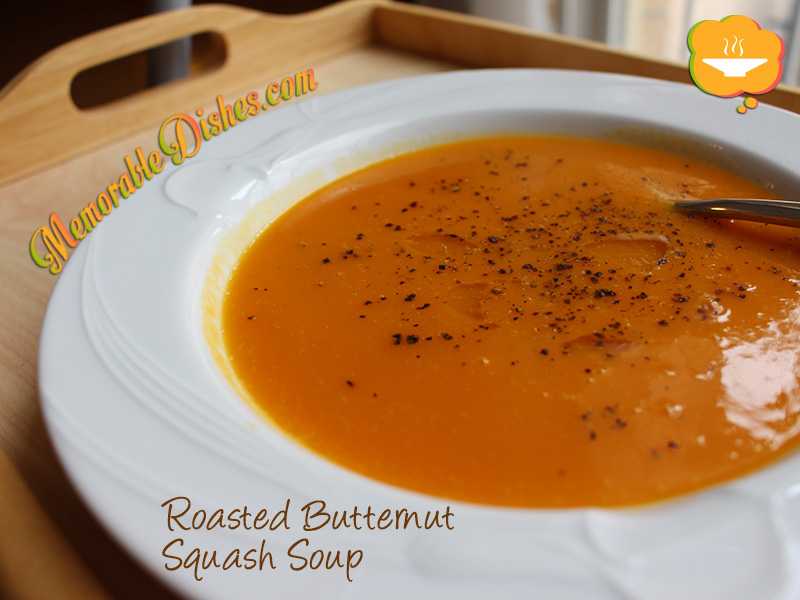
Roasted Butternut Squash Soup

Roasted Butternut Squash Soup

I am beginning to enjoy this time of year. I used to dread the Fall season because the weather gets cooler and summer clothes and flip flops get put away. Now when the leaves turn orange, brown and red, I think of eating warm and nourishing foods. I love that the colours of the vegetables in season also resemble the colours of the leaves.

Butternut squashes and other types of squashes dominate the grocery store this time of year. It’s hard not to buy them and make something out of them. The kids really enjoy this Memorable Dish, but this wasn’t always the case. They were used to drinking Chinese cleansing soup which is clear, so drinking this thick soup was weird to them. Now that they’re older and their taste has evolved, they are embracing this mushy soup. I make different versions of this soup and my oldest son really likes it with cumin added in.

I have tried roasting the butternut squash with the peel on, but the results are better if you peel it first. If you leave the peel on, the flavour gets left behind on the peel. Since you scoop the flesh out after roasting, the caramelization is left on the peel where the flavour is. To give this soup extra oomph, I tossed in a few garlic cloves to roast with the squash.

This is one of the recipes that you can’t really screw up and can make on the fly with a few ingredients on hand. If you want to sauté some onions and carrots, feel free to do so. I make this soup different every time and everyone always loves it! Enjoy this super easy (except for the peeling of the butternut squash part :P) and delicious Memorable Dish while the squashes are in season.

Roasted Butternut Squash Soup

Roasted Butternut Squash Soup

Prep Time: 20 minutes

Cook Time: 40 minutes

Total Time: 1 hour

Serving Size: 4

Ingredients

  • 1 Butternut Squash, peeled and cut into 1/2 inch chunks
  • 5 cloves of Garlic, peeled
  • Olive Oil
  • 4 cups Chicken or Vegetable Stock
  • 1/2 tsp Cumin
  • Salt & Pepper to taste

Preparation

  1. Preheat oven to 400°F.
  2. Place butternut squash and garlic on roasting pan and put enough olive oil to coat everything. Toss and make sure all the pieces are coated.
  3. Roast butternut squash and garlic for 20-30 minutes.
  4. Flip them around with a spatula and roast for another 20-30 minutes or until brown.
  5. In a pot, put the roasted butternut squash, garlic, cumin and stock.
  6. Use an immersion blender to blend until smooth.
  7. Bring the puréed soup to a boil.
  8. Add salt and pepper to taste. Then drizzle olive oil on top if desired.

Notes

Use more or less broth depending on the consistency you like or the size of your butternut squash.

https://www.memorabledishes.com/roasted-butternut-squash-soup/

Ramen Noodles

Ramen Noodles

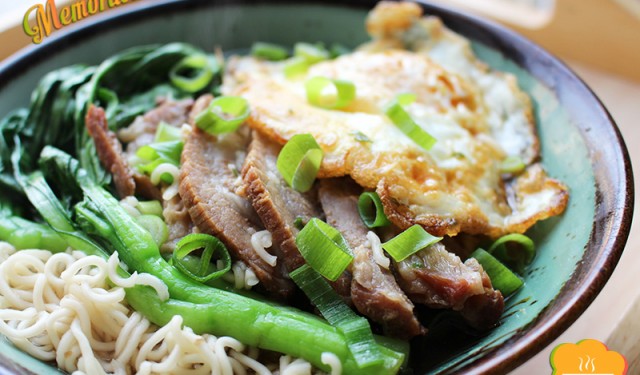
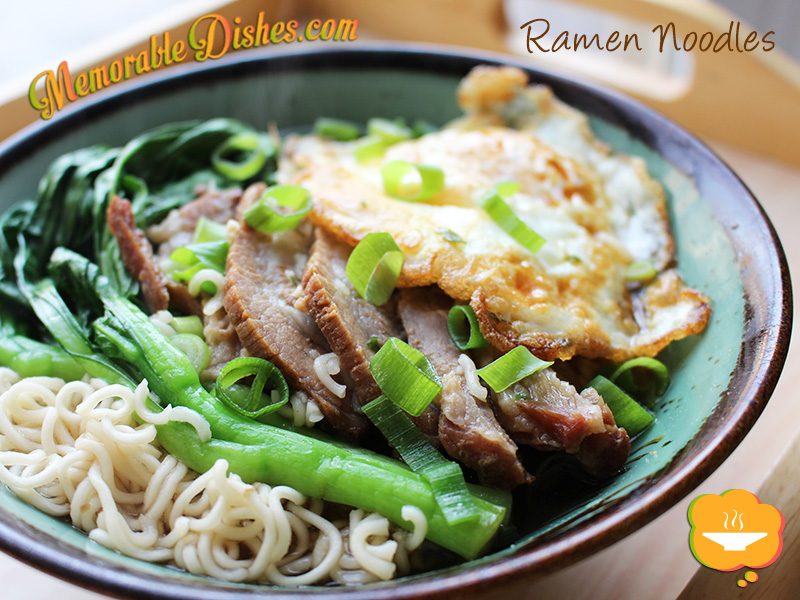
As the weather is getting cooler, I crave for a bowl of hot ramen noodles. Ramen noodles – not the fancy kind you eat at Japanese restaurants where they brew the broth with pork bone and meat for hours. But the instant kind. Every Asian household always has instant ramen noodles stocked up in their pantry at all times. Thus, instant ramen noodles should be a Memorable Dish for all Asians.

Instant ramen noodles is a comfort food to many Asians growing up. We know it’s not the healthiest thing on earth but we just love it. Asians don’t just eat the plain ramen noodles right out of a package but have extra add-ons to make the noodles extra yummy. Plus, if you are making them for your friends and family, it creates the illusion that you made some effort in cooking this dish and not just boiling instant noodles.

I personally blanch the noodles and rinse it with cold water and then reheat the noodles with the broth. If you don’t want to do that, just cook the ramen according to the package. I happen to have some of my homemade leftover Chinese BBQ Pork so I put that, veggies and a fried egg as my toppings. Put your favourite ingredients on your ramen and enjoy!
Ramen Noodles

Ramen Noodles

Prep Time: 5 minutes

Cook Time: 10 minutes

Total Time: 15 minutes

Serving Size: 1

Ingredients

  • 1 pack instant Ramen
  • Slices of leftover or fresh meat (chicken, beef, pork, etc.)
  • Fresh Vegetables
  • Fried Egg
  • Slices of Scallions (optional)

Preparation

  1. Boil the ramen according to the package.
  2. Top with cooked meat, vegetables, fried egg, scallions or any desired topping.
  3. Eat and enjoy!
https://www.memorabledishes.com/ramen-noodles/

Yeung Chow Fried Rice (揚州炒飯)

Yeung Chow Fried Rice

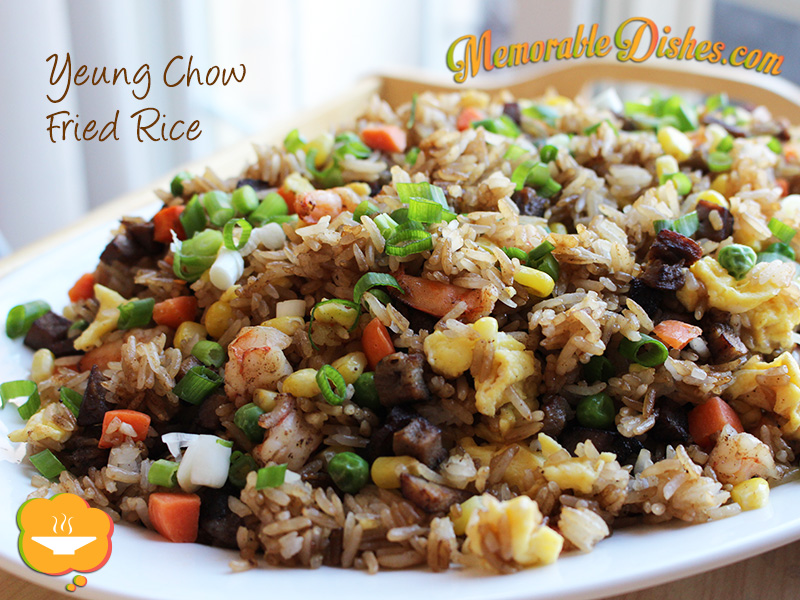
Yeung Chow Fried Rice derives from the city of Yangzhou, Jiangsu province of China. I believe it’s one of the most popular Cantonese rice dish in the West. In every Chinese restaurant, there is Yeung Chow Fried Rice on the menu. Who wouldn’t love it? It has a taste of everything—bbq pork, shrimp, eggs and veggies.

If you ask my husband what his favourite Chinese food is he would definitely say, “Yeung Chow Fried Rice!” Every time we go to a Chinese restaurant, he wants to order Yeung Chow Fried Rice. When he heard that I was making this for the blog, he was disappointed that he wouldn’t be able to taste this Memorable Dish because he had to fly out for work. I told him I was going to save him some if the boys hadn’t devoured it all.

The kiddies also love Yeung Chow Fried Rice. Actually they love eating any type of fried rice. I think the crispiness of the rice combined with the meat and vegetables give their mouths a sensation overload that they enjoy. They can eat bowls and bowls of it! When they eat fried rice, they are like little machines scooping big mouthfuls at a time into their mouths.

You can easily make this Memorable Dish right in your own home. Either buy Chinese BBQ Pork from the Chinese BBQ shop or major Chinese grocery store. If you have time, make your own Chinese BBQ Pork from my recipe. Frankly, I think it tastes better when you make this fried rice at home. I find that restaurants skimp out on the ingredients and the meat to rice ratio is too low. I’ll bet you can’t just eat one bowl of this yummy fried rice 😉Yeung Chow Fried Rice

Yeung Chow Fried Rice (揚州炒飯)

Prep Time: 15 minutes

Cook Time: 15 minutes

Total Time: 30 minutes

Serving Size: 4

Ingredients

  • 5 cups of day-old Cooked Rice (2 cups of uncooked rice)
  • 2 cups of Chinese BBQ Pork (Char Siu), diced
  • 1/2 cup of Shrimp, diced
  • 2 cups of frozen Peas, Carrots, Corn (thawed)
  • 3 large beaten Eggs
  • Vegetable Oil (1 tsp for eggs, 1 tsp for bbq pork and shrimp, 3 tsp for rice)
  • 1/2 tsp Salt
  • 1 tsp Garlic Powder
  • 1/4 cup low sodium Soy Sauce
  • 1 sliced Green Onion for garnish

Preparation

  1. Heat 1 tsp of oil in a non-stick wok or large frying pan.
  2. Scramble the eggs and set aside.
  3. Using the same wok, heat 1 tsp of oil and fry up the bbq pork until it’s lightly brown. Then add the shrimp to the pork and cook until shrimp just turn pink. Set aside.
  4. Heat 3 tsp of oil and stir fry the rice until it’s heated through.
  5. When the rice turns a bit crispy, add the salt, garlic powder, and soy sauce.
  6. Stir fry the rice a bit more until the soy sauce is mixed in the rice.
  7. Put the pork, shrimp, eggs, and vegetables with the rice.
  8. Stir fry all the ingredients until they are evenly mixed.
  9. Garnish with sliced green onions.

Notes

If you don’t have any day-old rice, cook the rice and cool it in the fridge before making the fried rice for best results. Basically, the rice has to be a bit on the dryer side.

https://www.memorabledishes.com/yeung-chow-fried-rice/

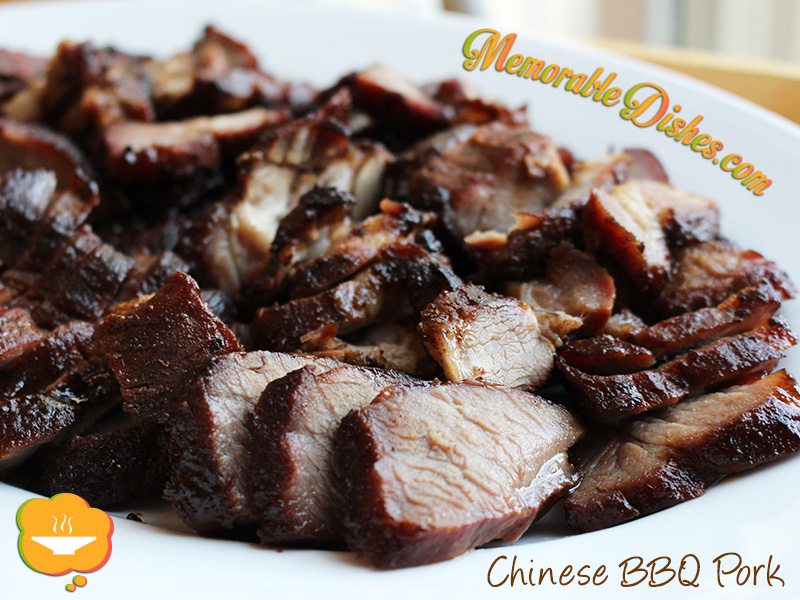
Chinese BBQ Pork (Char Siu)

Chinese BBQ Pork

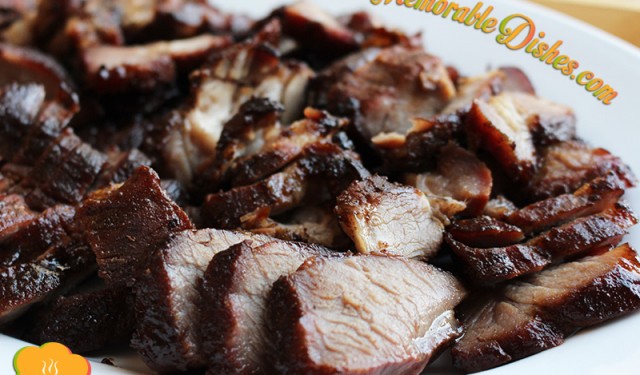
One of the most comforting foods to eat is Chinese barbecue with steamed rice. Roasted Peking duck, Chinese crispy pork, and of course, Chinese BBQ pork. If you live in areas where Chinese BBQ shops are readily available, you’re in for a treat. The BBQ shops hang whole pigs, ducks, chickens, squid, and sausages. They also sell other animal parts that might be tasty to some, but to others, maybe not so yum. I find all Chinese BBQ foods delicious nonetheless :d

My mom makes homemade Chinese BBQ pork at home often. She got the original recipe from my uncle who is a professional chef. In the recipe, the ingredient amount is very high because it is used for restaurants. Also, it uses Chinese units of measurement and a hassle to translate to our measurements. For example, it would say one Chinese pound of hoisin sauce or something like that. So my mom translates one Chinese pound to one tablespoon for home use.

I concocted this Memorable Dish based on my uncle’s recipe and others that I found. I also altered it a bit to suit my own taste. It is fairly easy to make once you find all the sauces at your local Asian supermarket. Even though this is comfort food for me, it can also be a great dish to make for a dinner party or potluck. When people ask if you bought it from the Chinese barbecue shop, you can proudly tell them it’s from your own home bbq shop! Maybe you can even trick them by putting it in a takeout container 😉Chinese BBQ Pork

Chinese BBQ Pork (Char Siu)

Prep Time: 10 minutes

Cook Time: 1 hour

Total Time: 1 hour, 10 minutes

Serving Size: 4-6

Ingredients

  • 2 lbs Pork Butt (Shoulder)
  • 1/2 cup Soy Sauce
  • 2 tbsp Hoisin Sauce
  • 1 tbsp Ground Bean Sauce (磨豉醬)
  • 1 tbsp Chinese Sesame Paste
  • 1 tbsp Shaoxing Wine or Cooking Wine
  • 1 tsp Five Spice Powder
  • 1 tbsp Sugar
  • 3 tbsp Honey

Preparation

  1. Cut pork into 3 to 4 long pieces.
  2. Mix all the marinate ingredients with a whisk in a large bowl and marinate pork for at least 4 hours or overnight.
  3. Preheat oven to 350°F.
  4. Take pork pieces out of marinade and place them on roasting pan to roast.
  5. In the meantime, bring remaining marinade to a boil in a small pot and set aside.
  6. After you roast the pork for 30 minutes, baste and flip the meat.
  7. Roast for another 30 minutes and it should be ready.
  8. If you want to brown the meat a bit, broil the pork for a few minutes. Make sure you keep an eye on it so you don't burn it.
  9. Take it out of the oven and set aside for 5 minutes before cutting into 1/4 inch thick slices.
  10. Use leftover marinade as dipping sauce.
  11. Serve over steamed rice or soup noodles.

Notes

Chinese Sesame Paste is very thick and topped with oil. So when scooping it out of the jar, try not to scoop too much of the oil.

https://www.memorabledishes.com/chinese-bbq-pork/

Show Buttons
Hide Buttons