Category Archives: Poultry

Recipes of Poultry

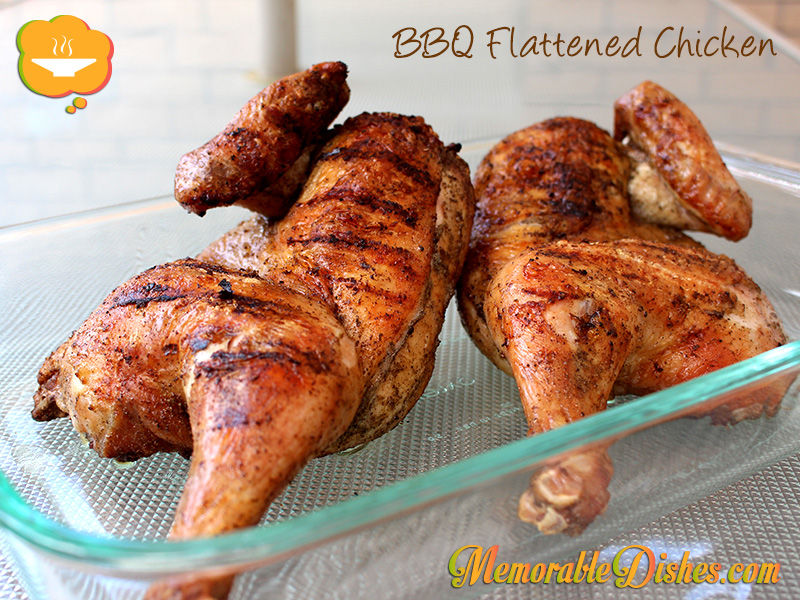
BBQ Flattened Chicken

BBQ Flattened Chicken

When I first made this Memorable Dish, I cut out the back and rib bones as recommended by recipes I found online. When serving it to my mom and aunt, who both love sucking on meat and fish carcasses, they were disappointed that there were no bones to suck on from my flattened chicken. If you are a food lover, you know the tastiest part of the meat is close to the bone.

My boys used to love eating chicken and meat off the bone. As they’ve grown older, they just like eating the meat part (I think they’ve become lazy and just want to eat quickly so they can go off and play.) Now my oldest son is finally starting to eat the meat off the bones again. My daughter is still young and has the patience to eat the whole chicken drumstick right to the bone!

It is so easy to barbecue flattened chicken after doing the initial prep. I use seasoning from my Perfect Roast Chicken recipe but you can use any seasoning you want. Even simple salt, pepper and garlic powder taste great. Now I don’t dare to cut out the back and rib bones anymore in case my family pop by to eat my flattened chicken 😛 .BBQ Flattened Chicken

BBQ Flattened Chicken

Prep Time: 15 minutes

Cook Time: 45 minutes

Total Time: 1 hour

Serving Size: 4-6

Ingredients

  • 1 Chicken whole (approximately 4 pounds)
  • 1 tbsp Kosher Salt
  • ½ tsp Pepper
  • 1 tsp Garlic Powder
  • 1 tsp Poultry Seasoning

Preparation

  1. Mix salt, pepper, garlic powder and poultry seasoning in a small bowl. Set aside.
  2. Cut chicken in half and tuck the wings in. If desired, cut out the back and rib bone with kitchen shears.
  3. Sprinkle herb and salt mixture all over chicken.
  4. Heat your whole barbecue up to high heat.
  5. Once it’s heated, place chicken on the barbecue skin side down.
  6. Grill on high for 5-10 minutes until you get grill marks. Watch carefully so you don’t get flare ups.
  7. Turn heat off on the side where you have the chicken on and leave the other side of the barbecue on high. (You’ll be cooking by indirect heat.)
  8. Flip the chicken (skin side on top now) and barbecue on indirect heat for 30-45 minutes until chicken is done.
  9. Let the chicken rest for 10-15 minutes before cutting.
https://www.memorabledishes.com/bbq-flattened-chicken/

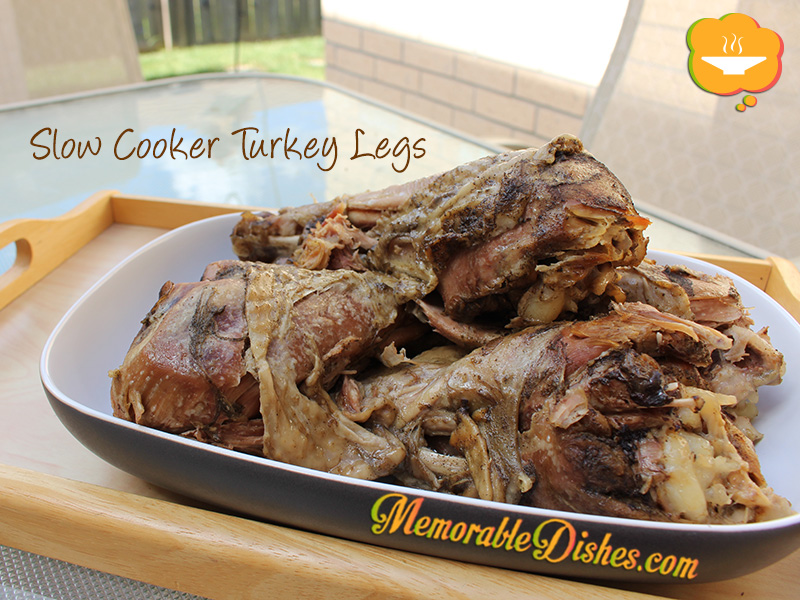
Slow Cooker Turkey Legs

Slow Cooker Turkey Legs

I’m not much of a slow cooker user. I know some people love it and I know it’s a useful vessel to cook meals for the family because you can set it and forget it. Somehow, I never have embraced the slow cooker as much as I’d like. Maybe it’s because you usually throw everything into it without browning the meat and it doesn’t have the depth of flavour that like. (I know I could brown the meat first then put it into the slow cooker but using more than one pot to cook a stew dish is just too much hassle.) I have been looking for ways to use my slow cooker lately because I had some delicious slow cooker ribs at a friend’s house and they were delicious!

Now back to my turkey legs. I made turkey legs in the oven before and it was quite a mess. I had to cook them for a long time to get them tender and the kiddies didn’t seem to like them. But cooking turkey legs in the slow cooker is an easy way to get them nice and tender. This recipe is super easy and delicious. My favourite part of cooking the turkey legs in the slow cooker is the juices they produce. If you’re nervous about putting the legs in the cooker without any liquid, pour 1/4 cup of water (but you really don’t have to).

After they’re cooked, don’t be deceived by the beige-looking turkey legs, they are delicious! If you like to brown them a bit in the oven before serving go right ahead. You can also reduce the sauce into a thicker gravy but I like the taste and consistency of the sauce after the legs have been rendering in the slow cooker for six hours. This Memorable Dish gets everyone’s mouth watering. Being Chinese, of course I serve my turkey legs with rice. But you can also break up the meat and mix it up with the sauce as a ragu and serve it over pasta.

Slow Cooker Turkey Legs

Slow Cooker Turkey Legs

Slow Cooker Turkey Legs

Prep Time: 5 minutes

Cook Time: 6 hours

Total Time: 6 hours, 5 minutes

Serving Size: 4-6

Ingredients

  • 4 Turkey Legs
  • 2 tsp Kosher Salt
  • 1 tsp Poultry Seasoning
  • 1 tsp Garlic Powder
  • 1/2 tsp Black Pepper

Preparation

  1. Mix all the salt and seasonings in a small bowl.
  2. Coat all the turkey legs generously with the spice mix.
  3. Set slow cooker at Low for 6 hours.

Notes

Here’s the seasoning portion for one turkey leg: 1/2 tsp Salt, 1/4 tsp Poultry Seasoning, 1/4 tsp Garlic Powder, 1/8 tsp Black Pepper.

https://www.memorabledishes.com/slow-cooker-turkey-legs/

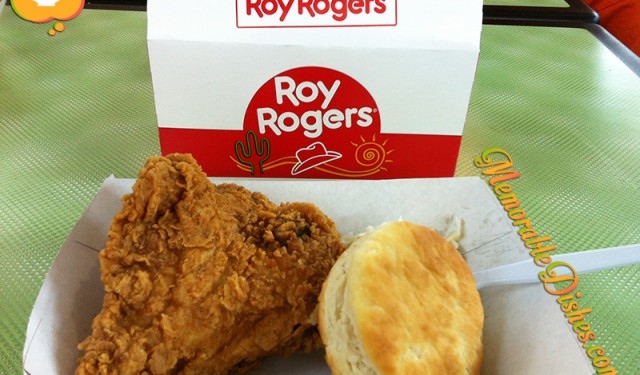
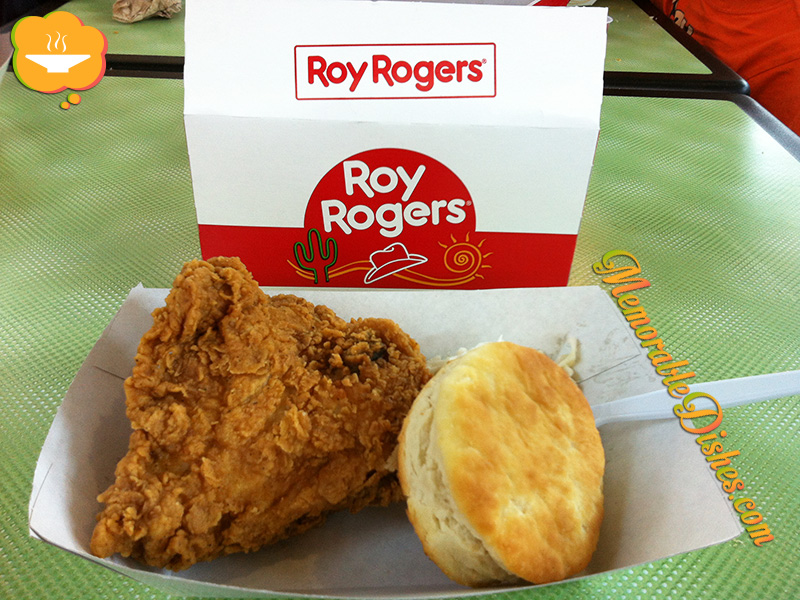
Roy Rogers Fried Chicken

Roy Rogers Fried Chicken

Two summers ago, our whole family drove to the States (New Jersey area, close to Philadelphia) to visit my uncles, aunts and cousins. When I say the whole family, I mean we rented a 11-passenger van to fit everyone!

One of our missions on every road trip to the US is to find the elusive Roy Rogers fast-food restaurant. They are famous for their fried chicken and roast beef sandwiches. Every time we’ve visited, my older brother and I HAD to eat their chicken. We even got my younger brother, who didn’t live there when he was little, to share our enthusiasm for Roy Rogers fried chicken. My uncle always wondered why we kept wanting to eat there. He said, “Church’s Chicken is better!” But eating at Roy Rogers brought back fond memories for my older brother and I because it was one of the fun outings with my cousins when we lived in the States.

Roy Rogers has since disappeared from the Philadelphia landscape. They’ve been overtaken by newer and perhaps better fried chicken places. Now it seems like they mostly reside at service stops throughout interstate highways or in certain parts of Philadelphia.

After crossing the border from Canada to the US, our first sighting of Roy Rogers was the second service stop at Clifton Springs. Of course, we were super hungry after we crossed the border and couldn’t wait so we ate at the first service stop instead. Shucks! Every time we go, we forget it’s the second service stop!

We didn’t get to eat at any Roy Rogers chicken during our stay in New Jersey and Philadelphia. But alas, on our drive back, we stopped at the Allentown Service Plaza and devoured the much anticipated Roy Rogers fried chicken! I honestly don’t remember if it tastes better than any other franchised fried chicken restaurants. It’s not the taste or aroma of the chicken that brings back my childhood memories. It’s eating it with my family that does. Hunting for Roy Rogers has become a family tradition. This fried chicken has become a collective Memorable Dish of my brothers and I. I can’t wait for our next road trip to the States again!

Roy Rogers Fried Chicken

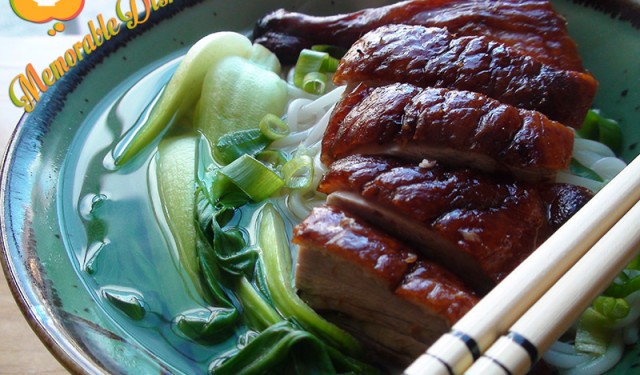
Circle of Food – Peking Duck Noodle Soup

Peking Duck Noodle Soup

My kids love eating at food courts inside of Chinese malls. I guess they love eating in any food court for that matter. They get very excited because it’s a treat and there are lots of places to choose from. What makes the Chinese food courts unique is the fact that they are all individually-owned. It’s a nice break from the franchised restaurants that we are used to at regular malls. It almost feels like we are eating on the streets filled with different food vendors, but in an enclosed and comfortable seating environment.

We often order dishes from different shops so we get to try everything. Since being a parent with young kids, I’ve ordered foods that the kids would eat, but not necessarily what I like to eat. Just the other evening, I went to the Chinese food court with my kids and my mom. As always, I ordered something the kids wanted to eat – fried noodles. I didn’t really want that but ordered it anyways. My mom ended up ordering what I normally like to eat – Peking Duck Noodle Soup. Maybe she wanted to eat that but I got a feeling she ordered it because of me 🙂

This brought back memories of when my mom and I were on a plane ride flying to Hong Kong. I loved that you got to choose between Western or Chinese entrées. For breakfast, there was a choice between congee or omelette. I ordered the omelette and my mom ordered the congee. I took a bite of the omelette and didn’t like it. Without a second thought, my mom gave me her congee. (Just so you know, I was a full-grown adult when it happened). I just voiced my dislike for the omelette and she gave me the congee right away!

I do the same for the kids now. I eat their food when they don’t finish it or I trade with them if they don’t like something. It’s like the circle of life or what I’d like to call – the circle of food. Parents always put their kids’ needs first no matter how old they are.

Just so you know, I have not attempted to make Peking duck at home. Even if I did, it would not taste the same as the ones you’d find at your typical Chinese BBQ shop. The method, technique, equipment and all that is involved in making a Peking duck is an art form. You can find Peking ducks sold at Chinese BBQ shops, Chinese restaurants that specialize in BBQ, or at select Chinese grocery stores. Once you buy your Peking duck, this dish is super easy to prepare and very comforting to eat.
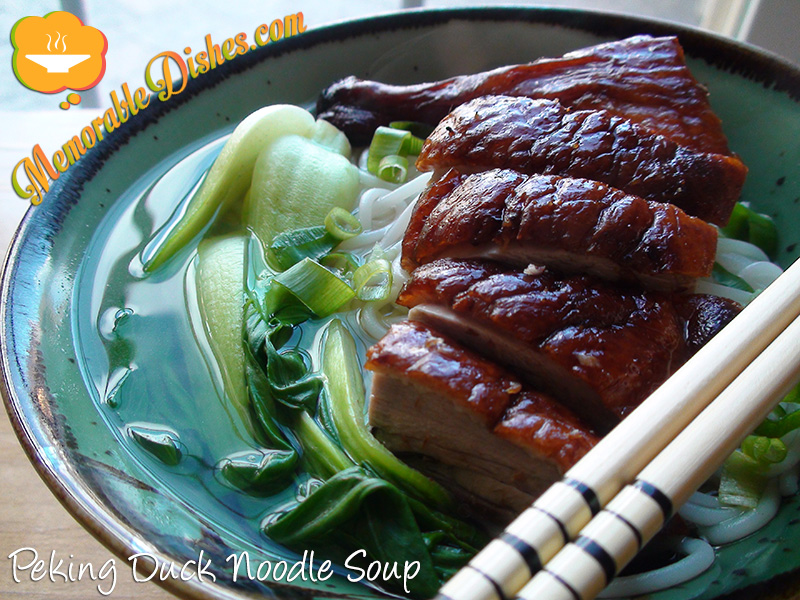
Peking Duck Noodle Soup

Peking Duck Noodle Soup

Prep Time: 15 minutes

Cook Time: 20 minutes

Total Time: 35 minutes

Serving Size: 4

Ingredients

  • 1/2 Roasted Peking Duck*
  • 1 package of Jiang Xi Rice Vermicelli
  • 8 small stalks of Shanghai Bok Choy (Wash and cut in half.)
  • 5 cups of homemade Chicken Stock or store-bought Chicken Broth
  • 2 slices of Ginger
  • 2 cloves of whole Garlic
  • 2 stalks of Green Onion (Use the white part to infuse the broth and thinly slice the green parts as garnish.)
  • *You can buy ½ or whole roasted Peking ducks at Chinese BBQ shops. Don’t forget to ask for extra plum sauce.

Preparation

  1. Boil the vermicelli based on the instructions found on the package.
  2. Drain the vermicelli into a colander and rinse it with cold water.
  3. Put ginger, garlic, white parts of the green onion into the stock/broth and bring it to a boil. (You can take them out after the broth has been infused with these flavours.)
  4. Once the broth is boiled, add the Shanghai bok choy and boil for a minute or so.
  5. Then add the cooked vermicelli.
  6. Once the broth is boiling again. Turn off heat.
  7. Divide up the noodles and bok choy into bowls. Top with broth and sprinkle sliced green onions on the top.
  8. You can place the Peking duck on top of the noodles or you can place them on the side.

Notes

Note #1: If you cannot find Jiang Xi Rice Vermicelli, use whatever rice vermicelli is available at your grocery store. Alternatively, you can always use any type of egg noodles as well.

Note #2: From my package of Jiang Xi Rice Vermicelli, it says to cook for 6-8 minutes. I have to cook them for 10-12 minutes for them to be al dente to soft. Test them out before draining the vermicelli to get the right consistency.

Note #3: If you cannot find Shanghai bok choy, you can use baby bok choy or any type of vegetable that you like.

https://www.memorabledishes.com/peking-duck-noodle-soup/

Jiang Xi Rice Vermicelli
Jiang Xi Rice Vermicelli


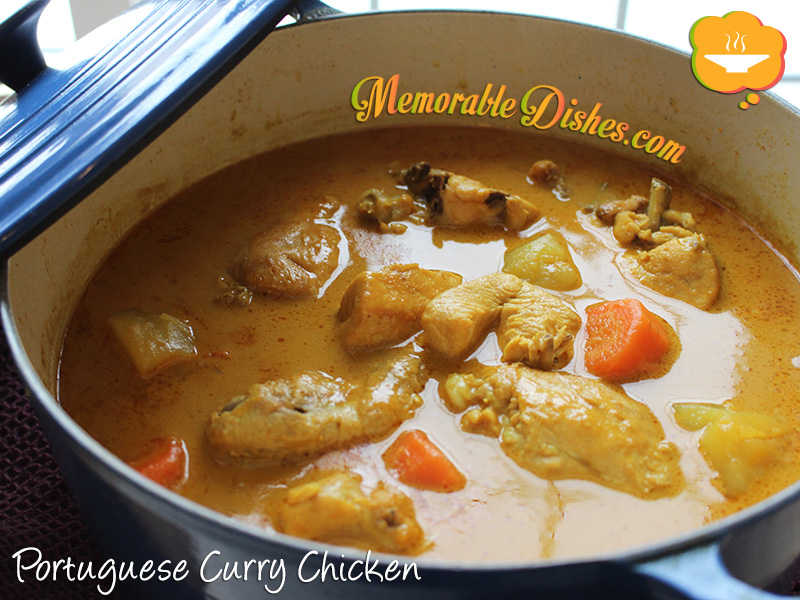
Portuguese Curry Chicken
(葡國雞)

Portuguese Curry Chicken

The name of this dish is a misnomer. This dish does not originate from anywhere in Portugal. And curry is definitely not part of Portuguese cuisine. This is actually a Macanese dish that emerged when Portugal colonized Macau. (Macau is about an hour ferry ride west of Hong Kong). This coconut milk-based curry is popular among Hong Kong people because it’s not as hot and spicy as other curries. The coconut milk neutralizes the curry and gives it a milder taste.

My husband and I LOVE spicy food! Having young kids means that we cannot indulge this craving very often. So when I make spicy food or curry at home, I always make a non-spicy dish for the kids. Believe it or not, curry chicken has become my oldest son’s favourite dish! When he claimed the love for this dish he was around five or six years old. Before that, he went through a time of picky eating where he ate only carbs or things without sauce.

One evening when I made curry, my oldest son actually asked to try it. (At that time, he was still going through his picky phase.) We were shocked at his request and of course didn’t want to deter him by saying, “This is too spicy for you!” Instead, we gave him some of our curry chicken, waited anxiously, and were half afraid he would spit it out. But alas, he said, “Yum! I like it!” Our mouths dropped and we gave him some more. That was the beginning of my son’s love of curry. He would actually eat it and gulp down water after every bite. He likes it even though it’s too spicy for him!

As my son grows older, I hope this will become one of his favourite childhood Memorable Dishes. Every time I make this dish, I think of him and how much he enjoys eating it. One bite of curry chicken. One gulp of water 😛

Portuguese Curry Chicken

Portuguese Curry Chicken (葡國雞)

Prep Time: 20 hours

Cook Time: 1 hour

Total Time: 1 hour, 20 minutes

Serving Size: 4-6

Ingredients

  • 1 Chicken whole (approximately 4 pounds)
  • 1 Onion cut into chunks
  • 4 cloves Garlic minced
  • 2 Carrots cut into chunks
  • 2 large Potatoes cut into chunks
  • 2 tbsp vegetable oil
  • 1 tbsp Kosher Salt
  • 3 tbsp Curry Powder
  • 1 can Coconut Milk (398 mL)
  • 2-3 cups Water
  • 1 Bay Leaf

Preparation

  1. Cut the chicken into serving size pieces and trim any excess fat.
  2. Salt the chicken with half of the salt.
  3. Heat oil in braising pot, such as a Dutch oven and lightly brown chicken. The chicken only needs to be browned a bit and doesn’t need to be cooked through. Set aside.
  4. Lower to medium heat. (If there’s too much residual oil left from the chicken skin fat, take some oil out.) In the same pot, add onions to brown until they are softened, about 5-10 minutes.
  5. Then add garlic and curry powder and mix.
  6. Pour in coconut milk and water. (You might want to reserve some of the water until you put all the chicken and vegetables into the pot. The liquid should just cover the meat and vegetables.)
  7. Scrape off brown bits that are stuck to the bottom of the pot.
  8. Put the browned chicken, carrots, and potatoes back into the pot.
  9. Once you bring it back to a simmer, lower heat, cover and simmer.
  10. After 20 minutes, stir the chicken and make sure nothing gets stuck to the bottom.
  11. Cook for another 20 minutes.
  12. Serve over a bed of steamed rice if desired.

Notes

Note #1: To avoid added fat, I skin all the chicken before browning it. It’s up to your family’s preference 🙂

Note #2: If you don’t want to use a whole chicken, you can use your favourite chicken parts. Chicken thighs and legs give the most flavour. Chicken breasts tend to be drier. For best results, leave all meats on the bone for stewing.

https://www.memorabledishes.com/portuguese-curry-chicken/

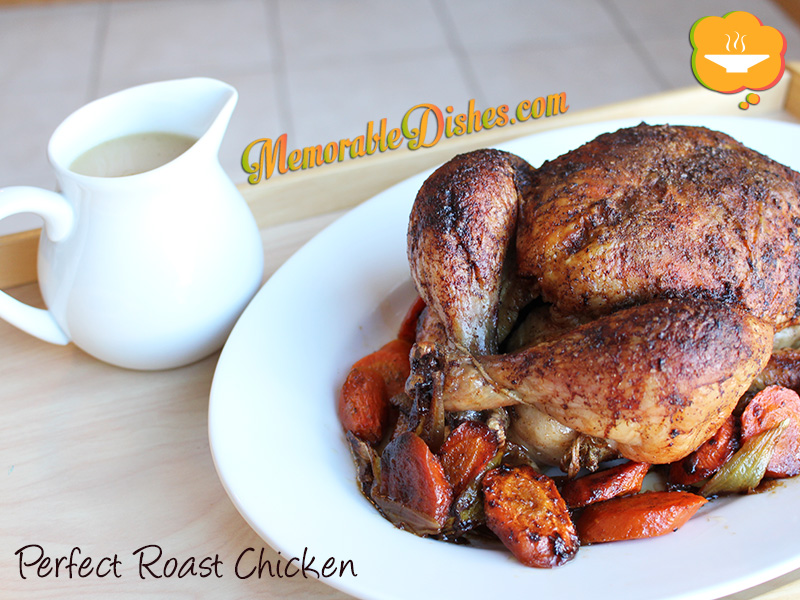
Perfect Roast Chicken

Perfect Roast Chicken

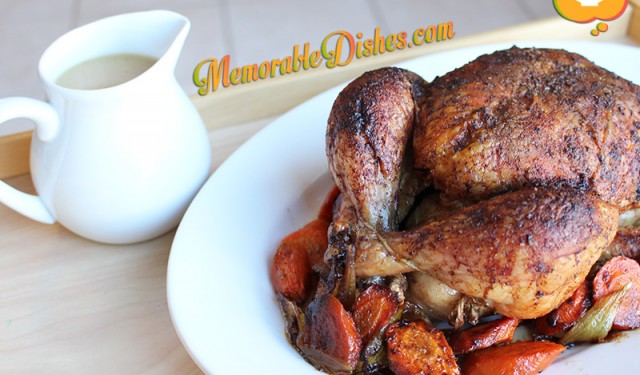
Roast chicken, I’m sure, is a Memorable Dish for a lot of people. Grandma’s or mother’s roast chicken certainly evokes the childhood memories of simpler days. In today’s busy world, this simple dish has reserved itself as a weekend meal, perhaps as a Sunday family dinner.

It’s such a simple dish, but there are so many little tricks needed to cook it perfectly. I’ve made roast chicken dozens of times. Sometimes I undercook it and other times I overcook it. I’ve followed recipes from reputable cookbooks to no avail. One recipe said to cook the chicken for 425 degrees for 1 ½ hours. I did it a few times and the results were not always favourable.

However, I think I have finally uncovered the secrets of cooking the perfect roast chicken! One cold winter’s day I was looking for fresh thyme to use for my roast chicken. I couldn’t find it at this particular local grocery store but I didn’t bother going to another store. I ended up perusing the herb aisle to see what I could use – poultry seasoning! I always hear TV chefs talk about poultry seasoning but have never used it. Since there was no fresh thyme available, I gave poultry seasoning a try. When I got home, I was a little skeptical about using it. It smelled like Chinese herbal medicine – not very appetizing 😛 I gave it a try anyways. TV chefs can’t be wrong, right? After the chicken was cooked, the herbal seasoning mellowed out and permeated into the meat of the chicken. It was mighty tasty! Don’t forget I also put butter beneath the skin and on top to make it crunchy and tasty. If you don’t have poultry seasoning, you can always just use salt, pepper and garlic powder.

My whole family devoured the chicken and I even got a “I love you” from my little one for making the chicken. I hope you give my roast chicken recipe a try and build your own family food memories. If you have any new tips and tricks after trying out my recipe, feel free to comment and share. I would love to hear how your roast chicken turns out 🙂

Perfect Roast Chicken

Perfect Roast Chicken

Prep Time: 15 minutes

Cook Time: 2 hours, 15 minutes

Total Time: 2 hours, 30 minutes

Serving Size: 4-6

Ingredients

  • 1 Chicken whole (approximately 4 pounds)
  • 1 Onion quartered
  • 2 Carrots cut into thick slices
  • ½ cup dry White Wine or Chicken Stock
  • 1 tbsp softened Butter
  • 1 tbsp melted Butter
  • 1 tbsp Kosher Salt
  • ½ tsp Pepper
  • 1 tsp Garlic Powder
  • 1 tsp Poultry Seasoning
  • For Gravy
  • 2 tbsp Chicken Fat or Butter
  • 2 tbsp Flour
  • 1 ½ to 2 cups Chicken Stock (depends on how thick you like your gravy)

Preparation

  1. Preheat oven to 350°F.
  2. Put carrots, onions, and wine/chicken stock in roasting pan/glass baking dish.
  3. Rinse and pat dry chicken with paper towels.
  4. Mix salt, pepper, garlic powder and poultry seasoning in a small bowl. Set aside.
  5. Spread softened butter underneath the skin of chicken breast and brush melted butter all over chicken.
  6. Sprinkle herb and salt mixture inside cavity and all over chicken.
  7. Place chicken in roasting pan, breast side up.
  8. Roast chicken for approximately 2 hours.
  9. The chicken is done when its internal temperature reaches 165°F. Check by inserting an instant food thermometer to the thickest part of the chicken, the thigh, without touching the bone. When the juice runs clear, it’s done.
  10. Rest the chicken by covering it with foil while you make the gravy.
  11. For Gravy Preparation
  12. Make a roux by cooking the chicken fat/butter with flour in a small pot over medium heat.
  13. Once it’s mixed into a thick paste and the flour smell is gone, slowly add the chicken stock.
  14. Stir and mix with a whisk to avoid lumps.
  15. Bring it to a simmer until it thickens.
  16. If desired, add drippings from roasted chicken.

Notes

Note #1: My package of poultry seasoning is made up of thyme, sage, marjoram, rosemary, black pepper, and nutmeg. If you don’t have poultry seasoning, you can use the herbs you have on hand.

Note #2: If you have time and want to cook the chicken more evenly, baste the chicken with drippings from the pan every 30 minutes. (If you don’t have a baster, use a silicone pastry brush to baste.) After basting, rotate roasting pan 180 degrees and continue roasting.

https://www.memorabledishes.com/perfect-roast-chicken/

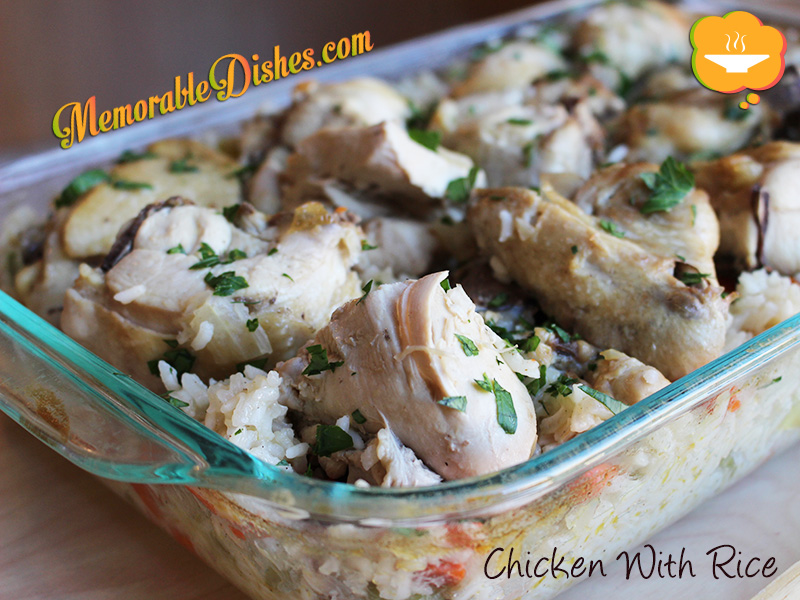
Chicken With Rice
(Kokoshka Sou Oris)

Chicken (Kokoshka) With (Sou) Rice (Oris) is one of my favourite Memorable Dishes from my husband’s family. When we first started dating, this is one of the dishes I had at my in-laws. It’s not a fancy dish by any means but I really enjoyed eating it every time. Even though we are from totally different backgrounds (me being Chinese and him being Macedonian), we find that lots of our values are very similar. Our family’s love of food is definitely one of them. Yes – I consider that a value! I always say to my husband, “Thank goodness you like to eat and try new foods as much as I do!” I believe our relationship has lasted because we share the same value for food 😉

When we got married, my mother-in-law bought me the “official” Macedonian recipe book. It’s a plastic-coiled bound book with a red cover that says, “Traditional Macedonian Recipes.” Mine is a revised edition with 40 additional recipes. It seems like everyone in the Macedonian community has one version or another. The book also includes a bit of Macedonian history and a map, which is very interesting to me. I also love that in each section, there’s a little anecdote that talks about the recipes and the importance of them to the Macedonian community.

The first time I cooked this dish from the recipe book, it didn’t turn out the same as my mother-in-law’s. When I told her about my blunder, she looked at the recipe and said that it wasn’t the same way she cooked this dish. This reiterated the line that I read from the cookbook, “In collecting the recipes, we did not find two women who made the same dish in exactly the same manner.” Go figure!

I find it very comforting when cooking this recipe. The smell of chopped onions, celery and carrots permeates my nose and into my mind. Even though I have never been to my husband’s Macedonian village before, I could picture hardworking mothers taking care of their families and cooking up a nice meal after a hard day’s work at the farm.

I used the Macedonian cookbook’s recipe as a base and adjusted the way I cook it for my family. The kids gobble up this dish every time I make it. Lovingly, they really enjoy this Macedonian dish made by their Chinese mother 🙂

Chicken With Rice (Kokoshka Sou Oris)

Chicken With Rice
(Kokoshka Sou Oris)

Prep Time: 20 minutes

Cook Time: 1 hour, 10 minutes

Total Time: 1 hour, 30 minutes

Serving Size: 4

Ingredients

  • (For Chicken Broth)
  • 1 Chicken whole (approximately 4 pounds)
  • 1 Celery stalk with leaves, halved
  • 1 Onion, halved
  • 1 Bay Leaf
  • 1 tsp Salt
  • 10 cups of Water for boiling
  • (For Chicken Rice Dish)
  • 3 tsp Olive Oil
  • 1 medium diced Onion
  • 2 diced Celery stalks
  • 2 diced Carrots
  • 2 cups of long grain Rice
  • 1 tsp Salt
  • ½ tsp Pepper
  • 4 cups Chicken Broth (from the boiled chicken)
  • Chopped Parsley for garnish

Preparation

  1. Cut the chicken into serving size pieces and trim any excess fat.
  2. Place chicken, celery, onion, bay leaf and 1 tsp salt in large pot and cover with water.
  3. Bring the water to a boil and skim any scum and fat floating on top.
  4. Turn down to medium low heat and simmer for 45 minutes.
  5. Once it’s done, set chicken aside from broth.
  6. For Rice Preparation
  7. Preheat oven to 375°F.
  8. Heat olive oil in large frying pan.
  9. Sauté onions, celery and carrots over medium heat until soft (about 5-10 minutes).
  10. Add rice, chicken broth, salt, and pepper into the vegetables and mix.
  11. Bring liquid back to a boil and turn off heat.
  12. Put rice mixture in a baking dish and place chicken on top.
  13. Bake at 375°F for 15 minutes.
  14. Cover with foil or lid and let it stand until all liquid is absorbed.
  15. Garnish with parsley.

Notes

Note #1: You can blanch the chicken pieces before boiling them to eliminate most of the scum.

Note #2: If rice is too dry for your liking, add some extra broth and then cover for a few more minutes.

https://www.memorabledishes.com/chicken-with-rice/

Chicken Crunchy Chow Mein

Chicken Crunchy Chow Mein

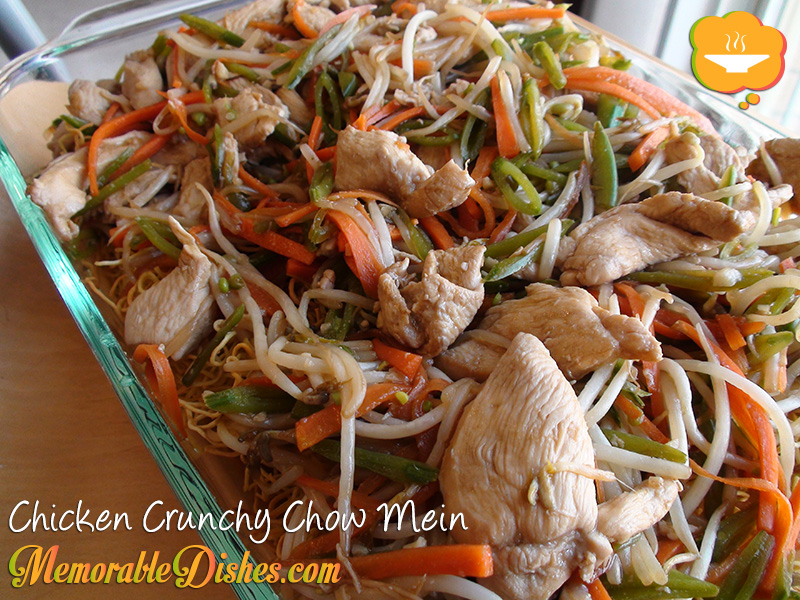
Who doesn’t love crunchy chow mein that you order from Chinese take out restaurants? It’s deceiving how fattening those skinny crunchy noodles are. Believe it or not, they are deep fried. I know – shocking isn’t it?

I for one, LOVE the crunchy chow mein that I order from Chinese restaurants. The meat and sauce on top of those crunchy noodles – It’s a perfect sensation in your mouth when biting into the saucy part of the noodles combined with the crunchy part.

This Chicken Crunchy Chow Mein is definitely one of my favourite memorable go-to dishes. Super-easy, super-delicious, and super-impressive! I’ve made it for my own parties and brought it as a potluck dish to friends’ houses.

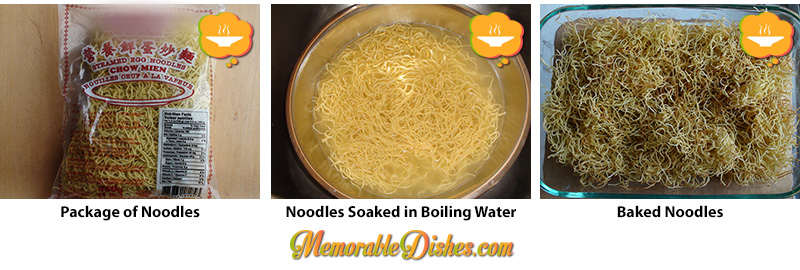
I wanted to create super crunchy noodles without the added fat. So I figured out baking the noodles with a little bit of oil can create the same effect. Here, I will show you how I make it. This is my secret passed onto you 😉 Your friends and family will be impressed that you can create restaurant-quality Crunchy Chow Mein from home.

I think this dish could be one of my friends’ most Memorable Dishes of mine. They are always shocked that it’s not bought from a Chinese restaurant. Yes, it’s that good!

Chicken Crunchy Chow Mein

Chicken Crunchy Chow Mein

Prep Time: 30 minutes

Cook Time: 30 minutes

Total Time: 60 minutes

Serving Size: 4-6

Ingredients

  • 2 boneless, skinless sliced Chicken Breasts (approximately 8 oz. each)
  • 1 tbsp of low sodium Soy Sauce
  • 1 tsp Sugar
  • 1 tsp Cornstarch
  • 1 tsp Chinese Cooking Wine (optional)
  • 2 cloves minced Garlic
  • 1 tsp of minced Ginger
  • 2 tbsp of Oyster Sauce
  • ½ cup of Chicken Broth or Water
  • 1 lb Bean Sprouts
  • 1 ½ cup of julienned Carrots
  • 1 ½ cup of julienned Snow Peas or Sugar Snap Peas (trimmed)
  • ½ tsp of Salt
  • 1 Package Egg Noodles
  • Vegetable Oil (2 tbsp for noodles, 2 tsp for vegetables, 2 tsp for chicken)
  • 2 tsp Cornstarch
  • 2 tbsp Water

Preparation

  1. Marinate chicken with soy sauce, sugar, cornstarch, and cooking wine for at least 30 minutes in refrigerator.
  2. For Noodles Preparation
  3. Preheat oven to 400°F.
  4. Put egg noodles in a large stainless steel bowl.
  5. Boil enough water to cover the noodles in the bowl.
  6. Once the water is boiled, pour it on the noodles.
  7. Loosen the noodles with a fork and let them sit for 1 minute.
  8. Drain noodles out thoroughly with a colander and pat dry with paper towel.
  9. Line baking sheet with parchment paper.
  10. Spread 1 tbsp of vegetable oil on the bottom of the lined baking sheet.
  11. Put noodles on oiled baking sheet.
  12. Then pour another 1 tbsp of vegetable oil on top of the noodles and mix.
  13. Bake for 10-15 minutes then flip the noodles over and bake it for another 10-15 minutes. (It depends on how crunchy you want them. I like them extra crunchy 🙂
  14. Set aside.
  15. For Vegetables and Chicken Preparation
  16. Heat 2 tsp of oil in wok or large frying pan.
  17. Fry up carrots and cook for a few minutes, then add snow peas and lastly the bean sprouts.
  18. Cook vegetables until tender but still have their crunch.
  19. Set vegetables aside.
  20. Using the same wok/frying pan, heat 2 tsp of oil and sauté the minced garlic and ginger.
  21. Add marinated chicken to the wok and cook until chicken is done.
  22. Add chicken broth/water and oyster sauce.
  23. Add vegetables back into the wok/frying pan and cook until everything is mixed in.
  24. Scoop chicken and vegetable mixture onto the crunchy noodles and leave liquid in the wok/frying pan.
  25. Mix 2 tsp of cornstarch with 2 tbsp of water into a small bowl.
  26. Then pour cornstarch mixture into sauce until thickens.
  27. Pour the rest of the sauce onto noodles & meat mixture.
https://www.memorabledishes.com/chicken-crunchy-chow-mein/
Chicken Crunchy Chow Mein - 3 pix

Show Buttons
Hide Buttons