Tag Archives: Pork

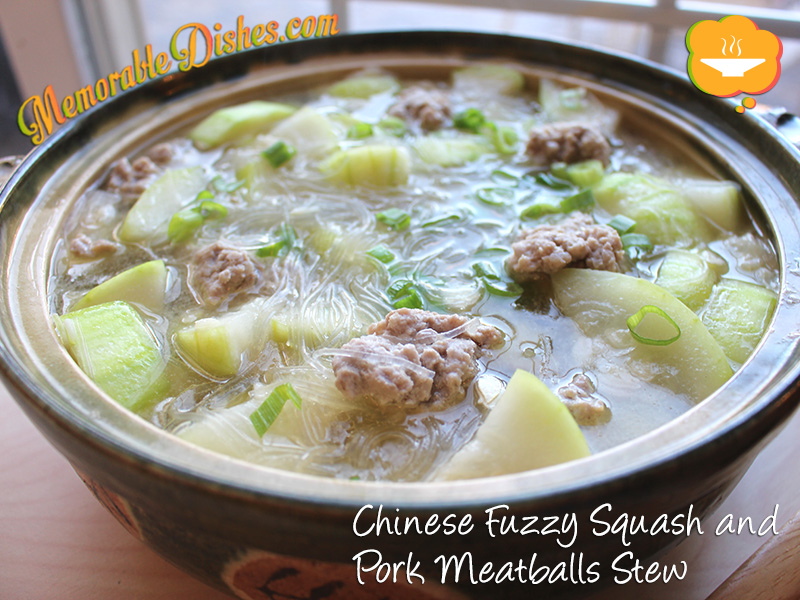
Chinese Fuzzy Squash and Pork Meatballs Stew

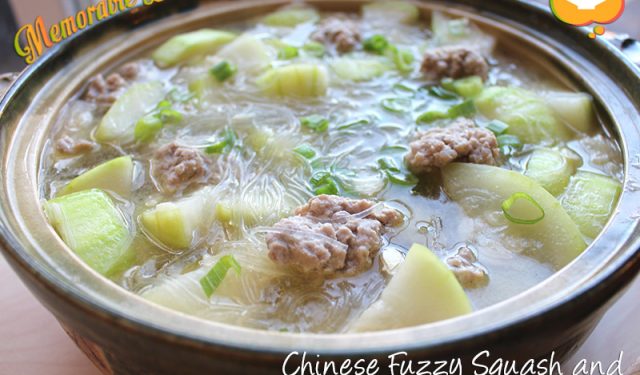
Chinese Fuzzy Squash and Pork Meatballs Stew

As an inexperienced gardener/farmer, last year I planted zucchinis that happened to overtake my small garden box. This year it was the Chinese fuzzy squash that took over the box. I didn’t get a chance to buy anything to plant and yet my garden box was full of crops. Between my father and my father-in-law, they bought me seedlings of tomatoes, cherry tomatoes, cucumbers, basil (which were in separate planters), peppers and Chinese fuzzy squash. I even had a sunflower growing in that box (don’t ask me how it got there.)

In that garden box, I got a few cucumbers, a few tomatoes, a fair amount of cherry tomatoes but the peppers never grew. However, the fuzzy squashes just keep on giving. My husband recently picked two ginormous squashes because I could never find them hidden underneath the big leaves. He even said there’s another small one growing right now (thanks to our mild weather this fall).

This Memorable Dish is one of my favourite childhood dishes. I remember my mom making it quite a bit. This dish is great for the kiddies because it’s brothy, noodle-ly and made with meatballs. What kid doesn’t love meatballs! Although they’re not too crazy about the squash part of the stew, they hesitantly eat it due to my daily propaganda of the importance of eating vegetables. This Chinese fuzzy squash and pork meatballs stew definitely brings me back warm, fuzzy and cozy memories 🙂 .Chinese Fuzzy Squash and Pork Meatballs Stew

Chinese Fuzzy Squash and Pork Meatballs Stew

Prep Time: 20 minutes

Cook Time: 20 minutes

Total Time: 40 minutes

Serving Size: 4-6

Ingredients

  • 1 1/2 pounds of Ground Pork
  • 1 tbsp of Soy Sauce
  • 1/2 tsp of Salt
  • 1/2 tsp of Sugar
  • 1 tsp of Cornstarch
  • 1/8 tsp of White Pepper
  • 1 tsp of Sesame Oil
  • 2 slices of Ginger
  • 1 Fuzzy Squash, cut into 2-inch, length-wise chunks
  • 2 cups Cellophane Noodles
  • 4 cups of Chicken Broth (add more if needed)
  • 1 tbsp of Oil
  • 1 sliced Green Onion for garnish

Preparation

  1. Marinate pork with soy sauce, salt, sugar, cornstarch, white pepper, sesame oil for at least 30 minutes.
  2. Reconstitute the dry cellophane noodles by soaking them in cold water.
  3. Shape pork into golfball sized meatballs or smaller and set aside.
  4. Heat 1 tbsp of oil in a large pot. Once the pot is heated, put 2 slices of ginger and stir fry along with the fuzzy squash for a bit until you get a bit of colour.
  5. Add the chicken broth and once it’s brought to a boil, slowly add the pork meatballs one by one.
  6. Cover and lower heat once the broth boils again.
  7. Cook for approximately 10 minutes until fuzzy squash is tender.
  8. Bring heat back up again and put cellophane noodles in the broth.
  9. Once it’s boiled again, turn heat off and garnish with green onions.

Notes

I cook my stew in a Chinese ceramic pot that is great for moving from stove to table 🙂 .

https://www.memorabledishes.com/chinese-fuzzy-squash-and-pork-meatballs-stew/

Steamed Minced Pork and Egg

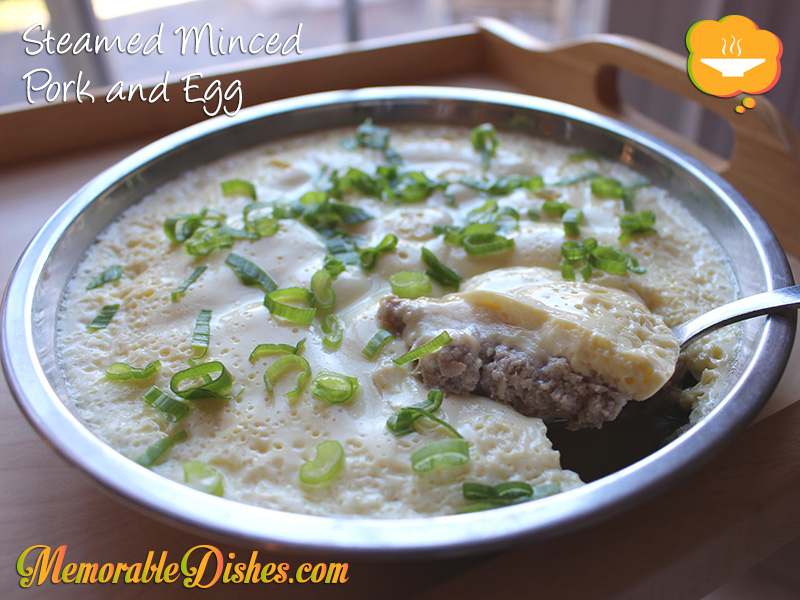
Steamed Minced Pork and Egg

Sometimes the most simplest food gets overlooked. I can’t believe I didn’t write a blog post about this Memorable Dish sooner! Steamed minced pork and egg was a childhood staple for me. I used to and still love eating this simple dish mixed with rice.

Growing up in Hong Kong, I remember eating this dish quite a bit. Even after moving to Canada and the United States, my mother continued making it for us. It uses simple ingredients that you can find anywhere so the comfort of this childhood dish can be made in a pinch.

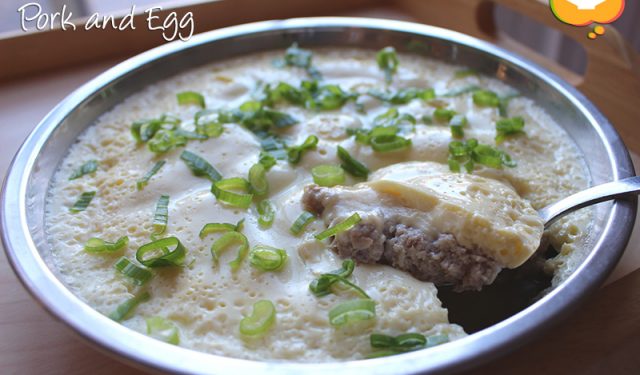
Our family loves this Memorable Dish with the exception of my oldest son. He likes the pork but doesn’t like the custardy egg. He thinks it’s tofu (which he doesn’t like). I would say most kids love it though because of its silky egg. Every time I have this dish it reminds me of being a little girl gobbling it with rice.Steamed Minced Pork and Egg

Steamed Minced Pork and Egg

Prep Time: 10 minutes

Cook Time: 10 minutes

Total Time: 20 minutes

Serving Size: 4

Ingredients

  • 1/2 pound of Ground Pork
  • 1 tsp of Soy Sauce
  • 1/2 tsp of Cornstarch
  • 1/4 tsp of Sugar
  • 1/2 tsp Shaoxing Wine or Cooking Wine
  • Dash of White Pepper
  • 3 large Eggs
  • 3/4 cup Chicken Broth
  • 1/8 tsp Salt
  • Green Onions, sliced, for garnish

Preparation

  1. Marinate ground pork with soy sauce, cornstarch, sugar, shaoxing wine, and white pepper for at least 30 minutes.
  2. In a stainless steel or ceramic wide and shallow dish, spread the ground pork mixture on the bottom of the dish as thin as possible.
  3. In a small bowl, beat the eggs, chicken broth and salt.
  4. Pour egg mixture on top of the ground pork.
  5. Steam for 8-10 minutes after the water has boiled.
  6. Garnish with sliced green onions.
https://www.memorabledishes.com/steamed-minced-pork-and-egg/

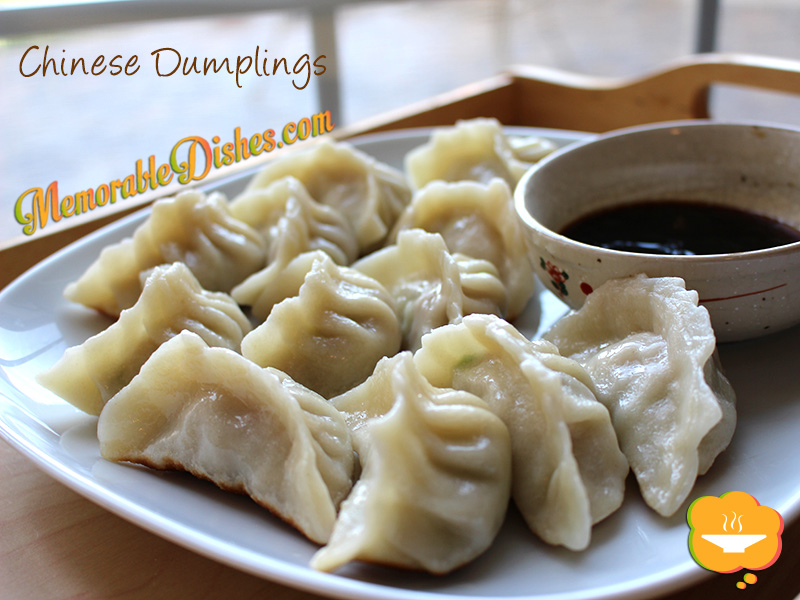
Chinese Dumplings

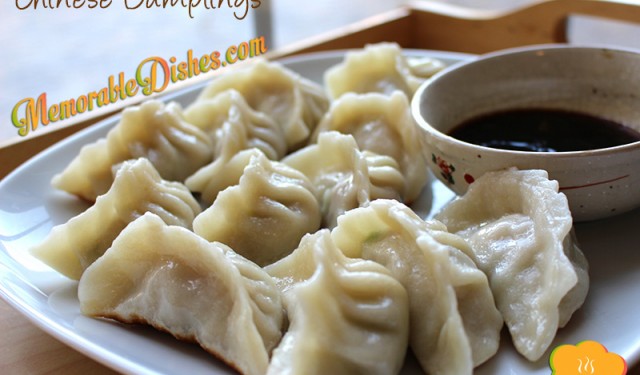
Chinese Dumplings

As a child I remember going to my maternal grandmother’s house on Sundays to wrap Chinese dumplings. As southern Chinese people, we don’t usually eat a lot of dumplings and are not very skillful in making the dough from scratch. So I can’t quite understand why we make dumplings on a fairly regular basis. My mother says it’s because my maternal grandfather’s friend (who we call great uncle) is an expert dumpling maker who used to own a dumpling shop. What a treat for me as a child! To witness my great uncle transforming flour and water into dough and then into dumpling wrappers was like magic.

Northern Chinese are known for their expertise in dumpling making. As southerners, we are not, hence we recruit other family members for the task to make the process go faster. Plus, it’s a great social event and gives us a chance to talk and bond. It’s like spending quality time and making something delicious to eat at once—a two for one deal!

While I was making these dumplings, my boys were eager to help. (I think they just wanted to play with the dough 😉 .) I told them they could help next time. My mother and I were making very “slow progress”, as quoted by my second son, and any interference would make the process even slower. We are not skillful dumpling makers but I must say I am looking forward to making this Memorable Dish again soon. The more I make it, the better I will become and in no time I will be as fast as the dumpling makers I see at the Chinese dumpling shops! (Yeah right! But I can’t wait to make it again soon. I’ll see how long the boys will last and see if they will actually finish making the dumplings from start to finish 🙂 .)

Chinese Dumplings

Chinese Dumplings

Chinese Dumplings

36 dumplings

Ingredients

  • Dumpling Dough
  • 2 cups All Purpose Flour
  • 1 cup Boiling Water
  • Filling
  • 2 cups Napa Cabbage, julienne
  • 3 tsp Salt (2 tsp for cabbage and 1 for pork)
  • 1 pound Lean Ground Pork
  • 1/4 cup Green Onions, thinly sliced
  • 1 tbsp grated Ginger
  • 1 tbsp minced Garlic
  • 1 tbsp Chinese Cooking Wine
  • 1 tsp Cornstarch
  • 1 tsp Sesame Oil
  • 1/8 tsp White Pepper
  • Dipping Sauce
  • 2 tbsp Soy Sauce
  • 2 tbsp Vinegar
  • 1 tsp Sesame Oil
  • Water for boiling dumplings
  • 1 1/2 tbsp Vegetable Oil

Preparation

  1. In a medium bowl, mix 2 teaspoons of salt into the napa cabbage. Set aside for 5 minutes and squeeze out the excess moisture with a paper towel.
  2. In a large bowl, mix the napa cabbage, pork, green onions, ginger, garlic, wine, cornstarch, sesame oil, white pepper and the remaining 1 teaspoon salt. Set aside.
  3. In a large bowl, mix the flour and 1 cup of boiling water together. Mix until a soft dough forms. Knead the dough on a lightly floured surface until smooth, about 5 minutes.
  4. Divide the dough in half and shape each into a roll approximately 12 inches long. Cut each roll into half inch slices.
  5. Roll 1 slice of dough into a 3-inch circle. The dough shouldn’t be too thin nor too thick.
  6. Place 1 tablespoon of pork mixture in the center of the circle.
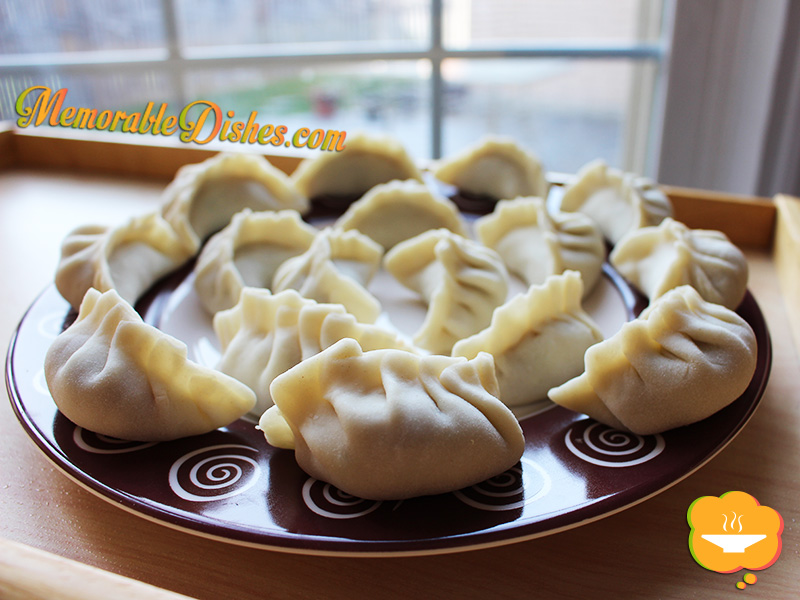
  7. Lift up the edges of the circle and pinch into pleats to create a pouch. Pinch the top together. Repeat with the remaining slices of dough and filling.
  8. Heat a large pot with water. Once the water is boiled, put approximately 12 dumplings at a time to boil.
  9. Once the dumplings float to the top, boil for another 2 minutes. Drain and set aside.
  10. Heat a nonstick wok or skillet until very hot. Add 1/2 tablespoon vegetable oil
  11. Place 12 dumplings in a single layer in the wok and fry 1-2 minutes, or until the bottoms are golden brown.
  12. For the dipping sauce, mix the soy sauce, vinegar and 1 teaspoon of sesame oil in a small bowl. Serve with the dumplings.

Notes

Note #1: You can make and store extra dumplings by freezing them on a tray lined with parchment paper. Put them into bags after they’re frozen. You don’t need to defrost them when boiling. Just boil them a little longer since they are frozen.

Note #2: If you cannot enclose the dumplings by creating pleats mentioned above, just pinch the dumplings tightly closed so the filling doesn’t leak out.

https://www.memorabledishes.com/chinese-dumplings/

Chinese Dumplings - Raw

Chinese Dumplings (Raw) – You can see my amateur skill at pleating the dough 🙂

Hawaiian Food Trip: Oahu: Part 2

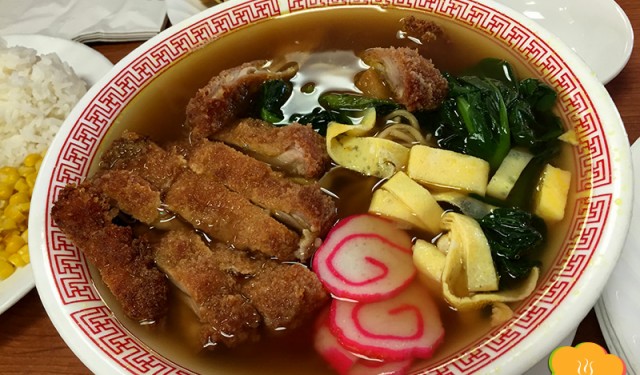
Chicken Katsu Curry Saimin

Here we continue our Hawaiian food journey in Oahu from my previous post—Hawaiian Food Trip: Oahu: Part 1 (Pearl Harbor). The major plan for this day was to visit the Polynesian Cultural Center. However it didn’t open until 12:00 pm. So we decided to check out the Dole Plantation which was on our way to the Polynesian Center.

Dole Plantation

The grounds of the Dole plantation is free to visit but if you want to do different activities, you have to pay extra. When entering the premises you pretty much have to go through their giant store (Very sneaky to get you to buy stuff! I fell for it and bought some souvenirs and a lei apron 🙂 . Even if you don’t end up paying for the extra activities, the grounds are very nice for kids to run around in. We took a ride on the Pineapple Express train (Nothing to do with the movie—this is a family place after all!) and went through the World’s Largest Maze. From an aerial view, the middle of the maze is the shape of a pineapple—which I thought was pretty cool. They make the maze fun by having secret stations for people to hunt for. One thing to note is that the maze isn’t stroller friendly because it’s narrow and paved with gravel. After the maze, we rewarded ourselves to some Dole Whip (pineapple soft serve). They’re famous for this refreshing treat so it’s a must-try.

Dole Whip, Dole Whip Sundae, Dole Plantation Grounds

Dole Whip, Dole Whip Sundae, Dole Plantation Grounds

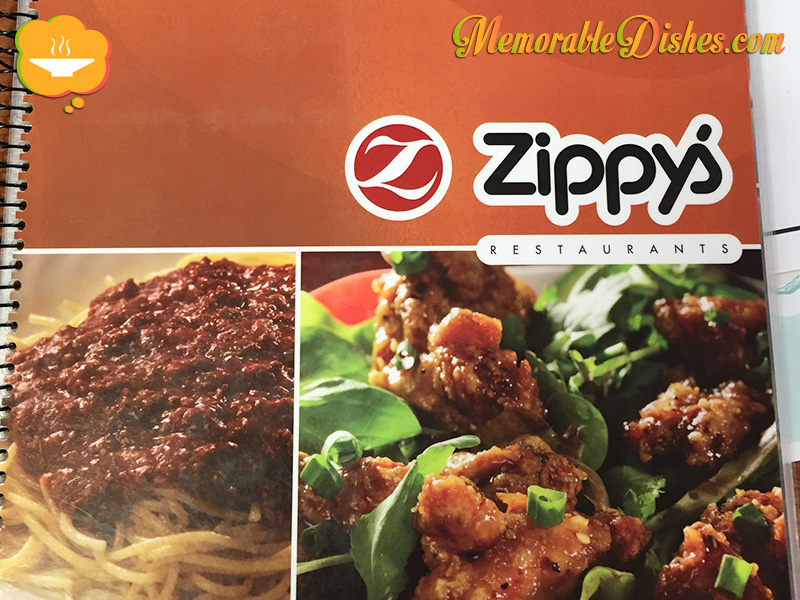
Zippy’s

Almost lunch time! I pre-found a restaurant that was a short drive from the Dole Plantation and also didn’t stray too far from our way to the Polynesian Cultural Center. When we got there, the place was permanently closed! Yikes! I saw some restaurant nearby that looked interesting so we walked there instead. However, there were no bathrooms that we were allowed to use and no high chairs. I’m usually OK with no high chairs because we make do when travelling but I really needed to use the washroom! So I did a quick Yelp check and yippee, we found Zippy’s! Of course, we’d never heard of this chain restaurant before because it’s only found in Hawaii. I wanted to order everything on the menu because I’ve never seen anything like it. You could order a beef stroganoff and a Korean chicken all at the same place! It’s like an American-Asian diner!

Zippy's Menu

Zippy’s Menu

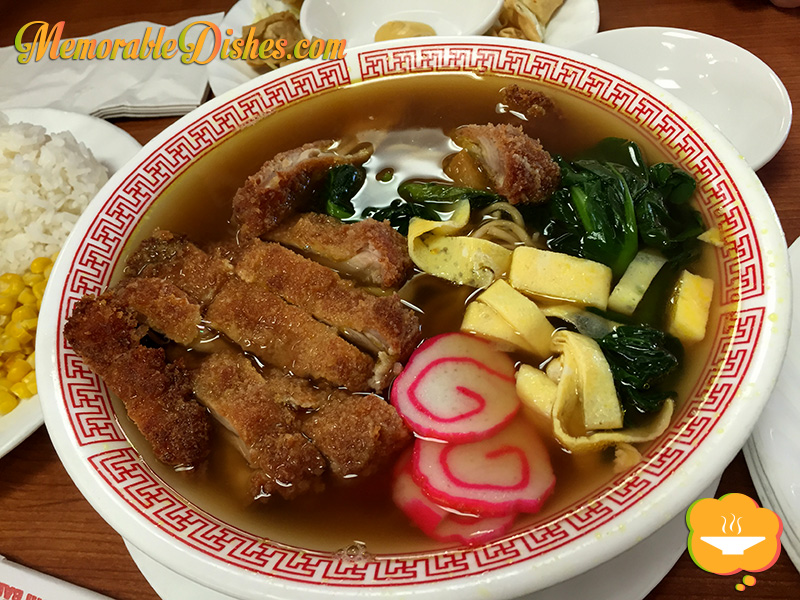
Chicken Katsu Curry Saimin – I’ve never heard of saimin before and I believe it’s a Hawaiian term. Tastes good and I wish they put the katsu on the side so it wouldn’t get soggy. The broth has a hint of curry taste but not very strong. Soup noodles are always very satisfying!

Chicken Katsu Curry Saimin

Chicken Katsu Curry Saimin

Minced Pork and Tofu Rice – Almost like Mapo Tofu but the sauce is not as spicy and almost has a chili-like consistency. (It’s like the chili you get when you order chili dogs.) The kids ate it all up because I’m sure it reminded them of the foods I made at home.

Minced Pork and Tofu Rice

Minced Pork and Tofu Rice

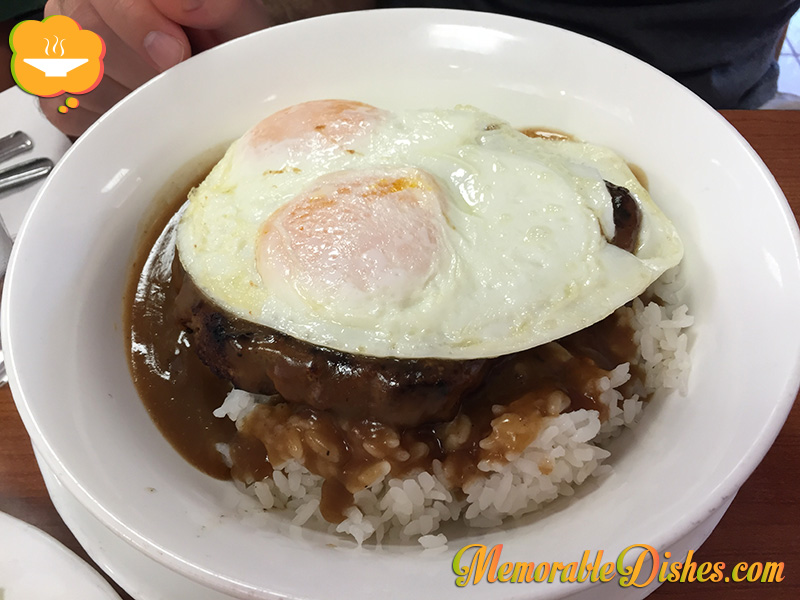
Loco Moco – Of course we had to try this famous Hawaiian dish! It’s rice topped with beef hamburger and fried egg with gravy on top.

Loco Moco

Loco Moco

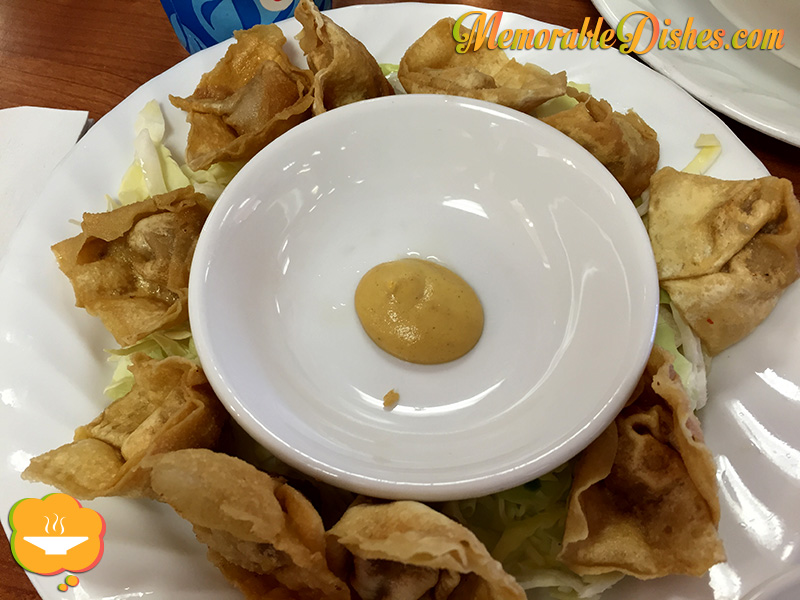
Fried Wuntun (We usually spell it like “Wonton”.) – It came with a dish of hot mustard and my husband just dipped it and complained that it was too spicy. The waiter told us to add soy sauce and mix it. I guess he couldn’t tell we weren’t locals 😛 .

Fried Wuntun

Fried Wuntun

Polynesian Cultural Center

After lunch, we continued our journey and finally arrived at the Polynesian Cultural Center. We got there later than expected and by the time we parked and got to the ticket booth, it was around 3:00 pm. The village grounds were open from 12:00 pm to 6:00 pm. If you end up staying for the luau and evening show, that part of the center stays open until the show ends.

If you’re short on time, go to the information booth and ask them to highlight all the village shows and places to check out. We were lucky we were talking to a couple who was also short on time. The information booth staff wrote all the times and shows for them to check out the different villages. So we followed their itinerary and checked out a few shows from their list. Otherwise, we would’ve missed the shows and wandered around aimlessly not knowing where to go.

Polynesian Cultural Center Map

Polynesian Cultural Center Map

The kids, my husband and I really enjoyed the live shows and exploring different areas of the villages. The boys even got inspired by their environment and started to pretend they were villagers roaming around the land. Since we got there late, by the time we were done watching the different shows, everyone was gone. No one came to kick us out—I wonder if we could’ve roamed around the village area a little longer? But we decided to head back to the front gate before the actors/villagers came rounding us up. We ended our visit with a short film called “Hawaiian Journey” at their theatre. This is something you could do last if you end up coming late because I believe the last show starts at 6:00 or 6:30 pm. You could explore the rest of the village first before catching the film.

Tita’s Grill

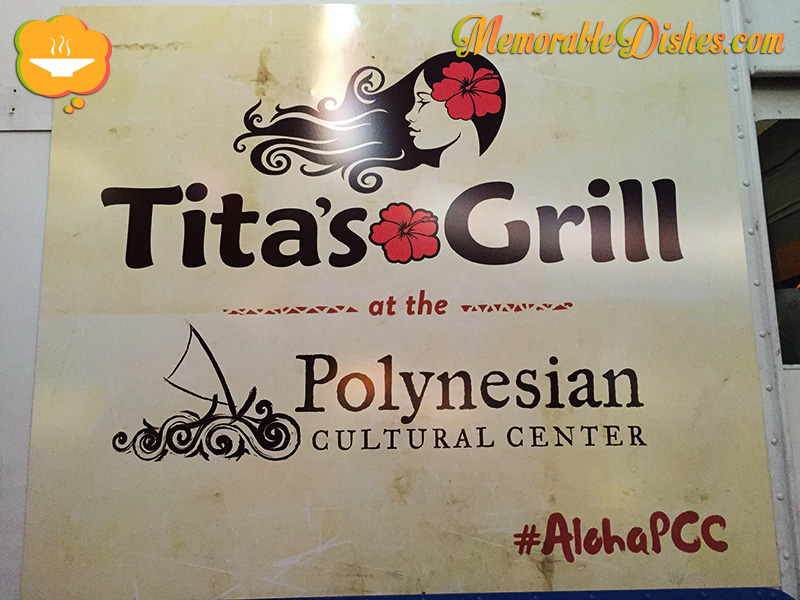
Tita's Grill Sign

Tita’s Grill Sign

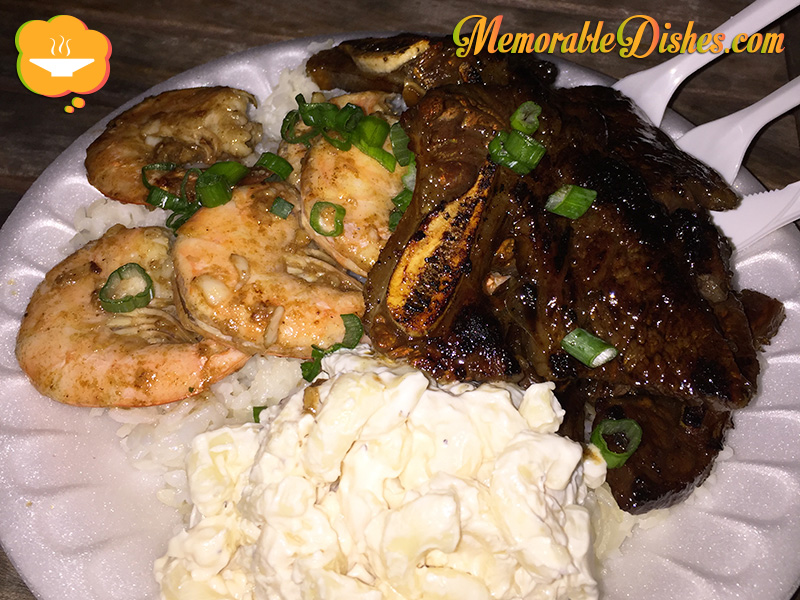
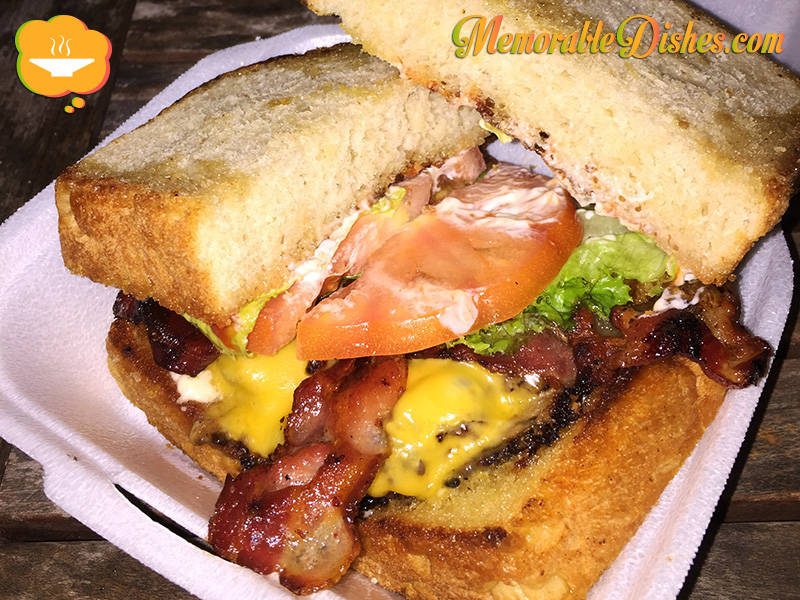
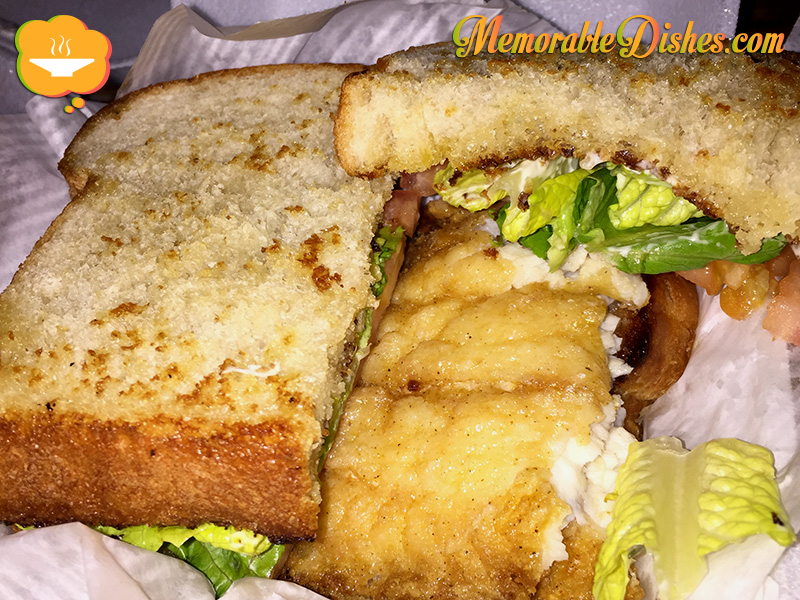
By the time the movie ended, the kids were starving. We didn’t book the luau and evening show because we already pre-booked a luau in Maui. The reviews of the restaurant on the premise looked promising so we were planning to check it out. But instead we got sidetracked when we saw a couple of food trucks near the front entrance. I beelined to the Tita’s Grill food truck after seeing the yummy foods people were eating at the nearby tables. I believe they have another more permanent location north-west of the Polynesian Cultural Center (about a 10 minute drive away). I ordered the garlic shrimp and kalbi (Korean beef ribs) plate for myself. My husband ordered the Tita’s burger. I ordered the fish burger for my toddler girl and the boys had the regular hamburgers and fries (the boys ate their burgers before I had a chance to take photos.)

Garlic Shrimp and Kalbi Plate – The most delicious garlic shrimp ever! I like that the shrimp comes in the shell because I find it more flavourful. The kalbi was tender and delicious. It also comes with rice and macaroni salad (standard Hawaiian plate). I’m usually not too crazy about macaroni salad but it’s super tasty and I couldn’t stop eating it.

Garlic Shrimp and Kalbi Plate

Garlic Shrimp and Kalbi Plate

Tita’s Burger – It’s essentially a banquet burger. By the look on my husband’s face and the speed he was eating it, I assumed it was mighty tasty.

Tita's Burger

Tita’s Burger

Fish Burger – This was shared amongst us because, of course, my toddler girl couldn’t finish the whole thing. I found the toasted buttered bread too oily. However, I really liked the fish. It was lightly breaded so you get a good chunk of fish. My girl loved it and asked for more. I limited the amount of buttered bread I gave her afraid that she might get a tummy ache.

Fish Burger

Fish Burger

I hope I whet your appetite with all these delicious Memorable Dishes from Hawaii so far! Stay tuned for Hawaiian Food Trip: Oahu: Part 3 where we continue our culinary journey on our last day in Oahu.

Hawaiian Food Trip: Oahu: Part 1 (Pearl Harbor)

Taro Milk Tea, Fried Calamari, Takoyaki

We will commence our Hawaiian Food Trip with a direct 10-hour flight from Toronto to Honolulu with Air Canada which lands us in Honolulu at 9:15 PM (Hawaii-Aleutian Standard Time). With a small flight delay, a missing car seat (the airport gave us a brand new car seat to keep due to the airline’s transporting issues) and by the time we gather our luggage, get our rental car and drive to our condo, it’s past 11:00 PM. I actually packed a tetra box almond milk in our checked luggage and brought my homemade banana muffins in one of our carry-ons so that the next day we don’t have to scramble around looking for breakfast.

With three kids, you just can’t freestyle travel. We planned ahead and pre-bought and pre-booked some activities. I would suggest to plan at least one major activity for the day and if you have time, plan others as backups but manoeuvre them as needed once you get there. If you’re a Canadian planning to visit some of the major attractions in Oahu and if you’re a Costco member (once again, I’m not being paid by Costco but this is really a great deal!), then go get yourself a Go Oahu® 4-day Card. It’s a great deal and if you pick a couple of major places to visit, you get your money’s worth. Plus, we pay Canadian prices for the Go Card online, which is a bonus.

Before planning every trip, I always ask friends to recommend places to visit, where to eat, and any other helpful tips. We were also lucky that we have Canadian friends living in Honolulu and they hosted a nice family dinner for us 🙂 She also recommended places to check out and restaurants to eat – it was helpful to have a local’s perspective. I told her she should be a tour guide expert for Canadian tourists!

Pearl Harbor

People who have been to Pearl Harbor would probably tell you that you cannot spend the whole day there. Very true unless you’re travelling with small children. We got there around 8:45 AM and left there around 4 PM. Start your tour with USS Arizona Memorial and get there early (they open at 7:00 AM) because the National Park Service gives out over 1,300 free walk up tickets each day on a first come, first serve basis. We were lucky that we got to go to the 9:00 AM tour and on we went. By the time it was finished, it was 10:30 ish. Even though it was only almost 11:00 AM, the kids were hungry. Luckily there was an outdoor food area on the premise. I’m usually not crazy about the food at tourist sites. They’re usually not the greatest so I was very surprised to find their hot dogs came with complimentary cheese and chili sauce. They also sold soups there too! Again, I was a bit skeptical especially because the soups were served in paper coffee cups. But the clam chowder and corn chowder were piping hot and surprisingly delicious. (Notice I forgot to take photos of these food items. I think my hand would’ve been bitten off if I took photos of the hot dogs and soups while my famished children looked on 😛 .)

After the animals, I mean, children were fed, we proceeded to visit the Battleship Missouri Memorial and Pacific Aviation Museum. You’ll need to take a complimentary shuttle to get there once you buy your tickets. Everything is clearly labelled and there are lots of people to ask questions if you get confused. When we got back to the main site, we checked out the USS Bowfin Submarine and museum. The kids, including our toddler girl had fun playing battleship control inside the museum. It was almost closing time so hardly anyone was there and they got to spend lots of time running around.

Pearl Harbor

Pearl Harbor

Tips for visiting Pearl Harbor

You cannot bring backpacks, not even diaper bags when visiting any of the Pearl Harbor historic sites. A great tip I read was to bring several clear large zip loc bags. I put all the baby essentials in the clear bags. (It was actually very liberating not having to carry so many things.) I had my pockets to put my wallet and cell phone.

Also, kids under 4 cannot go into the submarine but are allowed in the museum. So my husband and I took turns watching our toddler. After my husband came back with the boys, they allowed me to take the boys onto the submarine again, which was very nice.

Papa’s Tea House

Part of our Hawaii trip planning involved deciding where to eat. I am so happy now that we have Yelp, so we can pick and review the restaurants beforehand. I remember going to Santorini, Greece pre-Yelp days and we had to rely on outdated travel book restaurant reviews. One seaside restaurant had the audacity to tell us that they didn’t serve octopus! I thought to myself, their restaurant was right by the sea! As you could tell, it was one of those tourist trap restaurants. Meanwhile, we happened to discovered a neighbourhood restaurant (not by the sea) and they served the most delicious octopus and other great foods.

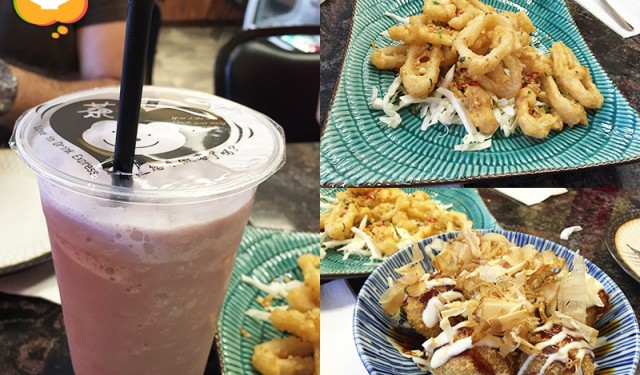
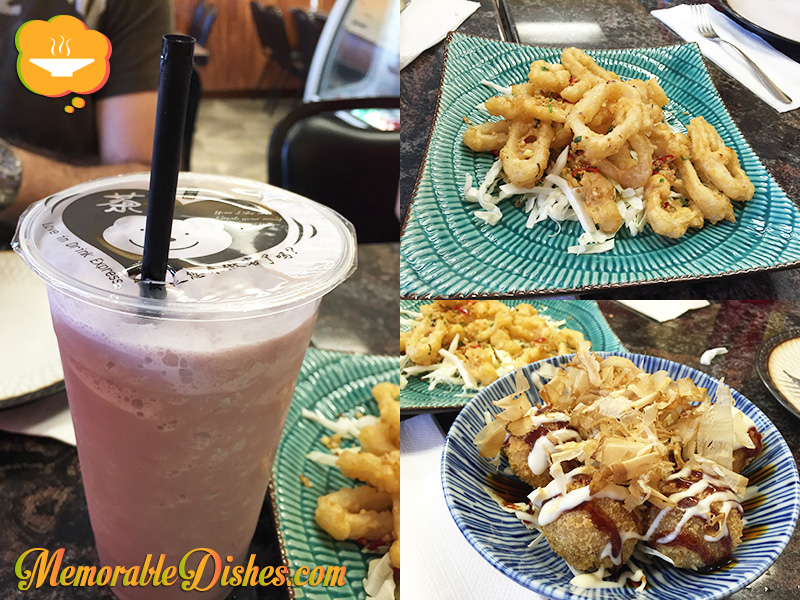
When I was searching, I tried to find Hawaiian style food that we normally can’t eat back home. I found this restaurant called Papa’s Tea House in Aiea which is five minutes away from the Pearl Harbor memorials. This restaurant is located in an ubiquitous suburban plaza. We ordered fried calamari (requested by the boys), takoyaki, spicy ahi don, pork katsu curry, seafood combo laksa and a large taro milk tea to share. Once again I forgot to take pics of the pork katsu and laksa because of my famished children.
Taro Milk Tea, Fried Calamari, Takoyaki

Taro Milk Tea, Fried Calamari, Takoyaki

Taro Milk Tea – Let me tell you it was the BEST taro milk tea ever! They actually use real taro and not powder.

Fried Calamari – Love the garlic and chili sprinkled on top.

Takoyaki – Crunchy on the outside and perfectly moist on the inside.

Spicy Ahi Don – Basically spicy tuna poke on top of rice. Poke was my addiction while I was in Hawaii and of course it was delicious.

Pork Katsu Curry – Pork cutlet was delicious. However, the curry didn’t taste like the Japanese curry I’m used to but almost like a Chinese curry.

Seafood Combo Laksa – Was OK but not very authentic. The taste of the broth wasn’t as complex compared to what I’m used to.

Stay tuned for Hawaiian Food Trip: Oahu: Part 2 in my next post for more Hawaiian Memorable Dishes!
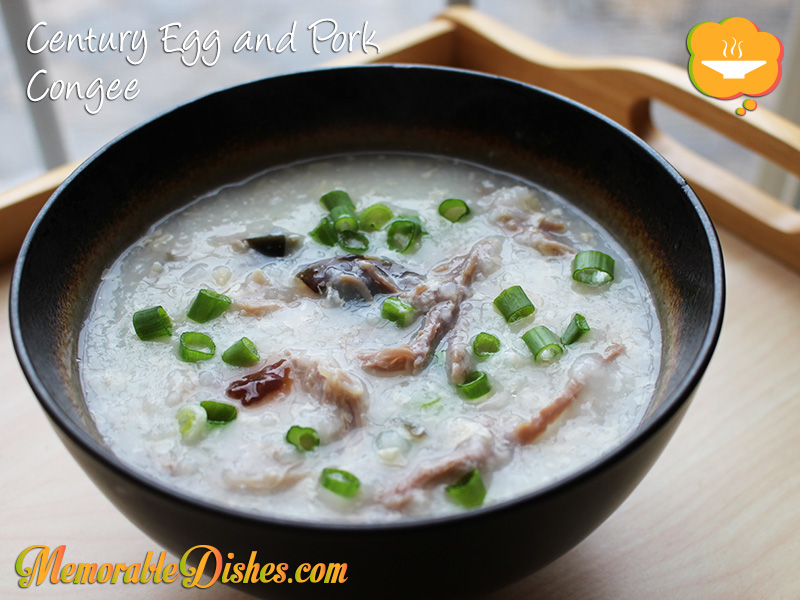
Century Egg and Pork Congee
(皮蛋瘦肉粥)

Century Egg and Pork Congee

Congee is a comfort food that many Asians grew up eating. It’s a rice porridge that is typically served for breakfast or lunch if you accompany it with other heartier foods such as noodles. You’ll get full pretty fast if you’re eating congee but you’ll get hungry pretty soon too because it’s liquidy. It’s also a great meal to eat when you’re feeling sick because it’s warm and nourishing. Congee is like North American’s chicken soup.

I’m sure a lot of Chinese children grew up eating this Memorable Dish whether they grew up in Asia, North America or any other part of the world. If they are able to buy century eggs, their moms or grandmothers would’ve made them this congee when they were children.

My mother uses a couple of Chinese ingredients that may not be common to some. So if you can’t find them or don’t want to use them, it’s OK. One ingredient is conpoy (dried scallop) because it gives the congee a better taste. You won’t find good quality conpoy at your Chinese grocery store. We usually buy it from a Chinese dried seafood shop (海味店). She also mixes dried bean curd sheet (腐竹) with the rice before boiling it.

At first, my boys didn’t seem to like congee very much. Every time we had it at my mom’s house, they would only eat a few spoonfuls. They ate more of the side dishes of noodles and Chinese cruller. For them, congee equates Chinese cruller; congee is blasphemous without it. As time goes by, they started getting second bowls of congee! I wonder if it’s because of the crunchy Chinese cruller they love dipping the congee into or their taste suddenly evolved into a higher level of adult sophistication.

I’m sure this Memorable Dish brings back childhood memories for a lot of Chinese families. I remember my grandmother making it for us when we were kids and now my mother makes it for us and my kids. When my kids grow up I will teach them how to make this dish for their family with the hopes that they will continue the tradition of congee cooking for their loved ones.Century Egg and Pork Congee

Century Egg and Pork Congee
(皮蛋瘦肉粥)

Prep Time: 15 minutes

Cook Time: 1 hour

Total Time: 1 hour, 15 minutes

Serving Size: 6-8

Ingredients

  • 1 pound Lean Pork, cut into 2 big pieces
  • 2 tsp Salt
  • 1 Century Egg (cut in half)
  • 1 cup Rice
  • 2 slices of Ginger
  • 16 cups Water
  • 3 pieces of Conpoy (Dried Scallop) (optional)
  • 1/2 cup Dried Bean Curd Sheet, crushed up (optional)
  • 1 sliced Green Onion for garnish
  • White Pepper & Salt or Soy Sauce to taste

Preparation

  1. The night before, coat pork pieces with salt and marinate in the fridge.
  2. If using conpoy, soak them in water to reconstitute it.
  3. On the day of making the congee, rinse rice until the water is almost clear.
  4. In a large bowl, mix 1/2 century egg, rice and dried bean curd sheet (if using) together. Set aside.
  5. After conpoy has been softened, break pieces up with a fork or by hand.
  6. In a large pot, put 12 cups of water, pork pieces, ginger slices, and conpoy (if using). Bring everything to a boil.
  7. Once it’s boiled, skim off scum and boil for another 15 minutes.
  8. Put rice mixture into the boiling liquid and once it’s boiled, turn down to medium to medium high heat.
  9. The liquid should be in a rolling boil state.
  10. Keep the pot lid slightly open so the congee won’t boil over,
  11. Cook congee for 15 minutes and add the additional 4 cups of water.
  12. Cook congee for approximately 45 minutes more.
  13. Check and stir the pot periodically to make sure the rice doesn’t stick to the bottom as it thickens.
  14. Once you boil it to the consistency of your liking, the rice should be broken down by now. Turn off heat.
  15. Take the big pork pieces out of the pot and shred it with a fork or by hand.
  16. Cut the other half of the century egg into small pieces.
  17. Put the shredded pork and century egg back into the pot of congee and mix.
  18. Serve in bowls and garnish with green onions, white pepper and salt or soy sauce to taste.

Notes

If you like thicker congee, cook it longer. If you like it thinner, add a bit more water. Make sure you bring it back to a boil if using cold water.

https://www.memorabledishes.com/century-egg-and-pork-congee/

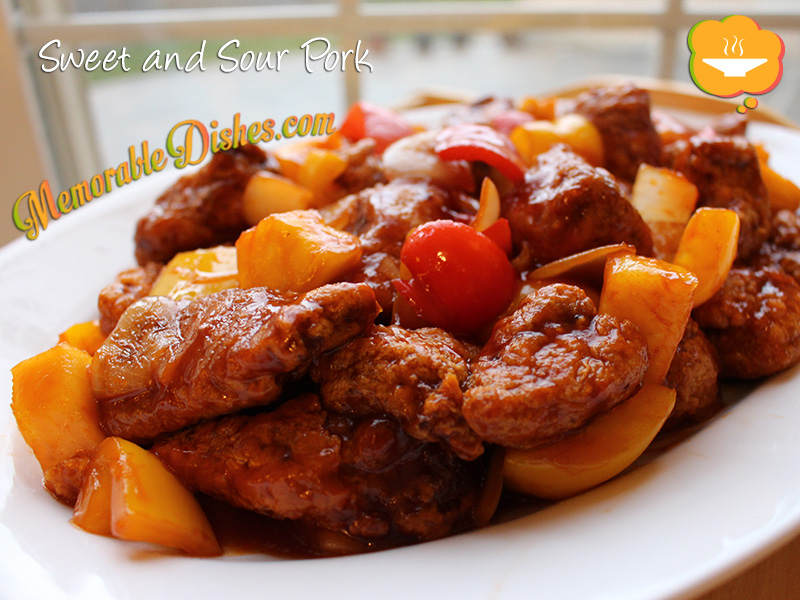
Sweet & Sour Pork

Sweet & Sour Pork

This Memorable Dish is another tribute to my husband. He loves sweet and sour pork. I would think most North Americans who eat Chinese food know about this dish and usually love it.

Believe it or not, this is NOT one of those dishes that was invented by North American Chinese, like chop suey. I believe sweet and sour pork is one of the most well known dishes in Chinese cuisine, both American/Canadian-Chinese and authentic Chinese restaurants alike.

My mom usually makes this for Sunday dinner when she has a bit more time because it’s a two-step process. First you have to deep fry the pork and then stir fry it with the sweet and sour sauce. I always find it a bit cumbersome to deep fry stuff at home. But alas, my mom does it because she enjoys making the food we like to eat.

This version of sweet and sour pork is based on my mom’s homemade version. Every Chinese family has their take on this dish and only certain Chinese restaurants make it well. Try my version but don’t forget to adjust the sweetness or sourness to your family’s liking.Sweet & Sour Pork

Sweet & Sour Pork

Prep Time: 20 minutes

Cook Time: 20 minutes

Total Time: 40 minutes

Serving Size: 4-6

Ingredients

  • 1 1/2 lbs Pork Butt (Shoulder), cut into 1 inch cubes
  • 1 tbsp of Soy Sauce
  • 1 tsp of Sugar
  • 1 tsp of Cornstarch
  • 1 tsp Shaoxing Wine or Cooking Wine
  • 1 small Onion, cut into large dice
  • 1 Pepper (green, red, orange or yellow), 1 inch pieces
  • 1 cup fresh or canned Pineapple,1 inch cube
  • 1/2 cup Ketchup
  • 1/2 cup Apple Cider Vinegar
  • 3 tbsp Sugar
  • 1 tbsp Soy Sauce
  • 1 Egg, beaten
  • 3/4 cup Cornstarch
  • Vegetable Oil for deep frying

Preparation

  1. Marinate pork with soy sauce, sugar, cornstarch, and cooking wine for at least 1 hour.
  2. In a small bowl, mix ketchup, vinegar, soy sauce and set aside.
  3. Preheat oil in a deep fryer or deep skillet to 375°F.
  4. Mix beaten egg with the marinated pork.
  5. Coat pork in cornstarch and shake off excess.
  6. Deep fry the pork until golden brown for about 5 minutes or until it floats.
  7. Make sure you don’t overcrowd the pork. Fry in batches if you’re not using a deep fryer with lots of oil.
  8. Once the pork pieces are done, place them on a plate lined with paper towel to absorb excess oil.
  9. In a wok or large skillet, heat up 1 tbsp of oil.
  10. Fry onions and green peppers until softened, then add ketchup mixture sauce.
  11. Once the sauce starts to boil, add the pineapples and stir.
  12. Put the pork in and mix until everything is coated.

Notes

Taste the ketchup mixture after you mix it. You might want to adjust the sweetness or sourness to your taste.

https://www.memorabledishes.com/sweet-sour-pork/

Ramen Noodles

Ramen Noodles

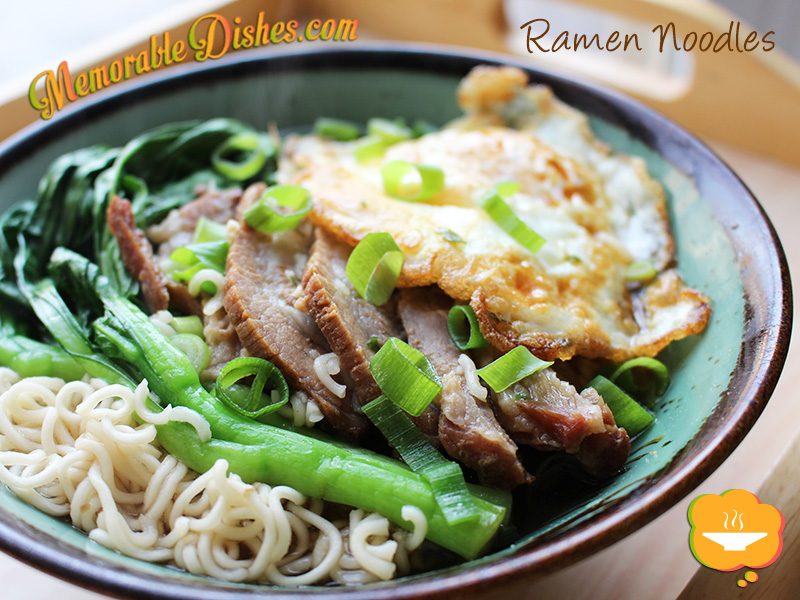
As the weather is getting cooler, I crave for a bowl of hot ramen noodles. Ramen noodles – not the fancy kind you eat at Japanese restaurants where they brew the broth with pork bone and meat for hours. But the instant kind. Every Asian household always has instant ramen noodles stocked up in their pantry at all times. Thus, instant ramen noodles should be a Memorable Dish for all Asians.

Instant ramen noodles is a comfort food to many Asians growing up. We know it’s not the healthiest thing on earth but we just love it. Asians don’t just eat the plain ramen noodles right out of a package but have extra add-ons to make the noodles extra yummy. Plus, if you are making them for your friends and family, it creates the illusion that you made some effort in cooking this dish and not just boiling instant noodles.

I personally blanch the noodles and rinse it with cold water and then reheat the noodles with the broth. If you don’t want to do that, just cook the ramen according to the package. I happen to have some of my homemade leftover Chinese BBQ Pork so I put that, veggies and a fried egg as my toppings. Put your favourite ingredients on your ramen and enjoy!
Ramen Noodles

Ramen Noodles

Prep Time: 5 minutes

Cook Time: 10 minutes

Total Time: 15 minutes

Serving Size: 1

Ingredients

  • 1 pack instant Ramen
  • Slices of leftover or fresh meat (chicken, beef, pork, etc.)
  • Fresh Vegetables
  • Fried Egg
  • Slices of Scallions (optional)

Preparation

  1. Boil the ramen according to the package.
  2. Top with cooked meat, vegetables, fried egg, scallions or any desired topping.
  3. Eat and enjoy!
https://www.memorabledishes.com/ramen-noodles/

Imitation Shark Fin Soup (碗仔翅)

Imitation Shark Fin Soup

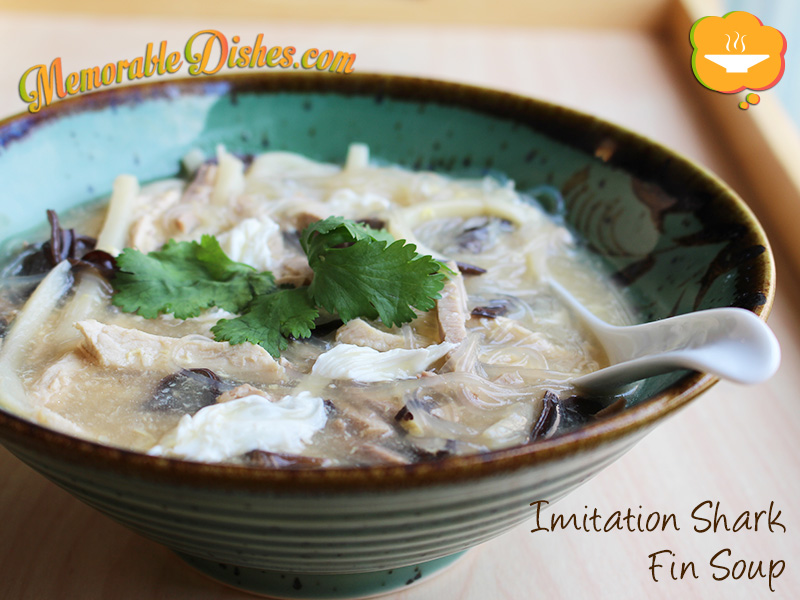
Even before it was politically incorrect to eat shark fin soup, I’ve always liked the fake version better. Maybe it was the extra MSG or maybe I was super hungry. But this is one of my favourite Memorable Dishes eaten on the streets of Hong Kong as a child. My older brother and I ate this on the streets after swimming. The street vendor had his (probably unlicensed) cart outside of the public swimming pool waiting for hungry post-swimming patrons. He definitely knew who his target audience was! I, like everyone else gets super famished after swimming, that’s why the street imitation shark fin soup was especially tasty and delicious.

When I found this hawker (street vendor) Memorable Dish at T&T (Chinese grocery store chain in Canada), I couldn’t believe it! I hadn’t eaten this soup in so long and when I discovered it, I was super ecstatic. It was still piping hot from its container when I brought it home. I devoured it and thought of my famished self after swimming in Hong Kong when I was little.

When researching for this recipe, I found a couple of versions. One where they use crab meat and store-bought imitation shark fin and another where shredded chicken, pork, and cellophane noodles are used. I adapted my recipe from both of these versions.

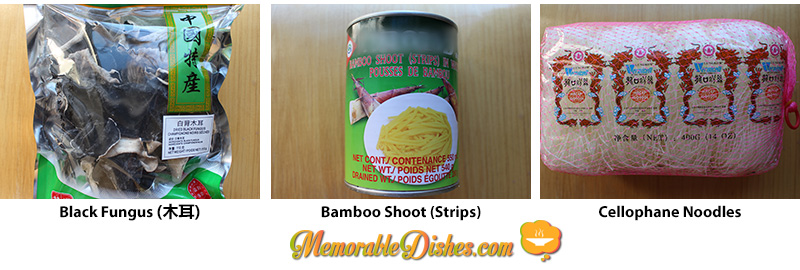
Eating this Memorable Dish brought back vivid memories of when my dad took my older brother and I swimming. Every time we went swimming, I looked forward to eating this hot soup filled with yummy goodness. After rediscovering this dish at the supermarket, I knew it wasn’t just about childhood memories. I genuinely enjoyed this dish! The texture of the crunchy black fungus and the meaty goodness soup warms up my mouth and enters into my soul.

Imitation Shark Fin Soup

Imitation Shark Fin Soup (碗仔翅)

Prep Time: 30 minutes

Cook Time: 30 minutes

Total Time: 1 hour

Serving Size: 4-6

Ingredients

  • 1 cup Imitation Shark Fin or Cellophane Noodles
  • 1 1/2 cup poached Chicken Breast, shredded
  • 1 1/2 cup poached Lean Pork, shredded
  • 1 cup reconstituted Dried Black Fungus (木耳) thinly sliced (see Note #1)
  • 1 cup canned Bamboo Shoots (strips)
  • 1 Egg
  • 6 cups Chicken Broth
  • Cornstarch Solution (combine 2 tbsp cornstarch with 4 tbsp water)
  • ¼ cup Soy Sauce
  • Salt to taste
  • Dash of White Pepper
  • Dash of Black Vinegar
  • Coriander or sliced green onions for garnish (optional)

Preparation

  1. If you are able to find imitation shark fins, blanch them by pouring boiling water over it and leaving it covered for about 5 minutes. Discard water, drain the fins and set aside.
  2. Bring chicken broth to boil in a pot. Add sliced black fungus and bamboo shoots, and simmer for about 5 minutes.
  3. Add chicken, pork and blanched shark fins (if using). Bring to a simmer for another 3 minutes.
  4. If using cellophane noodles only, put them at the very end because it cooks super quick.
  5. Before using cornstarch solution, stir again to dissolve mixture. Slowly pour in the cornstarch solution while stirring until you reach the consistency desired. Add soy sauce and season with salt to taste.
  6. Lastly, slowly pour beaten egg to the soup mixture. Turn off heat.
  7. Dish the soup into serving bowls. Garnish with coriander or sliced green onions (if using). Put dash of white pepper and black vinegar to taste.

Notes

Note #1: Use approximately 4 medium size black fungus. It really depends on how big your black fungus is. Soak the black fungus in hot water to soften. Cut around and discard the hard part. Then slice the fungus into thin strips. If you are unable to find black fungus or don’t want to use them, you can use shiitake mushrooms instead. The texture will be different since black fungus is crunchy and the shiitake mushrooms are soft.

Note #2: Poach the chicken and pork in water and you can use the poaching liquid as part of your broth.

Note #3: For thicker soup, add more cornstarch solution. For a thinner soup, don’t add as much solution.

https://www.memorabledishes.com/imitation-shark-fin-soup/

Imitation Shark Fin Soup - 3 pix

Mapo Tofu (麻婆豆腐)

Mapo Tofu

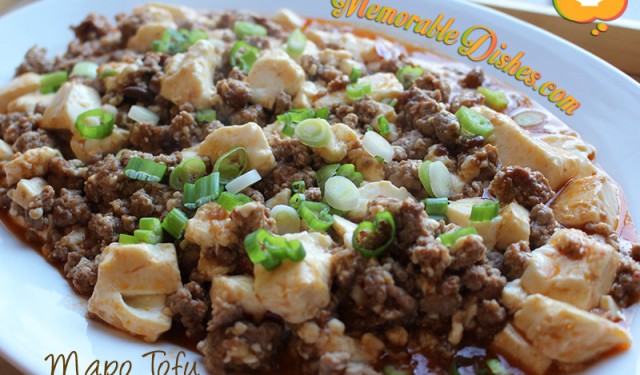
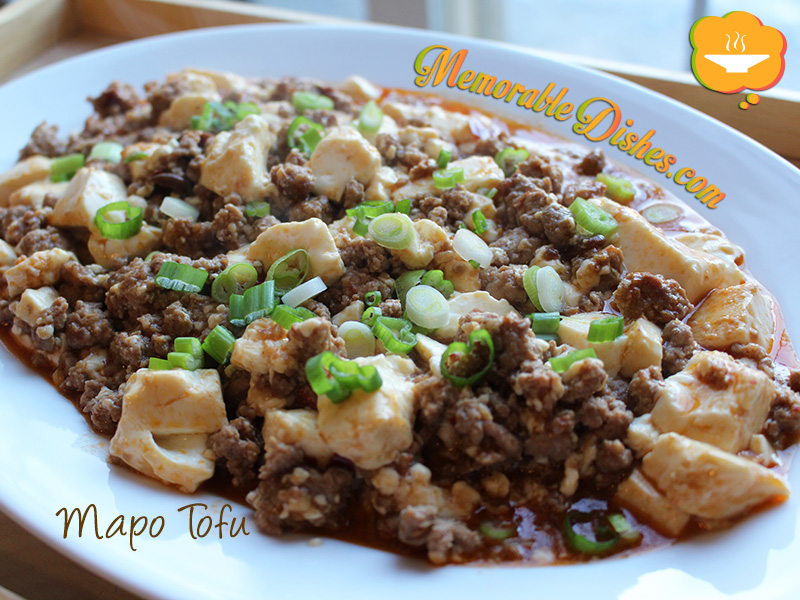
Mapo tofu – a staple childhood favourite for Chinese children. My cousin reminded me of this dish as one of her childhood favourites. I remember eating it as a kid and now make it often for my kids. My second son absolutely LOVES tofu! Hence, this is one of his favourite Memorable Dishes!

Mapo tofu derives from Sichuan province of China which is a region known for its spicy food. The version my mom used to make was not spicy at all. As the dish travels from the northern part of China to the south, it becomes milder for the southerner’s taste.

You don’t have to be Chinese to love this dish. It’s such a versatile and easy dish to make. Everyone in my family loves it! Kids love it because it’s saucy and goes well with rice. Old people love it because it’s soft and they don’t have to chew as much 😉

Just to let you know this isn’t an authentic version of Mapo Tofu. It’s a homemade version geared towards kids. Now that my kids are older and enjoy spicy food, I add a bit of chili bean sauce AKA Doubanjiang. You can add as much or as little chili bean sauce as you want or omit it altogether to suit your family’s taste. This Memorable Dish can become a staple in your repertoire of dishes to make for your family.

Mapo Tofu

Mapo Tofu (麻婆豆腐)

Prep Time: 15 minutes

Cook Time: 15 minutes

Total Time: 30 minutes

Serving Size: 4

Ingredients

  • 1 pound of Ground Pork
  • 1 tbsp of low sodium Soy Sauce
  • 1/2 tsp of Sugar
  • 1/2 tsp of Cornstarch
  • 1 tsp of Sesame Oil
  • 1 tbsp of Water
  • 1 tbsp of minced Garlic
  • ½ tbsp of grated Ginger
  • 1 package (530 grams) of tofu, cut into ½ inch cubes
  • 1 tbsp of Vegetable Oil
  • 1 tbsp of Oyster Sauce
  • 1 tbsp of Chili Bean Sauce AKA Doubanjiang (optional)
  • ½ cup water or chicken stock
  • 1 sliced Green Onion for garnish
  • To thicken sauce
  • 1 tsp cornstarch
  • 1 tbsp water

Preparation

  1. Marinate pork with soy sauce, sugar, cornstarch, sesame oil and water for at least 30 minutes.
  2. If you marinate the pork in the fridge, make sure you bring it back to room temperature before cooking it for best results.
  3. Heat oil in a wok or a large frying pan.
  4. Add garlic and ginger and pork. Sauté until it is done.
  5. Stir in oyster sauce, water or chicken stock and chili bean sauce (if using).
  6. Gently put the cubed tofu into the meat mixture. Stir until it’s heated through.
  7. Mix 1 tsp cornstarch and 1 tbsp water in a bowl.
  8. Then add the cornstarch solution into meat and tofu mixture.
  9. Cook until everything thickens.
  10. Garnish with sliced green onions.
  11. Serve with steamed rice.

Notes

I like using the soft tofu but if you like a harder texture, use medium to firm tofu.

https://www.memorabledishes.com/mapo-tofu/

Show Buttons
Hide Buttons