Tag Archives: Vegetables

Shepherd’s Pie

Shepherd's Pie

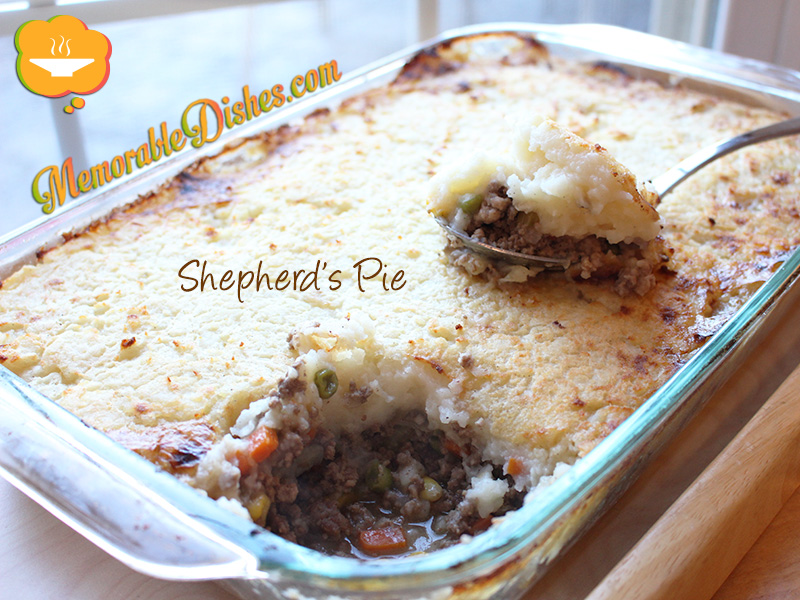
I don’t exactly remember the first time I had Shepherd’s Pie. Growing up in an Asian household, Shepherd’s Pie was definitely not a staple. But my adventurous food-loving mother made this Memorable Dish for us at home and we’ve been loving it ever since.

Shepherd’s pie is supposed to be made with ground lamb and cottage pie is supposed to be made with ground beef. But in North America, we use the term shepherd’s pie synonymously with cottage pie. This recipe isn’t my mom’s original recipe (she probably got hers from a friend or magazine). I remember one of my friends who was studying to be a chef was making shepherd’s pie while I was at his house. He used cumin and nutmeg and I really liked the taste.

This Memorable Dish is definitely an all-time favourite dish in our household. Everyone loves it. It can be a bit time-consuming to make. To break up the process a bit, I make the mashed potatoes a day before so I don’t spend all day making it 😉 .Shepherd's Pie
Shepherd’s Pie

Prep Time: 30 minutes

Cook Time: 1 hour

Total Time: 1 hour, 30 minutes

Serving Size: 6-8

Ingredients

  • For Potatoes:
  • 4 baking Potatoes (about 3 lbs), cut into 1-inch chunks
  • 2 cloves Garlic, peeled
  • 1 cup milk, warm
  • 1 tbsp butter
  • Salt for boiling potatoes
  • Salt & Pepper to taste
  • For Vegetables:
  • 1 cup Onion, diced (about 1 medium)
  • 4 cloves Garlic, minced
  • 3/4 cup Carrot, diced carrot
  • 2 stalks Celery, diced
  • 1/2 cup frozen Corn
  • 1/2 cup frozen Peas
  • 1 tbsp Extra-virgin Olive Oil
  • For Meat:
  • 2 1/2 lbs Ground Beef
  • 1/2 tsp Ground Cumin
  • 1/4 tsp Ground Nutmeg
  • 1 tsp Onion Powder
  • 1½ tsp Garlic Powder
  • 1 tsp Kosher salt
  • 2 cups of Beef Stock
  • 1 tbsp All-purpose Flour
  • 1 tbsp Extra-virgin Olive Oil

Preparation

  1. Place potatoes and whole garlic clove in a large pot of salted water. Bring to a boil and cook for about 15 minutes, or until tender. Drain, return to the pot and set aside.
  2. Brown ground beef in a large frying pan with 1 tbsp of olive oil.
  3. Once the meat is brown, scoop it onto a large plate lined with paper towels to drain excess fat.
  4. Heat 1 tbsp of olive oil in the frying pan over medium-high heat. Add the onion and sauté for 5 minutes or until transparent and soft. Scrape the bottom of the pan to remove the yummy bits. (If it’s too dry, you can add a bit of water to remove the bits.)
  5. Add the chopped garlic, carrot and celery. Reduce the heat to medium and sauté for 5 minutes.
  6. Return the cooked beef to the vegetable mixture, add the spices (cumin, nutmeg, onion and garlic powder) and 1 tsp of salt.
  7. Add the beef stock, mix and break down the meat with a wooden spoon as much as you can. Cook for approximately 10 minutes.
  8. Add 1 tbsp of flour and stir until thickened. Stir in the corn and peas and turn off heat.
  9. Preheat the oven to 400°F.
  10. Place the pot of drained potatoes over low heat. Add the warm milk and butter. Mash potatoes with a potato masher or hand-held mixer.
  11. Spoon the meat and vegetable mixture into a 13 x 9-inch large baking dish. Spread the potato mixture on top in an even layer.
  12. Bake for 20 minutes, or until the top is golden brown.

Notes

If the pie starts bubbling but the top hasn’t browned yet, you can put it under the broiler to be browned for a few minutes.

https://www.memorabledishes.com/shepherds-pie/

Chinese Hot Pot

Chinese Hot Pot

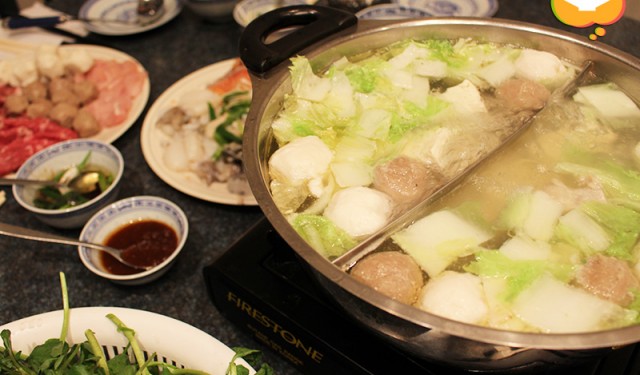
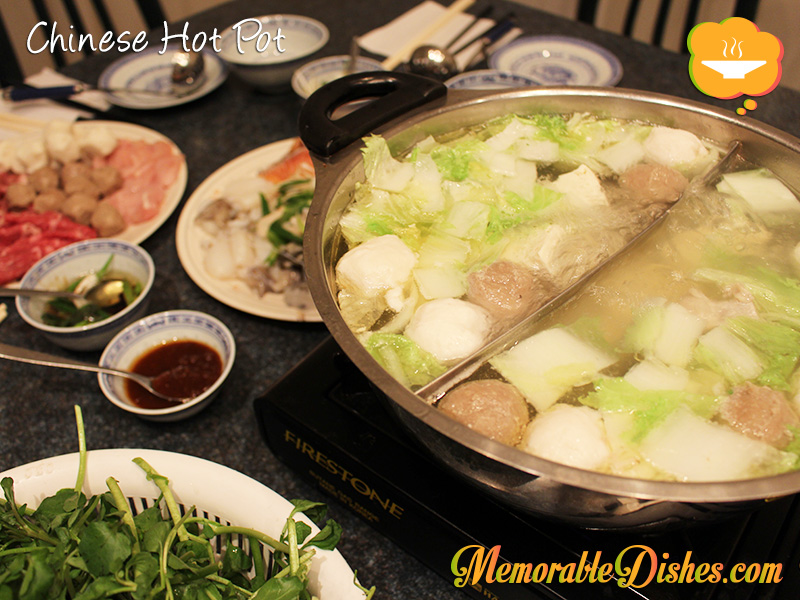
Hot pot is something that I crave during the cold winter months. The boys also look forward to eating it every winter. Chinese hot pot consists of using broth to cook slices of meats, seafood, dumplings and vegetables in a boiling pot of broth. You set this up on the dining table and everyone cooks their own food. It’s like a fondue except you cook with boiling broth.

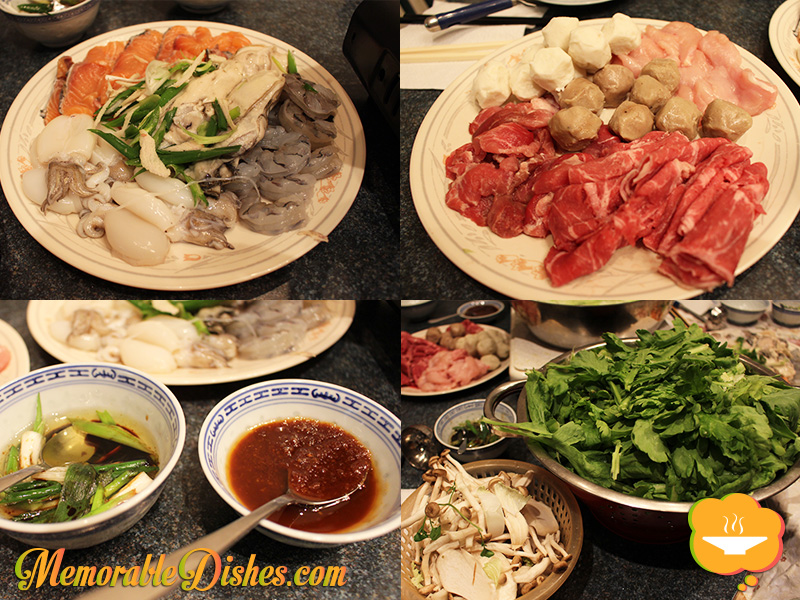
This is definitely a Memorable Dish for our whole family because we all look forward to it during the winter months. Thinking about eating hot pot always makes me hungry. The kids love picking their own pieces of meat and dumping them into the bubbling broth. They especially love the baby cuttlefish. My second son always forgets that the meat is piping hot after it’s just done cooking and usually ends up burning his tongue.

I remember my maternal grandmother used to have hot pot practically every evening during the winter months! In Hong Kong, there’s no central heating because it doesn’t snow and doesn’t get super cold. However, you need to wear thicker clothes inside the house or you might have a space heater if you’re really cold. To keep warm, my grandparents used to have hot pot in this mini pot that just serves one or two people.

We like using plain broth because of the kids. But you can spice it up by making your own spicy broth. If you dare, you can make a mala sauce which consists of Sichuan peppercorns, chilies and various spices. The Sichuan peppercorns create a numbing effect on your tongue – people either love it or hate it. But for now, we’ll stick to our regular broth hot pot.Chinese Hot Pot

Chinese Hot Pot

Prep Time: 30 minutes

Total Time: 30 minutes

Serving Size: Slice about 1/2 pound of meat per person.

Ingredients

  • Slices of Chicken
  • Slices of Beef
  • Slices of Pork
  • Slices of Fish
  • Cuttlefish
  • Shrimp
  • Oysters
  • Tofu
  • Frozen Dumplings
  • Udon Noodles
  • Leafy Vegetables (Spinach, Bak Choy, etc.)
  • Chicken Broth
  • For dipping sauces:
  • Scallions, julienned
  • Ginger, julienned
  • Vegetable Oil
  • Soy Sauce
  • Satay Sauce
  • Hot Sauce

Preparation

  1. Slice up all your meats if you’re not using frozen pre-sliced ones.
  2. For your dipping sauce, put your ginger and scallions in a bowl.
  3. Heat up the oil until it sizzles. You can check by putting a small piece of ginger in it.
  4. Once the oil is heated, pour the hot oil onto the ginger and scallions. Then pour in soy sauce.
  5. You can mix in satay sauce or use the satay sauce on the side.
  6. Set your butane burner on your dining table. (We also have an electric one.)
  7. Heat up your broth in a pot used for hot pot cooking on the stove.
  8. Once the broth is boiled, carefully transfer it onto your butane burner.
  9. Cook your meats in the broth and enjoy.
  10. You can make steamed rice to go with it if you want.
  11. As you cook, the broth will evaporate. Add boiling water to the pot so you’ll have enough liquid to cook the food.

Notes

Note #1: You can find butane burners and hot pot cooking pots at an Asian grocery store. The hot pot cooking pots are usually thinner and may have a divider in the middle so that you can split between a plain or spicy broth.

Note #2: You can purchase thin slices of meat in the frozen section at large Chinese grocery stores.

https://www.memorabledishes.com/chinese-hot-pot/

Chinese Hot Pot Ingredients

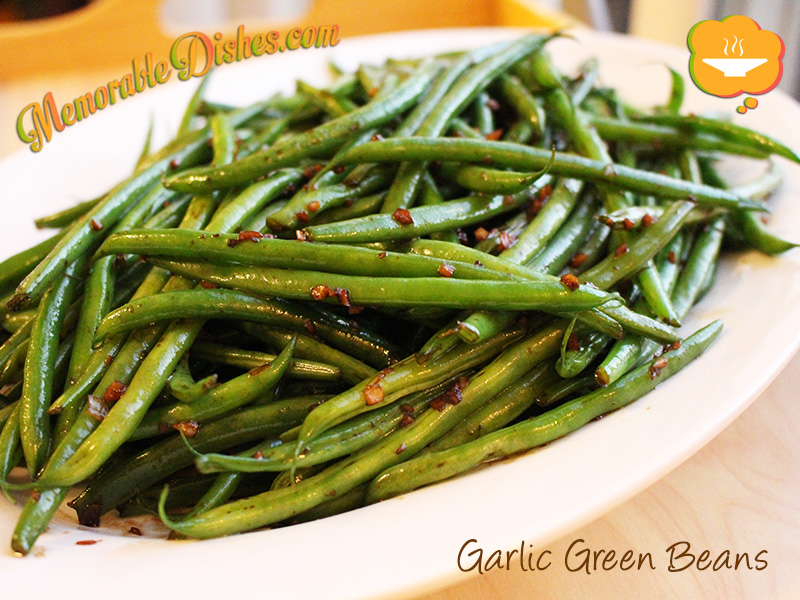
Garlic Green Beans

Garlic Green Beans

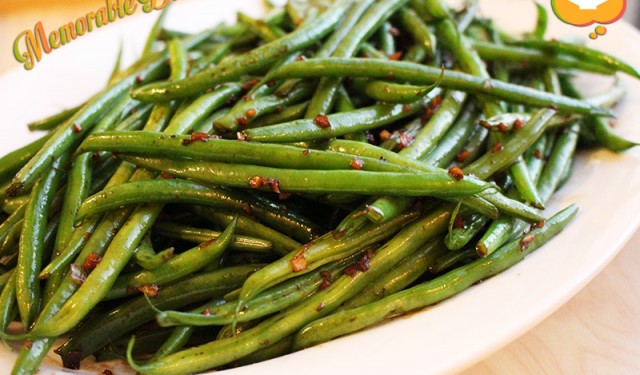
My kids insisted that I put this on my Memorable Dishes blog. They absolutely LOVE this dish. In fact, they said these garlic green beans were even better than French fries! I think they were just pulling my leg and trying to butter me up for something they want later 😉 Already, at such a young age, they’ve learned to subdue me with their sugary words…

I remember the days when the boys were not that much into vegetables. Persuading them to eat their veggies was like pulling teeth. Then when I least expected it, they were trying new vegetables! Maybe all the brainwashing horror stories I told them about not eating their veggies finally got to them 😉 I remember distinctly the first time they ate this vegetable. It was at a holiday potluck dinner with friends. We were waiting for other foods to finish cooking or heating up. The boys were super hungry so I told them to eat the garlic green beans our friends brought. I was expecting to hear moans and groans and thought to myself, they’re not going to eat them. I gave it a shot anyway and….lo and behold they ate them without any struggle! In fact, they actually embraced eating them.

I asked my friends what they put in it and all they said was garlic and butter. Since then, I started making this at home and every time they’ve loved it. Recently, I’ve added my own Asian twist to it and use soy sauce instead. Not just your regular soy sauce, mind you, but a good premium soy sauce. That took the green beans to a whole another level and that was when they said it tasted better than French fries.

I never would have thought simple garlic green beans with soy sauce could turn into a Memorable Dish. The trick is to cook the green beans to your liking. Our family likes it with a bit of a crunch to them. If you are able to find the French green beans (which are thinner), they are even better.Garlic Green Beans

Garlic Green Beans

Prep Time: 10 minutes

Cook Time: 10 minutes

Total Time: 20 minutes

Ingredients

  • 1 1/2 lb Green Beans
  • Water for boiling beans
  • Salt for boiling beans
  • 2 tbsp Vegetable Oil
  • 6 cloves Garlic, minced
  • 2 tbsp Soy Sauce

Preparation

  1. Bring water to a boil and add enough salt until you can taste it.
  2. Put green beans in boiling water. Once the water starts to boil again, drain the green beans and set aside.
  3. Heat oil in a wok or large frying pan.
  4. Add garlic and green beans and stir-fry for a few minutes until heated through.
  5. Add soy sauce and stir-fry until soy sauce is coated on all the beans.

Notes

If you end up overboiling the green beans, put them in an ice bath and drain.

https://www.memorabledishes.com/garlic-green-beans/

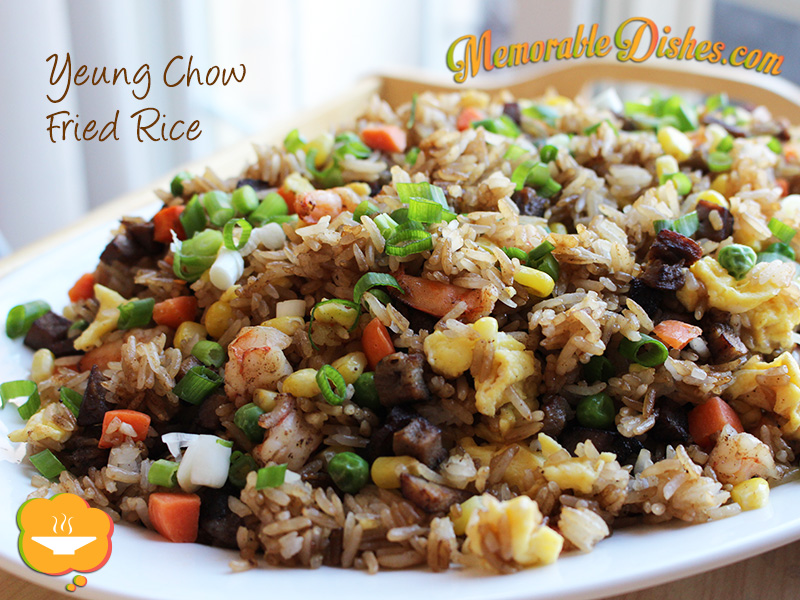
Yeung Chow Fried Rice (揚州炒飯)

Yeung Chow Fried Rice

Yeung Chow Fried Rice derives from the city of Yangzhou, Jiangsu province of China. I believe it’s one of the most popular Cantonese rice dish in the West. In every Chinese restaurant, there is Yeung Chow Fried Rice on the menu. Who wouldn’t love it? It has a taste of everything—bbq pork, shrimp, eggs and veggies.

If you ask my husband what his favourite Chinese food is he would definitely say, “Yeung Chow Fried Rice!” Every time we go to a Chinese restaurant, he wants to order Yeung Chow Fried Rice. When he heard that I was making this for the blog, he was disappointed that he wouldn’t be able to taste this Memorable Dish because he had to fly out for work. I told him I was going to save him some if the boys hadn’t devoured it all.

The kiddies also love Yeung Chow Fried Rice. Actually they love eating any type of fried rice. I think the crispiness of the rice combined with the meat and vegetables give their mouths a sensation overload that they enjoy. They can eat bowls and bowls of it! When they eat fried rice, they are like little machines scooping big mouthfuls at a time into their mouths.

You can easily make this Memorable Dish right in your own home. Either buy Chinese BBQ Pork from the Chinese BBQ shop or major Chinese grocery store. If you have time, make your own Chinese BBQ Pork from my recipe. Frankly, I think it tastes better when you make this fried rice at home. I find that restaurants skimp out on the ingredients and the meat to rice ratio is too low. I’ll bet you can’t just eat one bowl of this yummy fried rice 😉Yeung Chow Fried Rice

Yeung Chow Fried Rice (揚州炒飯)

Prep Time: 15 minutes

Cook Time: 15 minutes

Total Time: 30 minutes

Serving Size: 4

Ingredients

  • 5 cups of day-old Cooked Rice (2 cups of uncooked rice)
  • 2 cups of Chinese BBQ Pork (Char Siu), diced
  • 1/2 cup of Shrimp, diced
  • 2 cups of frozen Peas, Carrots, Corn (thawed)
  • 3 large beaten Eggs
  • Vegetable Oil (1 tsp for eggs, 1 tsp for bbq pork and shrimp, 3 tsp for rice)
  • 1/2 tsp Salt
  • 1 tsp Garlic Powder
  • 1/4 cup low sodium Soy Sauce
  • 1 sliced Green Onion for garnish

Preparation

  1. Heat 1 tsp of oil in a non-stick wok or large frying pan.
  2. Scramble the eggs and set aside.
  3. Using the same wok, heat 1 tsp of oil and fry up the bbq pork until it’s lightly brown. Then add the shrimp to the pork and cook until shrimp just turn pink. Set aside.
  4. Heat 3 tsp of oil and stir fry the rice until it’s heated through.
  5. When the rice turns a bit crispy, add the salt, garlic powder, and soy sauce.
  6. Stir fry the rice a bit more until the soy sauce is mixed in the rice.
  7. Put the pork, shrimp, eggs, and vegetables with the rice.
  8. Stir fry all the ingredients until they are evenly mixed.
  9. Garnish with sliced green onions.

Notes

If you don’t have any day-old rice, cook the rice and cool it in the fridge before making the fried rice for best results. Basically, the rice has to be a bit on the dryer side.

https://www.memorabledishes.com/yeung-chow-fried-rice/

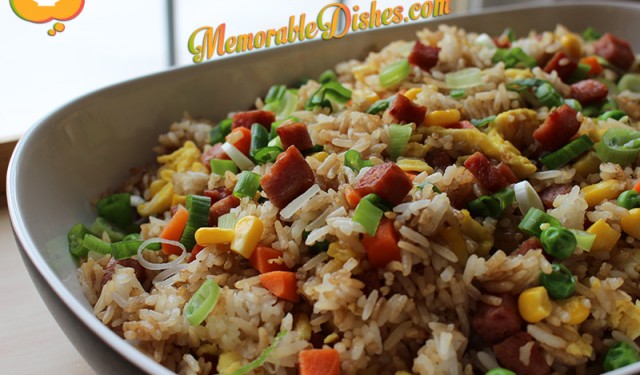
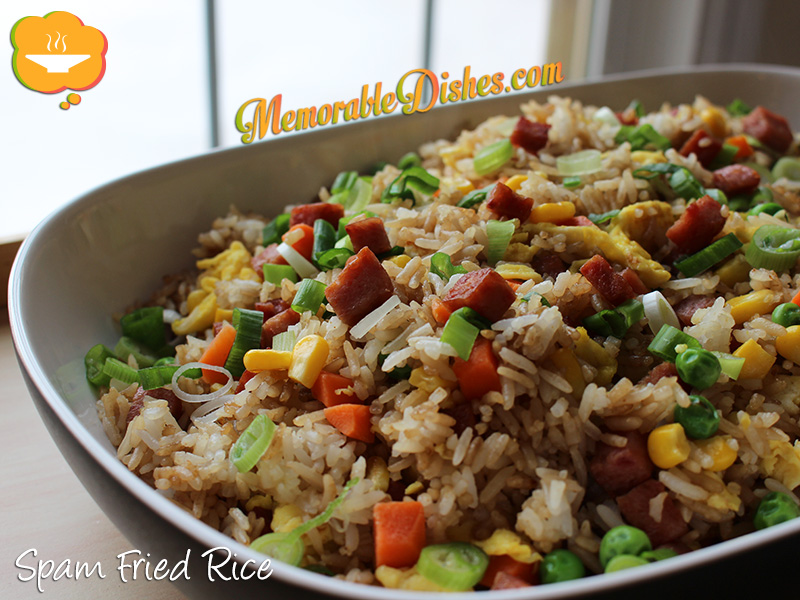
Spam Fried Rice

Spam Fried Rice

Spam – what can I say about it? For some, it is a deceptively tasty can of meat. For others, it is the antichrist of meat products. Whether you love it or loathe it, Spam is a Memorable Dish for everyone because everyone has an opinion about it.

I never knew that Spam was a food to be made fun of until I moved to North America. In Hong Kong, we consider Spam a meat staple. There are Spam and egg sandwiches, Spam in macaroni soup, Spam on top of ramen noodles, and Spam fried rice. The list of food made from Spam is endless.

Even though Spam is the butt of many jokes in North America (except in Hawaii where they LOVE Spam), I think most people secretly enjoy eating it. Some of my friends always bring Spam when they go camping. They insist they only eat it when camping because it’s easy to pack and doesn’t need refrigeration. Perhaps they use camping as an excuse to indulge in their innermost desires of Spam eating without the guilt? 😉

What makes this a Memorable Dish for me is that my mom used to make us Spam Fried Rice as kids. North Americans have their macaroni and cheese and we have our Spam Fried Rice, or any fried rice for that matter. But I fondly remember her Spam Fried Rice. Now that we are more health conscious, she hasn’t used Spam for fried rice as much. She uses ham or chicken or whatever leftover meats she has on hand.

I am continuing the family tradition of making fried rice for the kiddies. Most of the time, I use real meat (not that Spam is not “real” meat…haha). But sometimes when I feel nostalgic and want to live life on the edge, I make Spam Fried Rice.

Just like me, the kids can’t stop eating just one bowl of fried rice. If you end up making this recipe, please enjoy and indulge! I don’t pig out on Spam all the time (pun intended). So, no guilt is allowed when eating Spam Fried Rice, ok? 🙂 On that note, here’s my recipe for Spam Fried Rice. Now that Spam Lite is available, I’m using that instead. Healthier Spam – how ironic!

img_Spam_Fried_Rice

Spam Fried Rice

Prep Time: 15 minutes

Cook Time: 15 minutes

Total Time: 30 minutes

Serving Size: 4

Ingredients

  • 5 cups of day-old Cooked Rice (2 cups of uncooked rice)
  • 1 can of diced Spam (I use the low-fat version.)
  • 2 cups of frozen Peas, Carrots, Corn (thawed)
  • 3 large beaten Eggs
  • Vegetable Oil (1 tsp for eggs, 3 tsp for rice)
  • ½ tsp Salt
  • 1 tsp Garlic Powder
  • ¼ cup low sodium Soy Sauce
  • 1 sliced Green Onion for garnish

Preparation

  1. Heat 1 tsp of oil in a non-stick wok or large frying pan.
  2. Scramble the eggs and set aside.
  3. Using the same wok, fry up the Spam until lightly brown and crispy on the outside. (You don’t need to use oil because there’s enough fat in the Spam.) Drain out the oil and set aside.
  4. Heat 3 tsp of oil and stir fry the rice until it’s heated through.
  5. When the rice turns a bit crispy, add the salt, garlic powder, and soy sauce.
  6. Stir fry the rice a bit more until the soy sauce is mixed in the rice.
  7. Put the Spam, eggs, and vegetables with the rice.
  8. Stir fry all the ingredients until they are evenly mixed.
  9. Garnish with sliced green onions.

Notes

If you don’t have any day-old rice, cook the rice and cool it in the fridge before making the fried rice for best results. Basically, the rice has to be a bit on the dryer side.

https://www.memorabledishes.com/spam-fried-rice/

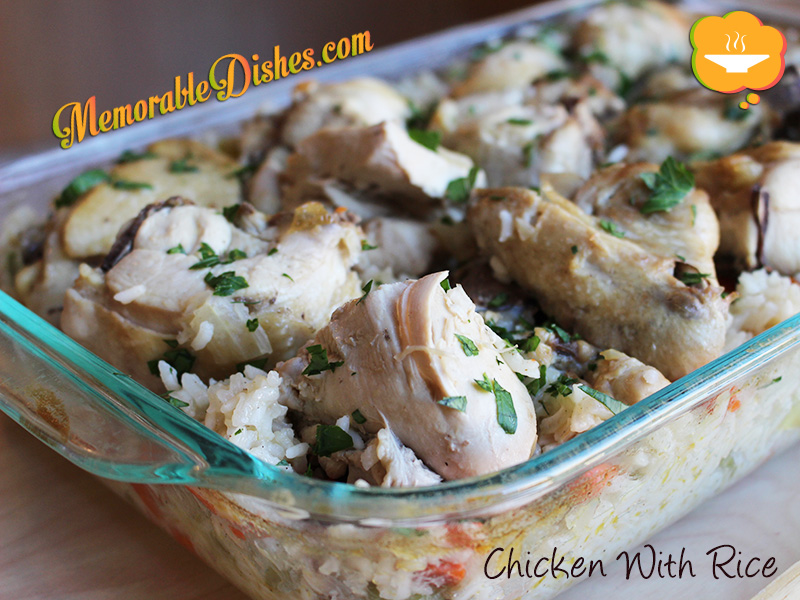
Chicken With Rice
(Kokoshka Sou Oris)

Chicken (Kokoshka) With (Sou) Rice (Oris) is one of my favourite Memorable Dishes from my husband’s family. When we first started dating, this is one of the dishes I had at my in-laws. It’s not a fancy dish by any means but I really enjoyed eating it every time. Even though we are from totally different backgrounds (me being Chinese and him being Macedonian), we find that lots of our values are very similar. Our family’s love of food is definitely one of them. Yes – I consider that a value! I always say to my husband, “Thank goodness you like to eat and try new foods as much as I do!” I believe our relationship has lasted because we share the same value for food 😉

When we got married, my mother-in-law bought me the “official” Macedonian recipe book. It’s a plastic-coiled bound book with a red cover that says, “Traditional Macedonian Recipes.” Mine is a revised edition with 40 additional recipes. It seems like everyone in the Macedonian community has one version or another. The book also includes a bit of Macedonian history and a map, which is very interesting to me. I also love that in each section, there’s a little anecdote that talks about the recipes and the importance of them to the Macedonian community.

The first time I cooked this dish from the recipe book, it didn’t turn out the same as my mother-in-law’s. When I told her about my blunder, she looked at the recipe and said that it wasn’t the same way she cooked this dish. This reiterated the line that I read from the cookbook, “In collecting the recipes, we did not find two women who made the same dish in exactly the same manner.” Go figure!

I find it very comforting when cooking this recipe. The smell of chopped onions, celery and carrots permeates my nose and into my mind. Even though I have never been to my husband’s Macedonian village before, I could picture hardworking mothers taking care of their families and cooking up a nice meal after a hard day’s work at the farm.

I used the Macedonian cookbook’s recipe as a base and adjusted the way I cook it for my family. The kids gobble up this dish every time I make it. Lovingly, they really enjoy this Macedonian dish made by their Chinese mother 🙂

Chicken With Rice (Kokoshka Sou Oris)

Chicken With Rice
(Kokoshka Sou Oris)

Prep Time: 20 minutes

Cook Time: 1 hour, 10 minutes

Total Time: 1 hour, 30 minutes

Serving Size: 4

Ingredients

  • (For Chicken Broth)
  • 1 Chicken whole (approximately 4 pounds)
  • 1 Celery stalk with leaves, halved
  • 1 Onion, halved
  • 1 Bay Leaf
  • 1 tsp Salt
  • 10 cups of Water for boiling
  • (For Chicken Rice Dish)
  • 3 tsp Olive Oil
  • 1 medium diced Onion
  • 2 diced Celery stalks
  • 2 diced Carrots
  • 2 cups of long grain Rice
  • 1 tsp Salt
  • ½ tsp Pepper
  • 4 cups Chicken Broth (from the boiled chicken)
  • Chopped Parsley for garnish

Preparation

  1. Cut the chicken into serving size pieces and trim any excess fat.
  2. Place chicken, celery, onion, bay leaf and 1 tsp salt in large pot and cover with water.
  3. Bring the water to a boil and skim any scum and fat floating on top.
  4. Turn down to medium low heat and simmer for 45 minutes.
  5. Once it’s done, set chicken aside from broth.
  6. For Rice Preparation
  7. Preheat oven to 375°F.
  8. Heat olive oil in large frying pan.
  9. Sauté onions, celery and carrots over medium heat until soft (about 5-10 minutes).
  10. Add rice, chicken broth, salt, and pepper into the vegetables and mix.
  11. Bring liquid back to a boil and turn off heat.
  12. Put rice mixture in a baking dish and place chicken on top.
  13. Bake at 375°F for 15 minutes.
  14. Cover with foil or lid and let it stand until all liquid is absorbed.
  15. Garnish with parsley.

Notes

Note #1: You can blanch the chicken pieces before boiling them to eliminate most of the scum.

Note #2: If rice is too dry for your liking, add some extra broth and then cover for a few more minutes.

https://www.memorabledishes.com/chicken-with-rice/

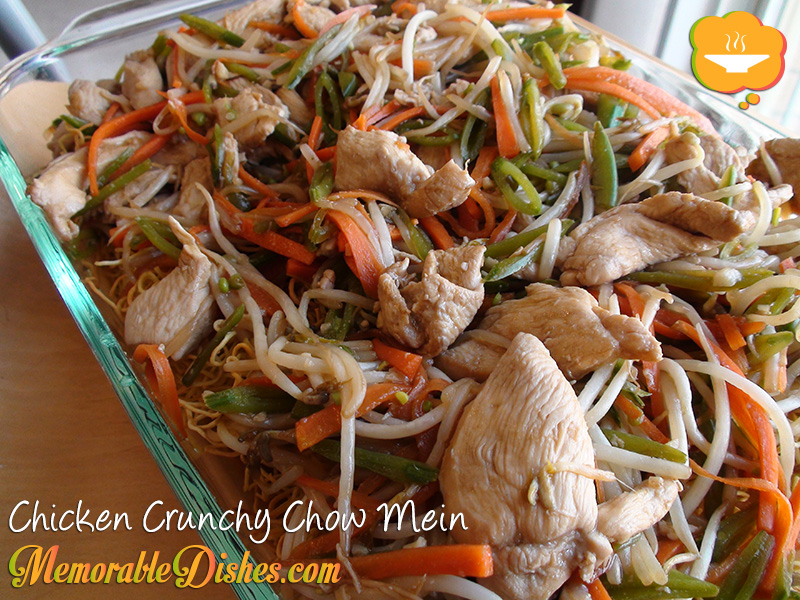
Chicken Crunchy Chow Mein

Chicken Crunchy Chow Mein

Who doesn’t love crunchy chow mein that you order from Chinese take out restaurants? It’s deceiving how fattening those skinny crunchy noodles are. Believe it or not, they are deep fried. I know – shocking isn’t it?

I for one, LOVE the crunchy chow mein that I order from Chinese restaurants. The meat and sauce on top of those crunchy noodles – It’s a perfect sensation in your mouth when biting into the saucy part of the noodles combined with the crunchy part.

This Chicken Crunchy Chow Mein is definitely one of my favourite memorable go-to dishes. Super-easy, super-delicious, and super-impressive! I’ve made it for my own parties and brought it as a potluck dish to friends’ houses.

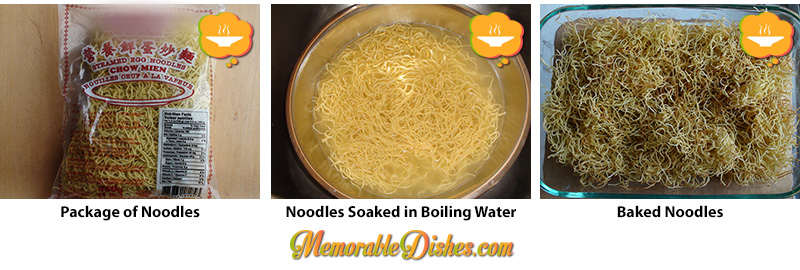
I wanted to create super crunchy noodles without the added fat. So I figured out baking the noodles with a little bit of oil can create the same effect. Here, I will show you how I make it. This is my secret passed onto you 😉 Your friends and family will be impressed that you can create restaurant-quality Crunchy Chow Mein from home.

I think this dish could be one of my friends’ most Memorable Dishes of mine. They are always shocked that it’s not bought from a Chinese restaurant. Yes, it’s that good!

Chicken Crunchy Chow Mein

Chicken Crunchy Chow Mein

Prep Time: 30 minutes

Cook Time: 30 minutes

Total Time: 60 minutes

Serving Size: 4-6

Ingredients

  • 2 boneless, skinless sliced Chicken Breasts (approximately 8 oz. each)
  • 1 tbsp of low sodium Soy Sauce
  • 1 tsp Sugar
  • 1 tsp Cornstarch
  • 1 tsp Chinese Cooking Wine (optional)
  • 2 cloves minced Garlic
  • 1 tsp of minced Ginger
  • 2 tbsp of Oyster Sauce
  • ½ cup of Chicken Broth or Water
  • 1 lb Bean Sprouts
  • 1 ½ cup of julienned Carrots
  • 1 ½ cup of julienned Snow Peas or Sugar Snap Peas (trimmed)
  • ½ tsp of Salt
  • 1 Package Egg Noodles
  • Vegetable Oil (2 tbsp for noodles, 2 tsp for vegetables, 2 tsp for chicken)
  • 2 tsp Cornstarch
  • 2 tbsp Water

Preparation

  1. Marinate chicken with soy sauce, sugar, cornstarch, and cooking wine for at least 30 minutes in refrigerator.
  2. For Noodles Preparation
  3. Preheat oven to 400°F.
  4. Put egg noodles in a large stainless steel bowl.
  5. Boil enough water to cover the noodles in the bowl.
  6. Once the water is boiled, pour it on the noodles.
  7. Loosen the noodles with a fork and let them sit for 1 minute.
  8. Drain noodles out thoroughly with a colander and pat dry with paper towel.
  9. Line baking sheet with parchment paper.
  10. Spread 1 tbsp of vegetable oil on the bottom of the lined baking sheet.
  11. Put noodles on oiled baking sheet.
  12. Then pour another 1 tbsp of vegetable oil on top of the noodles and mix.
  13. Bake for 10-15 minutes then flip the noodles over and bake it for another 10-15 minutes. (It depends on how crunchy you want them. I like them extra crunchy 🙂
  14. Set aside.
  15. For Vegetables and Chicken Preparation
  16. Heat 2 tsp of oil in wok or large frying pan.
  17. Fry up carrots and cook for a few minutes, then add snow peas and lastly the bean sprouts.
  18. Cook vegetables until tender but still have their crunch.
  19. Set vegetables aside.
  20. Using the same wok/frying pan, heat 2 tsp of oil and sauté the minced garlic and ginger.
  21. Add marinated chicken to the wok and cook until chicken is done.
  22. Add chicken broth/water and oyster sauce.
  23. Add vegetables back into the wok/frying pan and cook until everything is mixed in.
  24. Scoop chicken and vegetable mixture onto the crunchy noodles and leave liquid in the wok/frying pan.
  25. Mix 2 tsp of cornstarch with 2 tbsp of water into a small bowl.
  26. Then pour cornstarch mixture into sauce until thickens.
  27. Pour the rest of the sauce onto noodles & meat mixture.
https://www.memorabledishes.com/chicken-crunchy-chow-mein/
Chicken Crunchy Chow Mein - 3 pix

Show Buttons
Hide Buttons